So, you’re eyeing a fancy dessert that screams “I spent hours on this!” but secretly hoping it’s something you can whip up without, you know, actually spending hours? Girl, same. We’re talking show-stopping, jaw-dropping chocolate strawberry cake designs that look like they came straight out of a patisserie, but are totally achievable even if your baking skills lean more towards “expert box-mix opener.” 😉
Why This Recipe is Awesome
Because it’s basically the culinary equivalent of wearing sweatpants but making them look chic. You get all the “oohs” and “aahs” without the all-nighters. This isn’t just about baking a cake; it’s about making a masterpiece with minimal fuss. Think rich chocolate, vibrant red strawberries, and a design that makes everyone think you’re secretly a professional baker. Plus, it’s idiot-proof—even I didn’t mess it up, and my kitchen has seen some things, trust me.
Ingredients You’ll Need
Alright, gather your troops! Here’s what’s on the shopping list for your chocolate-strawberry-extravaganza:
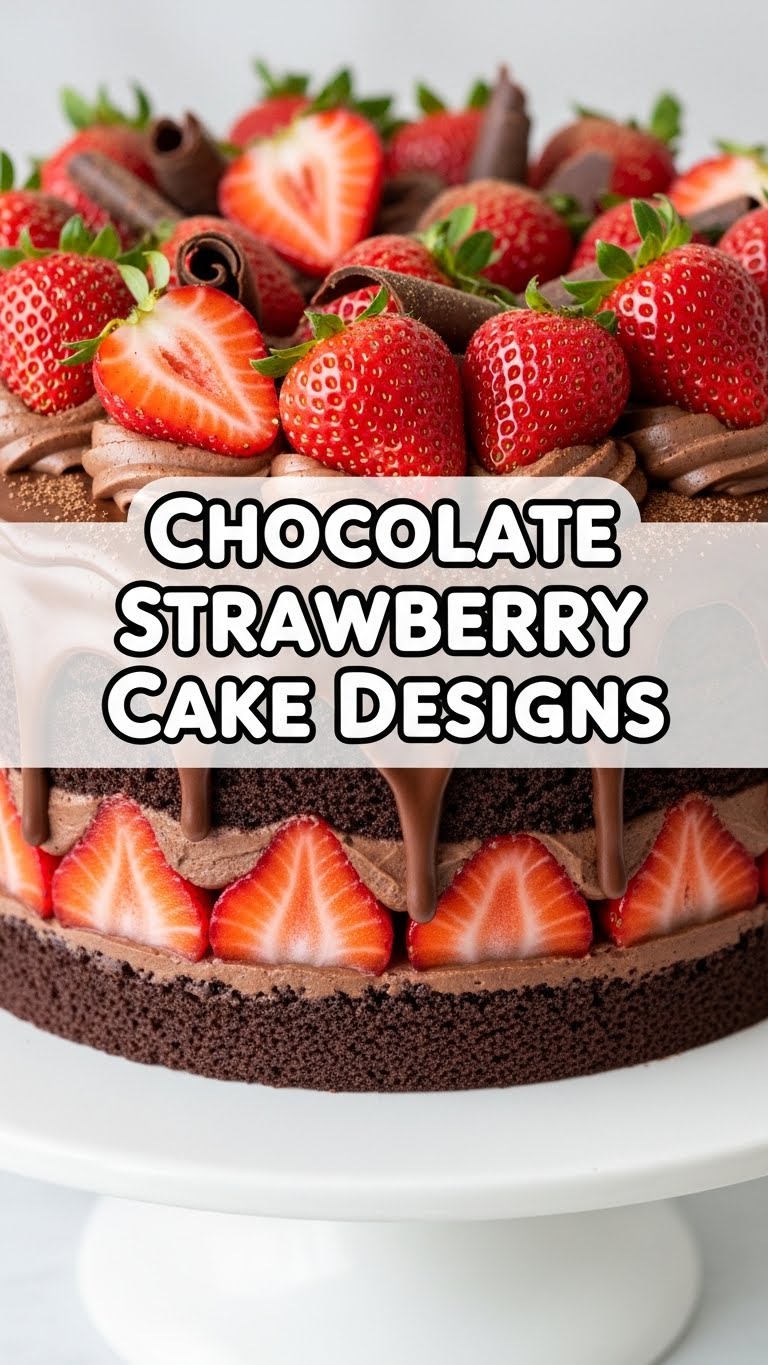
- **Your Favorite Chocolate Cake:** Whether it’s from scratch (bravo!) or a high-quality box mix (no judgment here, we love a shortcut!). Two 8-inch or 9-inch rounds usually work best.
- **Chocolate Frosting or Ganache:** About 2-3 cups. Store-bought is perfectly acceptable, or whip up your own if you’re feeling extra. We need that rich, chocolatey canvas!
- **Fresh Strawberries:** A whole pint or two, depending on how extra you want to get with the decor. Pick the prettiest, reddest ones you can find. They’re the stars, after all!
- **Optional Decoratives:**
- **Chocolate Shavings or Curls:** Because more chocolate is always a good idea.
- **Edible Glitter or Sprinkles:** For that extra sparkle, because why not?
- **Mint Leaves:** A few sprigs for a pop of green and a touch of elegance.
Step-by-Step Instructions
- **Bake Your Cake:** First things first, get those cake layers baked and cooled completely. This is crucial! Trying to frost a warm cake is a recipe for a molten, crumbly disaster. Once baked, let them chill out on a wire rack until they’re totally cool to the touch.
- **Prep Your Berries:** While the cake cools, wash your strawberries gently. Pat them *super* dry with a paper towel. Seriously, wet berries mean watery frosting, and nobody wants that. Slice about half of your strawberries for filling and leave the rest whole for decorating the top.
- **Crumb Coat (aka the Messy Bit):** Place one cooled cake layer on your serving plate or cake stand. Spread a thin layer of chocolate frosting over the top. This “crumb coat” traps all those pesky crumbs so your final frosting layer looks smooth and pro. Pop it in the fridge for 15-20 minutes to set.
- **Layer Up the Goodness:** Once the crumb coat is firm, spread another, thicker layer of frosting on top. Arrange your sliced strawberries over this, but keep them a bit away from the edge so they don’t peek out awkwardly. Place the second cake layer on top.
- **The Grand Frosting Finale:** Now, frost the entire cake (top and sides) with the remaining chocolate frosting. Take your time to get it smooth, or go for a rustic, textured look if that’s more your vibe. No stress!
- **Design Time!** This is where the magic happens.
- **Strawberry Crown:** Arrange your whole strawberries artfully on top of the cake. You can make a concentric circle, a semi-circle, or just a beautiful cluster in the middle.
- **Chocolatey Embellishments:** Sprinkle those chocolate shavings around the base of the cake, or over the top, nestled amongst the strawberries.
- **Sparkle & Shine (Optional):** A dusting of edible glitter or a scattering of sprinkles can add that extra “wow” factor. Pop on a few mint leaves if you have them for a touch of fresh green.
Common Mistakes to Avoid
- **Frosting a Warm Cake:** We talked about this! It melts the frosting and creates a crumb-filled nightmare. **Patience is a virtue here, my friend.**
- **Wet Strawberries:** They’ll make your frosting watery and slip-slidey. Dry, dry, dry!
- **Over-decorating:** Sometimes less is more. Let the natural beauty of the chocolate and strawberries shine. You don’t need *every* decorative element on one cake.
- **Forgetting the Crumb Coat:** Skipping this step is like skipping your primer before makeup. You *can*, but it won’t look as flawless.
Alternatives & Substitutions
Feeling adventurous or just working with what you’ve got? No problem!
- **White Chocolate Swirl:** Instead of pure chocolate frosting, try a swirl of white chocolate ganache over the top of the dark chocolate for a stunning contrast.
- **Other Berries:** Blueberries, raspberries, or even blackberries can totally join the party. A mix of berries looks super fancy!
- **Cream Cheese Frosting:** If you’re not a die-hard chocolate frosting fan, a classic cream cheese frosting pairs beautifully with chocolate and strawberries. It’s a match made in heaven, IMO.
- **Store-bought vs. Homemade:** Seriously, use whatever gets you excited to bake. A good quality store-bought cake or frosting can save you tons of time without sacrificing deliciousness.
FAQ (Frequently Asked Questions)
- **”Can I use frozen strawberries?”** Well, technically yes, but why hurt your soul like that? They’ll release a lot of water when thawed and turn mushy. Stick to fresh for the best look and texture.
- **”How far in advance can I decorate this?”** You can assemble and decorate the cake a few hours before serving. If you’re doing it the day before, add the fresh strawberries closer to serving time to prevent them from getting too soft or weeping.
- **”What if my cake layers aren’t perfectly flat?”** No worries! A sharp serrated knife can help you level them. Or, just embrace the rustic charm—it’s homemade, not factory-made!
- **”My ganache is too runny! Help!”** If it’s too warm, chill it for a bit. If it’s truly too thin, add a bit more chocolate. For a thicker ganache that’s easier to work with, make sure your cream-to-chocolate ratio is right (usually 1:1 or less cream for a thicker spread).
- **”Does it need to be refrigerated?”** Yep, because of the fresh strawberries, it’s best to keep it in the fridge. Bring it to room temp for about 30 minutes before serving for the best flavor and texture.
Final Thoughts
See? You just pulled off a chocolate strawberry cake design that looks like it belongs in a magazine. And you did it without breaking a sweat (or a budget!). Now go impress someone—or yourself—with your new culinary skills. You’ve earned it! Grab a slice, put your feet up, and enjoy the fruits (and chocolate) of your labor. You’re basically a baking superstar now. 😎


