So, you’re craving something ridiculously decadent, chocolatey, and kinda fancy, but also, you know, want to put in minimal effort? Yeah, me too. And honestly, who has time for complicated bakes after a long day? Not us, my friend. That’s why we’re diving headfirst into the magical world of the Chocolate Molten Lava Cake. It’s basically a hug in a ramekin, but way more impressive.
Why This Recipe is Awesome
Let’s be real, this isn’t just a recipe; it’s a superpower. You’re getting a rich, fudgy cake with a glorious, gooey, literally *molten* chocolate center. And the best part? It looks like you slaved away for hours, but you probably spent more time choosing your Netflix show than making these. Seriously, it’s pretty much **idiot-proof** (and I say that with love, having messed up my fair share of “easy” recipes). It’s quick, it’s dramatic, and it’s a guaranteed crowd-pleaser. Or, if you’re like me, a guaranteed “treat-yo-self” moment for one.
Ingredients You’ll Need
Gather ’round, butter-fingered bakers! Here’s your very short shopping list. Odds are, most of this stuff is already lurking in your pantry.
- Unsalted Butter (1/2 cup / 113g): The good stuff. Don’t skimp here; flavor is key!
- Good Quality Dark Chocolate (4 oz / 113g): Think 60-70% cacao. This is the star of the show, so no cheaping out on the chocolate chips you use for pancakes, okay?
- Large Eggs (2 whole eggs + 2 egg yolks): The whole eggs give structure, the extra yolks make it extra rich and fudgy. It’s science, baby!
- Granulated Sugar (1/4 cup / 50g): Just enough sweetness to balance the dark chocolate.
- All-Purpose Flour (2 tablespoons): Barely any! Just enough to give it a little body without making it taste like, well, flour.
- Pinch of Salt: Always, always, always add salt to chocolate. It brings out all those deep, delicious flavors. Don’t argue with me on this one.
- Vanilla Extract (1/2 teaspoon): A little splash for warmth and aroma.
Step-by-Step Instructions
Alright, apron on, game face ready! Let’s get these bad boys baking.
- Get Your Oven & Ramekins Ready: First things first, preheat your oven to a blazing **425°F (220°C)**. Then, butter and flour four 6-ounce ramekins. This is super important unless you want your beautiful cakes stuck forever. Tap out any excess flour.
- Melt the Good Stuff: In a microwave-safe bowl or a double boiler, melt the butter and chopped dark chocolate together. Stir until smooth and glorious. Set aside to cool slightly.
- Whip It Good: In a separate bowl, whisk together the two whole eggs, two egg yolks, granulated sugar, a pinch of salt, and vanilla extract until the mixture is light and slightly foamy. You want it pale yellow and well combined.
- Combine Forces: Slowly pour the slightly cooled chocolate mixture into the egg mixture, whisking constantly. You don’t want to scramble your eggs, so make sure the chocolate isn’t scorching hot. Once combined, gently fold in the flour until just incorporated. **Don’t overmix!**
- Fill ‘Em Up: Divide the batter evenly among your four prepared ramekins. They should be about three-quarters full.
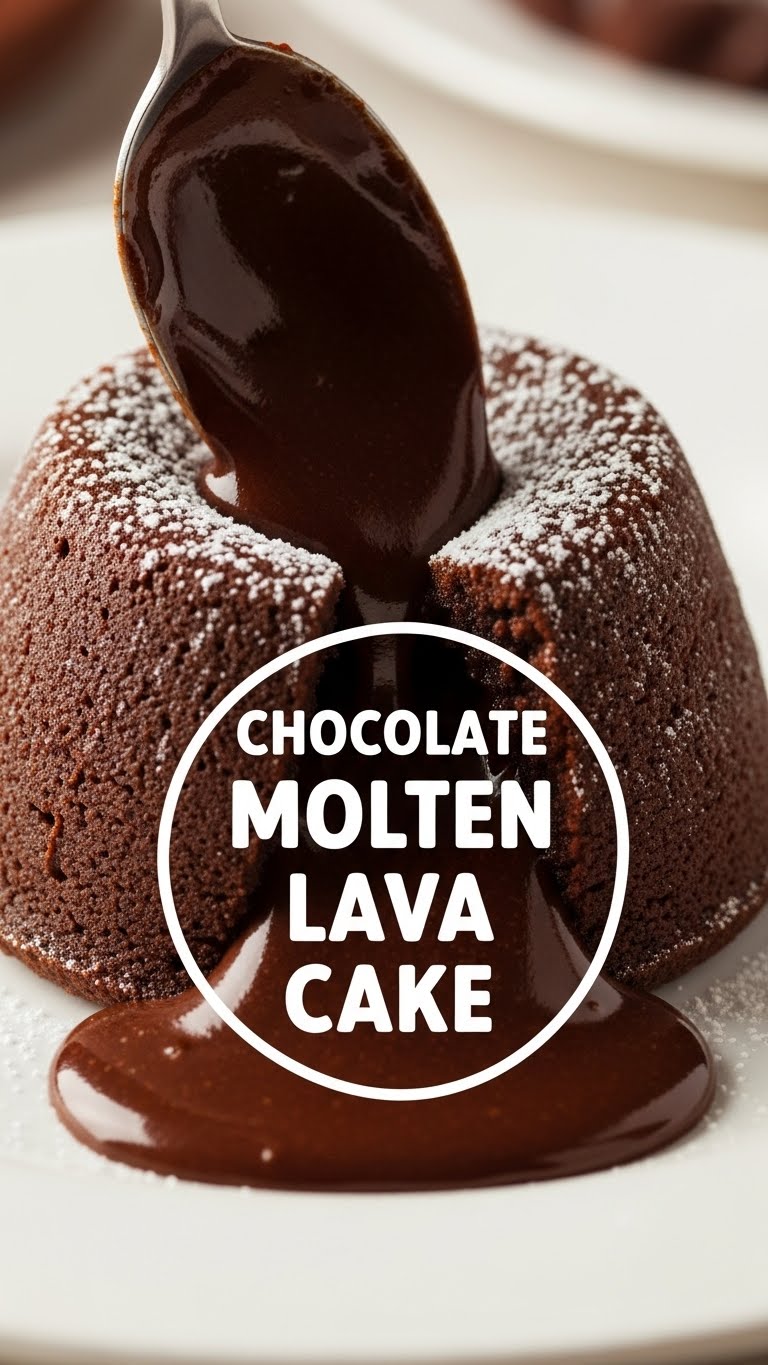
- Bake ‘Em Till They’re Almost Done: Pop those beauties into your preheated oven and bake for **12-14 minutes**. The edges should look set and slightly puffed, but the center should still be jiggly when you gently shake a ramekin. That jiggle means lava!
- The Grand Finale: Carefully remove the ramekins from the oven. Let them cool for just 1-2 minutes. Then, run a knife around the edge of each cake, invert it onto a serving plate, and lift the ramekin. Boom! Instant chef status.
Common Mistakes to Avoid
Even though I said it’s idiot-proof, there are still a few rookie errors to steer clear of:
- Not Preheating Your Oven: This isn’t a suggestion, it’s a command! An un-preheated oven means uneven baking and no glorious lava. **Don’t skip this step.**
- Overbaking: This is the cardinal sin of lava cakes. If you bake it too long, you’ll end up with a delicious, but sadly solid, chocolate cake. Set a timer, watch for that jiggle!
- Not Greasing/Flouring Ramekins Properly: Ever had a cake stick? It’s soul-crushing. Take the extra 30 seconds to butter and flour properly. Your future self will thank you.
- Using Low-Quality Chocolate: Remember when I said this is the star? If you use waxy, cheap chocolate, your cake will taste… waxy and cheap. Invest a little.
Alternatives & Substitutions
Feeling a little wild? Want to spice things up? I got you.
- Different Chocolates: Not a dark chocolate fan? Try semi-sweet! Or, for a truly decadent twist, mix in some milk chocolate, but maybe stick to mostly dark for that intense flavor. White chocolate? I’ve seen it done, but IMO, it’s not the same molten vibe.
- Flavor Boosts: Add a tiny pinch of cayenne pepper for a subtle spicy kick (Mexican chocolate style!). A splash of coffee or espresso powder will deepen the chocolate flavor beautifully. Orange zest or a dash of orange liqueur? Divine!
- Gluten-Free: Swap out the all-purpose flour for a good quality 1:1 gluten-free baking flour. Easy peasy.
FAQ (Frequently Asked Questions)
- Can I make the batter ahead of time? Absolutely! You can whip up the batter, cover it, and refrigerate it for up to 24 hours. Just let it come to room temperature for about 30 minutes before baking, and you might need an extra minute or two in the oven.
- What if I don’t have ramekins? A 6-ounce oven-safe custard cup or even a silicone muffin tin (fill 4 large cups) can work in a pinch! Just be sure they’re buttered and floured properly.
- Can I freeze these? You can freeze the baked and cooled cakes! Wrap them tightly in plastic wrap and foil. To reheat, thaw at room temp, then warm gently in the oven or microwave until the center is gooey again.
- My cake didn’t have a molten center! What went wrong? Bummer! Most likely, it was overbaked. Next time, pull them out a minute or two earlier when the center is still visibly jiggly.
- Do I need special fancy chocolate? Not necessarily *fancy*, but definitely good quality baking chocolate (bars or wafers) as opposed to chocolate chips (which have stabilizers to hold their shape and don’t melt as smoothly).
Final Thoughts
So there you have it, folks! Your new favorite party trick, stress-baking go-to, or just a delicious way to tell yourself, “You’re awesome.” Go forth, melt some chocolate, bake some joy, and then promptly devour it with a scoop of vanilla ice cream, whipped cream, or just a spoon. You’ve earned it!


