So you’re craving something ridiculously tasty but also kinda want to avoid spending your entire weekend slaving away in the kitchen, huh? Same, friend, same. We’ve all been there – staring into the abyss of an empty fridge, dreaming of chocolate, but also really committed to our couch-potato lifestyle. Well, buckle up, buttercup, because I’ve got a treat for you that’s going to satisfy that chocolate craving without requiring a culinary degree or an hour-long dishwashing session.
Why This Recipe is Awesome
Let’s be real: life’s too short for complicated recipes that make you question all your life choices. This Chocolate Cream Cake? It’s basically the culinary equivalent of a warm hug that also high-fives you. It’s **super forgiving**, meaning even if you accidentally hum a little too loud while mixing, it’ll probably still turn out amazing. It’s quick enough that you won’t lose precious Netflix-binging time, and the results? Pure, unadulterated, chocolatey bliss. Plus, it looks fancy AF without actually being fancy, which, IMO, is the ultimate win. You’ll be basking in compliments, and no one needs to know how easy it actually was. 😉
Ingredients You’ll Need
Gather your troops! Here’s what you’ll need to transform your kitchen into a chocolatey wonderland. Don’t worry, nothing too exotic here.
- All-Purpose Flour: About 1 ½ cups. The backbone of our cake, keeping it all together.
- Granulated Sugar: 1 ½ cups. Because sweetness is not a crime.
- Unsweetened Cocoa Powder: ½ cup. The star of the show! Go for good quality – it makes a difference.
- Baking Soda: 1 teaspoon. Our little leavening friend.
- Baking Powder: ½ teaspoon. Another leavening buddy, working double time!
- Salt: 1 teaspoon. Just a pinch to balance all that deliciousness.
- Large Eggs: 2. Nature’s glue, as I like to call them.
- Whole Milk: ½ cup. Gives our cake some tenderness.
- Vegetable Oil: ¼ cup. Keeps it moist and dreamy.
- Vanilla Extract: 1 teaspoon. Don’t skip this! It adds a lovely depth.
- Hot Water (or coffee!): ½ cup. This is key for blooming the cocoa and making the cake extra moist. Trust me.
For the Dreamy Chocolate Whipped Cream:
- Heavy Cream (cold!): 2 cups. Straight from the fridge, please!
- Powdered Sugar: ½ cup (or more, to taste). For that perfect sweet cloud.
- Unsweetened Cocoa Powder: ¼ cup. More chocolate, because why not?
- Vanilla Extract: 1 teaspoon. Boosts the creamy goodness.
Step-by-Step Instructions
Alright, apron on (or not, I won’t judge!), let’s get this chocolate party started!
- Get Prepped: Preheat your oven to 350°F (175°C). Grab a 9-inch round cake pan, grease it, and dust it with a little cocoa powder instead of flour. It helps keep the cake looking perfectly chocolatey.
- Mix the Dry Stuff: In a large bowl, whisk together the flour, granulated sugar, cocoa powder, baking soda, baking powder, and salt. Make sure there are no lumps hiding out!
- Add the Wet Ingredients (Mostly): Add the eggs, milk, vegetable oil, and vanilla extract to the dry ingredients. Mix on medium speed with an electric mixer (or by hand, if you need a workout) until just combined. **Do not overmix!** A few small lumps are okay.
- Bring in the Heat: Carefully pour in the hot water (or coffee). Mix on low speed until the batter is smooth. It will be pretty thin, and that’s exactly what we want.
- Bake It Up: Pour the batter into your prepared cake pan. Pop it into the preheated oven and bake for 30-35 minutes, or until a toothpick inserted into the center comes out clean.
- Cool Down: Let the cake cool in the pan for about 10-15 minutes before carefully inverting it onto a wire rack to cool completely. This part is crucial! **Don’t rush it.**
- Whip the Cream Dream: While the cake cools, grab a large, chilled bowl and your cold heavy cream. Beat the cream on medium-high speed until soft peaks form. Add the powdered sugar, cocoa powder, and vanilla extract. Continue beating until stiff peaks form. Try not to eat it all straight from the bowl!
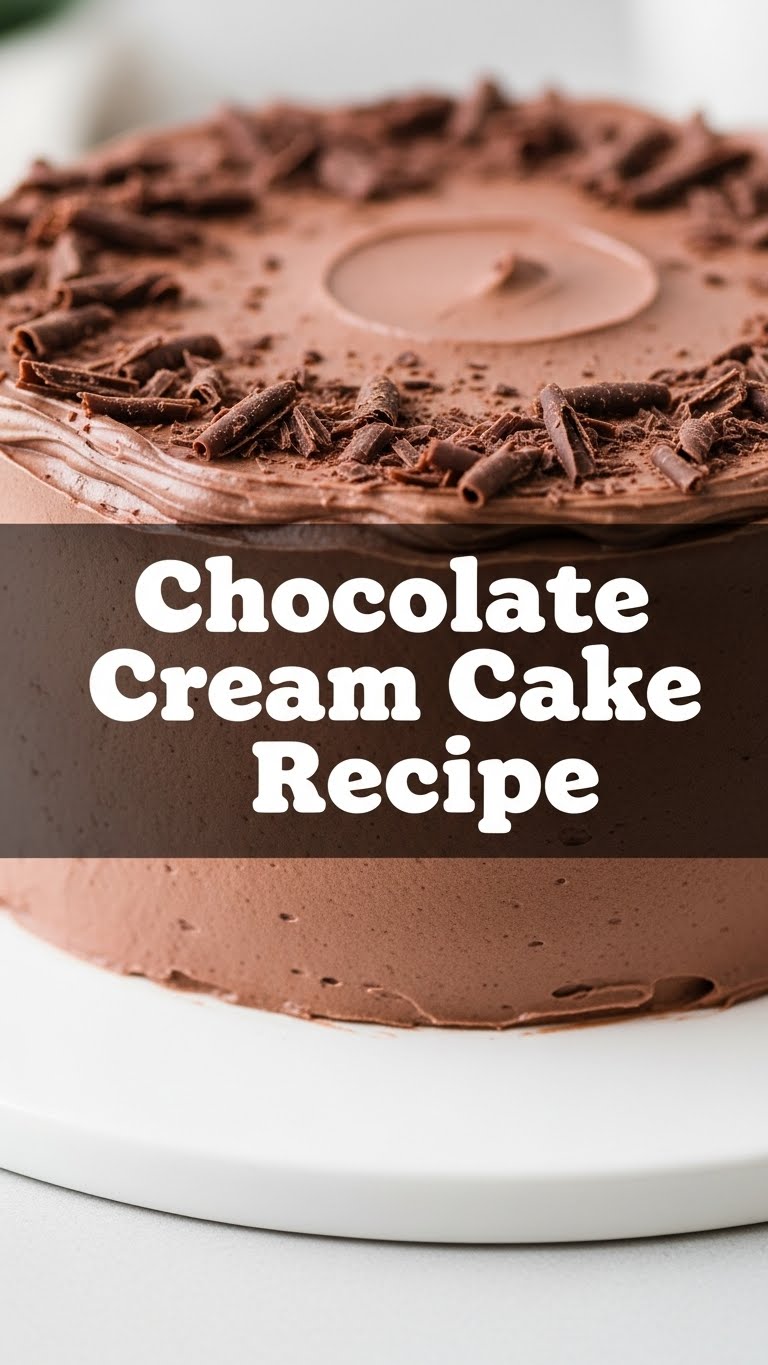
- Assemble Your Masterpiece: Once the cake is fully cooled (seriously, no warm cake and whipped cream disasters here!), spread a generous layer of your chocolate whipped cream over the top. If you’re feeling fancy, make two thinner cake layers and frost between them for a true layer cake experience!
- Serve and Devour: Slice, serve, and watch it disappear. You deserve this!
Common Mistakes to Avoid
Nobody’s perfect, but we can avoid some classic cake calamities, right? Here’s a little heads-up from someone who’s probably made all these mistakes (and then some):
- The “I Don’t Need to Preheat” Syndrome: Rookie mistake! **Always preheat your oven.** A cold oven equals unevenly baked (or sunken) cakes.
- Overmixing the Batter: Once the wet and dry ingredients are *just* combined, stop! Overmixing develops gluten, which leads to a tough, dry cake. Nobody wants that.
- Opening the Oven Door Too Soon: Patience, young padawan. Resist the urge to peek before at least 25 minutes. Opening the door too early can make your cake sink.
- Frosting a Warm Cake: This isn’t a “warm chocolate sauce” recipe, friend. Your beautiful whipped cream will melt into a sad puddle. **Always let the cake cool completely.**
- Warm Cream for Whipping: Your heavy cream and bowl need to be super cold to whip properly. A warm bowl or cream means flat, sad, un-whippable cream. Pop them in the freezer for 10 minutes beforehand if you’re worried.
Alternatives & Substitutions
Feeling adventurous? Or just missing an ingredient and too lazy to run to the store? I got you:
- Milk Swap: If you’re dairy-free, feel free to use your favorite non-dairy milk (almond, soy, oat). It works wonderfully!
- Oil Alternatives: Canola oil or melted coconut oil (liquid form) can step in for vegetable oil. Butter could also work for a richer flavor, just make sure it’s melted.
- Coffee Power-Up: Seriously, using hot brewed coffee instead of hot water in the batter enhances the chocolate flavor like crazy without making it taste like coffee. Try it!
- Cream Cheese Frosting: Not a whipped cream fan? Mix softened cream cheese with powdered sugar, a little milk, and vanilla for a denser, tangy frosting. It’s a different vibe, but equally delicious.
- Add-ins: Throw in a handful of chocolate chips, a sprinkle of espresso powder, or even some orange zest to the batter for an extra flavor kick.
FAQ (Frequently Asked Questions)
- Can I use margarine instead of butter/oil? Well, technically yes, but why hurt your soul like that? Stick to oil for moisture in this cake. Margarine is just… not the same, IMO.
- My cake sank in the middle! What happened? Oh no! Could be a few things: overmixing the batter, opening the oven door too early, or your baking soda/powder might be old. Make sure those leavening agents are fresh!
- Can I make this cake ahead of time? Absolutely! The cake layers can be baked a day ahead, wrapped tightly, and stored at room temperature. The whipped cream is best made fresh, but you can whip it a few hours beforehand and keep it chilled.
- How do I store leftovers? If there are any! Cover it loosely and keep it in the fridge. It’s best eaten within 2-3 days, mainly because of the whipped cream.
- What if my whipped cream won’t get stiff? You’re probably not using heavy cream, or it’s not cold enough! Make sure it’s heavy cream (at least 36% fat) and that your bowl and cream are super chilled. A quick chill in the freezer for 10 mins can help.
- Can I make this into cupcakes? You bet! Pour the batter into cupcake liners, fill them about two-thirds full, and bake for 18-22 minutes. Adjust baking time accordingly.
Final Thoughts
So there you have it, folks! Your new go-to recipe for when you need a chocolate fix that’s easy, impressive, and downright delicious. You’ve navigated the flour, the sugar, and the glorious cocoa, and now you stand triumphant with a cake that screams “I know what I’m doing!” (even if you were just winging it). Now go impress someone—or just yourself, honestly—with your new culinary skills. You’ve earned it! Enjoy every single chocolatey bite. You’re awesome.


