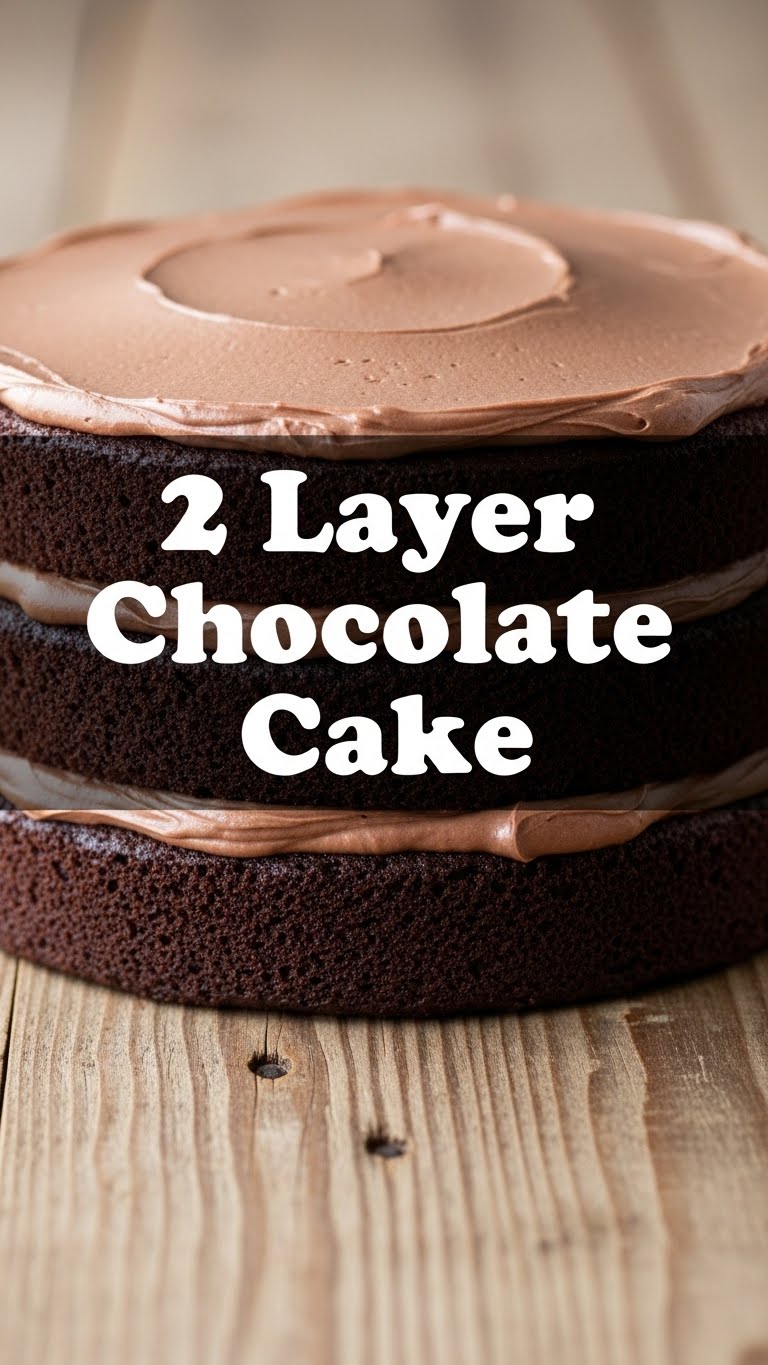
So, you’ve got that irresistible chocolate craving, huh? The kind that whispers sweet nothings in your ear until you either succumb or raid the secret stash of questionable Halloween candy? Yeah, I know that feeling. And honestly, who has time for a complicated, multi-step baking saga when the chocolate urge strikes? Not me, and probably not you. So let’s make some magic – easy, delicious, two-layer chocolate cake magic!
Why This Recipe is Awesome
Because it’s practically idiot-proof. Seriously, I’ve made this on a Tuesday night after a particularly rough meeting, and it still turned out phenomenal. We’re talking rich, moist, chocolatey goodness that tastes like you spent hours slaving away, but in reality, you probably just scrolled through TikTok while it baked. It’s also incredibly forgiving, meaning if you’re a little off on a measurement, it won’t spontaneously combust. Plus, it uses mostly pantry staples, so you won’t need to embark on a quest for dragon’s blood or unicorn tears. Just simple ingredients for maximum deliciousness. It’s the chocolate cake equivalent of a warm hug for your soul.
Ingredients You’ll Need
Get ready to gather your deliciousness enablers. No fancy stuff, just the good ol’ reliable gang:
- 2 cups (250g) All-Purpose Flour: The backbone of our cake. Don’t skip sifting if you want extra fluffiness!
- 2 cups (400g) Granulated Sugar: Because, well, it’s cake. We’re not making health food here, folks.
- ¾ cup (75g) Unsweetened Cocoa Powder: The darker, the dreamier. This is where the chocolate party starts.
- 2 tsp Baking Soda: Our lift-off agent! Essential for a fluffy, not dense, cake.
- 1 tsp Baking Powder: Reinforcements for the baking soda. Double the trouble, double the rise!
- 1 tsp Salt: Don’t underestimate salt! It enhances all those lovely chocolate flavors.
- 1 cup (240ml) Milk: Any milk works, but whole milk gives it that extra richness.
- ½ cup (120ml) Vegetable Oil: Or any neutral oil. This keeps our cake super moist.
- 2 Large Eggs: Our binding heroes, keeping everything together.
- 2 tsp Vanilla Extract: Pure vanilla, please. It makes a HUGE difference, IMO.
- 1 cup (240ml) Hot Water or Hot Coffee: Trust me on the coffee. It seriously deepens the chocolate flavor without making it taste like coffee. It’s magic!
For the Frosting (Because a cake without frosting is just bread, right?):
- ½ cup (113g) Unsalted Butter: Softened to room temp. Don’t rush this!
- 1 tsp Vanilla Extract: More vanilla!
- 3-4 cups (360-480g) Powdered Sugar (Confectioners’ Sugar): Sifted, unless you like lumpy frosting.
- ½ cup (120ml) Unsweetened Cocoa Powder: Again, the good stuff!
- 4-6 tbsp Milk (or cream): To get that perfect, spreadable consistency.
- Pinch of salt: Cuts through the sweetness.
Step-by-Step Instructions
- Preheat & Prep: Get your oven cranked up to 350°F (175°C). Grease and flour two 8 or 9-inch round cake pans. Don’t skip this, unless you want to play a game of “Will it stick?” (Spoiler: it will).
- Dry Mix: In a large bowl, whisk together the flour, sugar, cocoa powder, baking soda, baking powder, and salt. Make sure there are no lumps lurking. You want everything well combined.
- Wet Mix: In a separate medium bowl, whisk together the milk, oil, eggs, and vanilla extract. These are the liquids that bring our cake to life!
- Combine ‘Em Up: Pour the wet ingredients into the dry ingredients. Mix on low speed (or by hand) until *just* combined. We’re aiming for cake, not gluten development. Overmixing is the enemy of tenderness!
- The Secret Ingredient: Carefully pour in the hot water or hot coffee. Stir until the batter is smooth. It will be thin, don’t panic! This is what makes it so moist.
- Divide & Conquer: Pour the batter evenly into your two prepared cake pans. Give them a gentle tap on the counter to release any air bubbles.
- Bake It Off: Bake for 30-35 minutes, or until a wooden skewer inserted into the center comes out with a few moist crumbs attached (but not wet batter!).
- Cool Down: Let the cakes cool in their pans on a wire rack for about 10-15 minutes. Then, carefully invert them onto the wire rack to cool completely. Do NOT try to frost warm cakes! They will melt and crumble, and you’ll cry.
- Frosting Time! While the cakes cool, beat the softened butter until creamy. Sift in the powdered sugar and cocoa powder, then beat until combined. Add the vanilla, salt, and milk (start with 4 tbsp, add more if needed) and beat until smooth and fluffy.
- Assemble Your Masterpiece: Once the cakes are completely cool, place one layer on your serving plate. Spread about a third of the frosting evenly over the top. Place the second layer on top, then frost the top and sides. Make it smooth, or make it rustic – your kitchen, your rules!
Common Mistakes to Avoid
- Not Greasing Your Pans Properly: This is how heartbreak happens. Use butter, shortening, or baking spray. Flour for extra insurance.
- Overmixing the Batter: Once the wet and dry ingredients meet, mix *just* until combined. Overmixing develops gluten, leading to a tough, dry cake. Nobody wants a hockey puck.
- Opening the Oven Door Too Soon: Patience, grasshopper. Resist the urge to peek before the 25-minute mark, or your cake might sink in the middle.
- Baking for Too Long: A dry cake is a sad cake. Start checking at the lower end of the baking time. A few moist crumbs on the toothpick are perfect!
- Frosting a Warm Cake: As mentioned, it’s a disaster. Melted frosting, crumbled cake. Just… don’t.
Alternatives & Substitutions
Got a dietary quirk or missing an ingredient? No stress, we can totally roll with it:
- Buttermilk Substitute: If you don’t have buttermilk (which would make this cake extra tender, FYI), you can make your own! Add 1 tablespoon of lemon juice or white vinegar to your 1 cup of milk, stir, and let it sit for 5-10 minutes until it slightly curdles. Voila!
- No Hot Coffee? No Problem: Hot water works just fine. But seriously, the hot coffee amplifies the chocolate like nothing else. Give it a try sometime!
- Gluten-Free Flour: Yes, you can absolutely use a good quality 1:1 gluten-free baking blend. Results may vary slightly, but it should still be delicious.
- Oil vs. Butter: While this recipe calls for oil in the cake (for ultimate moisture!), you *can* use melted butter if you prefer, but oil generally results in a moister cake. For the frosting, though, stick to butter for that creamy texture.
- Vegan Version: You can often substitute eggs with flax eggs (1 tbsp ground flaxseed + 3 tbsp water per egg) and use plant-based milk and butter alternatives. Results might differ slightly, but it’s totally doable!
FAQ (Frequently Asked Questions)
- “Can I make cupcakes instead of a cake?” Absolutely! This recipe makes fantastic cupcakes. Just fill liners about two-thirds full and bake for 18-22 minutes. Keep an eye on them!
- “How long will this cake last?” Covered at room temperature, it’s usually good for 3-4 days. In the fridge, maybe up to a week, but honestly, it probably won’t last that long.
- “My cake is dry! What went wrong?” Oh no! Most likely culprits are overbaking or overmixing the batter. Make sure your oven temperature is accurate (an oven thermometer helps!).
- “Can I use store-bought frosting?” Well, technically yes, but why hurt your soul like that? Homemade frosting is miles better and super easy, I promise! But hey, no judgment if you’re in a pinch.
- “What if I only have one cake pan?” You can totally bake one layer at a time. Just keep the remaining batter at room temperature while the first layer bakes.
- “Can I freeze this cake?” You bet! You can freeze individual unfrosted cake layers, wrapped tightly, for up to a month. Thaw at room temperature before frosting. You can also freeze slices of frosted cake!
Final Thoughts
And there you have it! A seriously amazing, ridiculously easy, two-layer chocolate cake that will make you feel like a baking superstar. Go ahead, make it. Eat it. Share it (or don’t, I won’t tell). You deserve every single delicious crumb. Now go impress someone – or yourself – with your new culinary skills. You’ve earned it!
