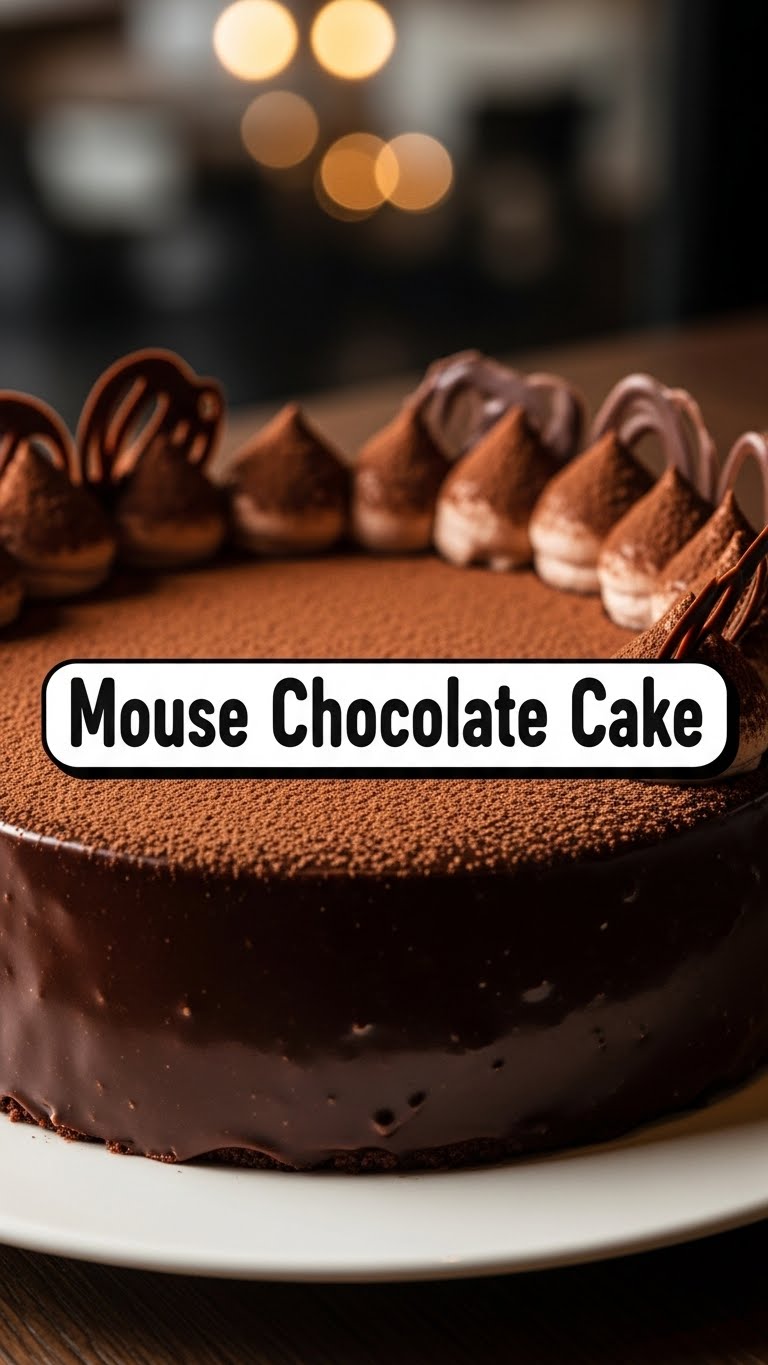
So you’re craving something sinfully delicious but also kinda want to pretend you’re a sophisticated pastry chef without, you know, actually *being* one? And maybe you’re picturing something tiny, adorable, and intensely chocolatey? Friend, you’ve come to the right place. Forget those overly complicated recipes that make you question your life choices. We’re diving headfirst into the world of the “Mouse Chocolate Cake.” Don’t worry, no actual mice were harmed in the making of this recipe, just a whole lot of chocolate love.
Why This Recipe is Awesome
Let’s be real. In a world full of “artisanal sourdough” and “sous vide everything,” sometimes you just need a straightforward win. This isn’t just any chocolate cake; it’s the kind you whip up when you need a hug in dessert form, or when unexpected guests show up (who are we kidding, it’s mostly for you). It’s **idiot-proof**, I swear. Even I didn’t mess it up, and my kitchen adventures often involve smoke alarms and questionable culinary decisions. It’s quick, it’s rich, and it’s perfectly portioned for one or two greedy little mice (aka, you and your significant other, or just *you*). Plus, it’s a total mood booster without the commitment of baking a giant cake that will judge you from the counter all week.
Ingredients You’ll Need
Gather your magic potion components! These are pretty standard, so you probably have most of them lurking in your pantry already. No fancy-pants stuff here, promise.
- All-Purpose Flour: Just a half cup. The unsung hero of baked goods.
- Granulated Sugar: Half a cup. Because life’s too short for unsweetened cake.
- Unsweetened Cocoa Powder: 1/4 cup. The darker, the better, IMO. This is where the magic happens.
- Baking Soda: 1/2 teaspoon. Your cake’s little lift ticket to fluffiness.
- Salt: 1/4 teaspoon. Don’t skip this! It makes everything else taste better.
- Milk: 1/4 cup. Any kind works, even oat milk if you’re feeling plant-based.
- Vegetable Oil (or melted butter): 2 tablespoons. For that rich, moist texture.
- Vanilla Extract: 1/2 teaspoon. Because vanilla makes chocolate even more chocolatey. It’s science.
- Boiling Water: 1/4 cup. The secret ingredient for an incredibly moist crumb. Don’t be scared, it’s friendly.
Step-by-Step Instructions
Alright, apron on (or not, we don’t judge). Let’s get this deliciousness going!
- Prep Your Pan: Grab a small 6-inch round cake pan or even a couple of oven-safe ramekins (think “individual mouse portions”). Grease and flour it/them. If you’re using ramekins, this is where the “mouse” size really comes into play.
- Mix the Dry Stuff: In a medium bowl, whisk together your flour, sugar, cocoa powder, baking soda, and salt. Make sure there are no lumpy bits. We want smooth sailing.
- Add the Wet Stuff (Except Water): Pour in the milk, oil (or melted butter), and vanilla extract. Stir it up with a spoon or spatula until just combined. It’ll look a bit thick and shaggy – totally normal.
- Introduce the Hot Water: Carefully add the boiling water to the batter. Stir gently until everything is smooth. **Don’t overmix!** Overmixing is the enemy of tender cake. The batter will be quite thin, almost soupy. This is correct!
- Bake It Up: Pour the batter into your prepared pan(s). Bake in a preheated oven at 350°F (175°C) for about 20-25 minutes for the small pan, or 15-20 minutes for ramekins. A toothpick inserted into the center should come out clean.
- Cool Down: Let it cool in the pan for about 10 minutes before carefully inverting it onto a wire rack to cool completely. Or, if using ramekins, just let them cool a bit before digging in with a spoon. You do you.
Common Mistakes to Avoid
Nobody’s perfect, but we can at least try to avoid these rookie errors, right?
- Thinking you don’t need to preheat the oven: Rookie mistake! Your cake won’t rise properly, and you’ll end up with a sad, dense disc. **Always preheat!**
- Overmixing the batter: This is a biggie. Once the wet ingredients hit the dry, mix *just* until combined. Too much mixing develops gluten, leading to a tough, chewy cake. We want tender, not tire rubber.
- Not using boiling water: Seriously, this step is key. The hot water “blooms” the cocoa, intensifying the chocolate flavor, and helps create that incredible moist texture. Cold water just won’t cut it.
- Poking the cake too soon: Patience, young grasshopper. Resist the urge to open the oven door every five minutes. Let it do its thing.
Alternatives & Substitutions
Feeling a little rebellious? Or just ran out of something? I got you.
- Milk: No cow’s milk? No problem! Almond milk, soy milk, oat milk – they all work wonderfully. Just don’t use buttermilk unless you adjust the baking soda, which is a whole other recipe.
- Oil: If you’re out of vegetable oil, melted coconut oil (neutral tasting kind) or even melted butter will do the trick. Butter will give it a richer, more buttery flavor, obviously.
- Add-ins: Want to get wild? Throw in a handful of chocolate chips, a sprinkle of instant coffee powder (enhances chocolate flavor!), or even a dash of cinnamon. Live a little!
- Frosting (or lack thereof): This cake is amazing plain, or dusted with a little powdered sugar. But if you’re feeling fancy, a simple chocolate ganache or even some whipped cream would be divine. Or, you know, just eat it with a spoon straight from the ramekin.
FAQ (Frequently Asked Questions)
- Can I make this in a regular-sized muffin tin? Oh, absolutely! Just fill the cups about two-thirds full and adjust baking time down to about 12-15 minutes. Perfect for little “mouse bites”!
- My cake sank in the middle, what gives? Could be a few things: oven too hot, not enough leavening, or opening the oven door too early. **Ensure your oven temperature is accurate and don’t peek!**
- Can I use margarine instead of butter/oil? Well, technically yes, but why hurt your soul like that? Stick to oil or real butter for the best flavor and texture. Margarine is a last resort, friends.
- How long does it keep? If covered tightly at room temperature, it’ll last 2-3 days. But honestly, it’s so good, it probably won’t see day two.
- Is this cake really “mouse-sized”? That’s the beauty of it! It’s a small, perfect cake designed to satisfy that intense chocolate craving without overwhelming you. Or, if baked in ramekins, literally “mouse” portions.
Final Thoughts
So there you have it, your very own “Mouse Chocolate Cake.” It’s a tiny triumph, a personal victory in the kitchen, and a delicious declaration that baking doesn’t have to be a chore. It’s about enjoying the process and, more importantly, the outcome. Now go impress someone—or yourself—with your new culinary skills. You’ve earned it! Seriously, go make this. Your taste buds will thank you.

