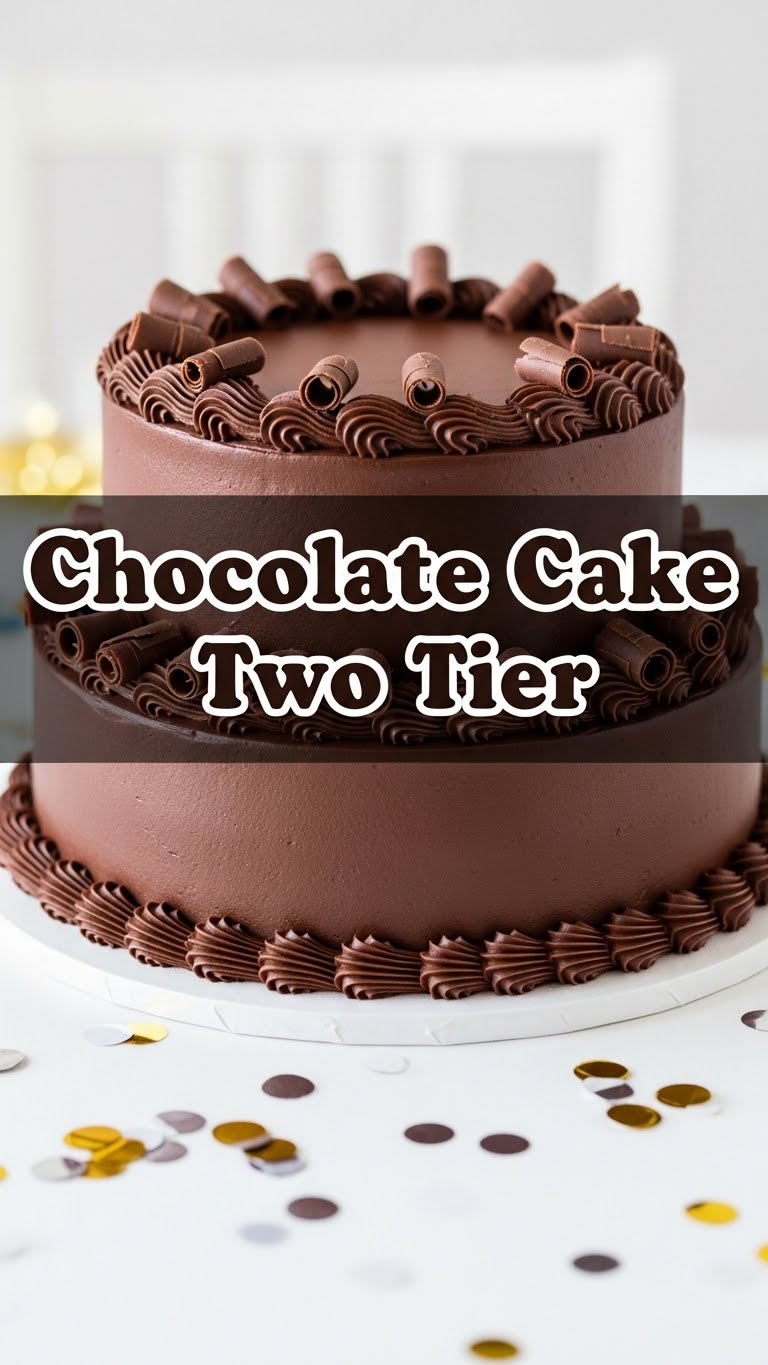
So, you’ve decided to level up your chocolate cake game, huh? Good for you! But before you panic about ‘tiers’ and ‘structure,’ let’s just say this isn’t rocket science. It’s cake science, which is way more delicious and forgiving. We’re making a two-tier chocolate cake, because let’s be real, one tier is cute, but two tiers screams, “I’m a baking goddess (or god!), and I’m here for a good time *and* a long time… of eating cake.”
Why This Recipe is Awesome
Okay, let’s be blunt: this isn’t just *any* chocolate cake. This is the kind of chocolate cake that makes people gasp. And then ask for the recipe. And then maybe propose to you. It’s a showstopper, but here’s the kicker: it’s deceptively easy. Like, “I totally made this look hard, but I was secretly binging reality TV while doing it” easy.
- It’s chocolate. Duh. What more do you need?
- It’s two tiers! Because sometimes, one cake just isn’t enough to express your love for cocoa. Or your hunger.
- It’s ridiculously moist. Seriously, we’re talking melt-in-your-mouth, ‘is there butter in this even though I already added oil?’ levels of moistness.
- **It’s idiot-proof.** Even I didn’t mess it up, and my kitchen regularly stages minor culinary disasters.
- Perfect for showing off at parties, birthdays, or just a Tuesday when you feel like treating yourself. No judgment here, ever.
Ingredients You’ll Need
Gather your troops! Make sure everything is at room temperature unless specified. This isn’t just a suggestion; it’s a command for cake success!
For the Seriously Good Chocolate Cake Layers:
- All-Purpose Flour: 2 ½ cups. The backbone of our cakey dreams.
- Granulated Sugar: 2 cups. For that sweet, sweet goodness.
- Good Quality Unsweetened Cocoa Powder: ¾ cup. Don’t skimp here, people! Life’s too short for sad, pale chocolate.
- Baking Soda: 2 teaspoons. Our leavening MVP.
- Baking Powder: 1 teaspoon. Another leavening hero, for extra lift.
- Salt: 1 teaspoon. Don’t skip it; it balances all that sweetness!
- Large Eggs: 2. Preferably not still in the shell.
- Whole Milk: 1 cup. Adds richness and moisture.
- Vegetable Oil (or other neutral oil): ½ cup. The secret to that super moist texture.
- Vanilla Extract: 2 teaspoons. Vanilla and chocolate are besties, remember?
- Boiling Water (or hot coffee): 1 cup. **This is key!** It activates the cocoa and makes the cake incredibly moist. Trust me on this one.
For the Dreamy Chocolate Buttercream Frosting:
- Unsalted Butter: 2 cups (4 sticks), softened. The star of the show!
- Powdered Sugar (Confectioners’ Sugar): 6-8 cups, sifted. We need a lot for two tiers!
- Unsweetened Cocoa Powder: 1 cup, sifted. Again, good quality, please!
- Whole Milk (or heavy cream): ¼ cup + 2-4 tablespoons, as needed. For creaminess.
- Vanilla Extract: 1 tablespoon. More vanilla, more joy.
- Pinch of Salt: To cut through the sweetness.
Step-by-Step Instructions
Alright, apron on, game face on. Let’s make some magic happen!
Prep Time! Preheat your oven to 350°F (175°C). Grease and flour two 8-inch round cake pans. Or, if you’re like me and have a love-hate relationship with flouring, line the bottoms with parchment paper. This is a crucial step; don’t skip it unless you enjoy crying over stuck cake.
Dry Mix Fun: In a large bowl, whisk together the flour, sugar, cocoa powder, baking soda, baking powder, and salt. Make sure there are no lumps. We’re going for smooth sailing here.
Wet Mix Magic: In a separate medium bowl, whisk together the eggs, milk, vegetable oil, and vanilla extract until well combined.
Combine and Conquer: Pour the wet ingredients into the dry ingredients. Mix on low speed with an electric mixer (or by hand with a whisk if you’re feeling ambitious) until just combined. Don’t overmix, unless you’re aiming for a hockey puck texture. Nobody wants that.
The Secret Weapon: Carefully pour the boiling water (or hot coffee) into the batter. Mix on low speed until the batter is smooth. It will be very thin – that’s exactly what we want! FYI, the coffee enhances the chocolate flavor like nobody’s business.
Divide and Bake: Divide the batter evenly between your two prepared cake pans. Bake for 30-35 minutes, or until a wooden skewer inserted into the center comes out clean. **Don’t open the oven door every five minutes**; it’s not a microwave, chill!
Cool Down: Let the cakes cool in the pans for about 10-15 minutes before inverting them onto a wire rack to cool completely. And I mean *completely*. Warm cake + frosting = melted, messy sadness.
Frosting Time! While the cakes cool, let’s make that dreamy buttercream. In a large bowl with an electric mixer, beat the softened butter on medium speed until light and fluffy (about 2-3 minutes).
Sugar Bomb: Gradually add the sifted powdered sugar, cocoa powder, and salt to the butter, alternating with splashes of milk or cream. Start with about half the sugar, then some milk, then the rest of the sugar, adding more milk as needed to reach your desired consistency. Beat on high speed for another 2-3 minutes until it’s super fluffy and spreadable. Stir in the vanilla extract.
Level Up (literally): Once the cakes are completely cool, use a serrated knife to level the tops if they’ve domed. We want nice, flat layers for stacking.
Crumb Coat Crusade: Place one cake layer on your serving plate or cake stand. Spread a thin layer of frosting over the top. This is the “crumb coat” and it traps any loose crumbs. Top with the second cake layer.
Final Frosting Flourish: Apply a thin layer of frosting around the sides of the entire cake for another crumb coat. Chill the cake in the fridge for 15-20 minutes to set this layer. Then, apply a generous, even layer of frosting to the entire cake, smoothing it out with an offset spatula or bench scraper. Decorate as desired – sprinkles, chocolate shavings, fresh berries, whatever makes your heart sing!
Common Mistakes to Avoid
We all make mistakes, but let’s try to avoid these rookie errors, shall we?
- Not Greasing Your Pans Properly: The ultimate betrayal. Grease, flour, or parchment paper. Do it. Or cry when your cake refuses to budge.
- Overmixing the Batter: Remember, you want cake, not a dense, chewy brick. Mix until *just* combined.
- Not Cooling Cakes Completely: I can’t stress this enough. If your cakes are warm, your frosting will melt into a sad, sticky puddle. Patience, young Padawan.
- Using Cold Ingredients for Frosting: Your butter *must* be softened. Cold butter leads to lumpy, un-creamy frosting. Nobody wants that.
- Skipping the Crumb Coat: Oh, the horror! Unless you want crumbs all over your beautifully finished cake, do the crumb coat. It’s like magic for a smooth finish.
- Ignoring the Sifting: Sifting powdered sugar and cocoa powder prevents lumps. Don’t be lazy, your frosting will thank you.
Alternatives & Substitutions
Feeling a little rebellious? Here are some ways to switch things up:
- Dairy-Free? Swap whole milk for unsweetened almond or soy milk in both the cake and frosting. Use a good quality dairy-free butter alternative for the frosting.
- Coffee Boost: If you’re not into coffee, hot water works perfectly fine in the cake batter. But honestly, **IMO**, the coffee really makes the chocolate sing.
- Different Frosting Vibes: Not a buttercream fan? Try a simple chocolate ganache (heavy cream + chocolate) or a tangy cream cheese frosting.
- Extra Layers? You can split these two 8-inch layers in half to make four thinner layers for an even taller, more dramatic cake. Just make sure to adjust chilling times.
- Flavor Boosters: Add a pinch of instant espresso powder to the cake batter with the dry ingredients for an even deeper chocolate flavor. Or a dash of peppermint extract for a festive twist!
FAQ (Frequently Asked Questions)
Got questions? I’ve got (casual, humorous) answers!
- Can I use a different size pan? Sure, you rebel! Just note that baking times will change. Smaller pans (e.g., 6-inch) will need longer, larger pans will be quicker. Keep an eye on that skewer!
- How long does this masterpiece last? Covered at room temperature, it’s good for 2-3 days. In the fridge, up to 5 days. But let’s be real, it won’t last that long.
- Can I make it ahead of time? Absolutely! The unfrosted cake layers can be baked, cooled, wrapped tightly in plastic wrap, and frozen for up to a month. Thaw at room temp before frosting. You can also make the frosting a day or two ahead and store it in the fridge; just re-whip it before using.
- Is it really two tiers? It looks like one big one! Ha! Good question! When we say two tiers, we mean two *layers* stacked on top of each other to make one tall cake. If you want a literal multi-level cake (like for a wedding), you’d bake different sized cakes (e.g., 6-inch and 8-inch) and stack them with support dowels. This recipe is for one tall, impressive cake, two layers deep!
- My frosting is too runny/too thick! Help! Frosting woes are common. If it’s too runny, add more sifted powdered sugar, a tablespoon at a time. Too thick? Add more milk or cream, a teaspoon at a time, until you hit that perfect creamy consistency.
- Can I use margarine instead of butter? Well, technically yes, but why hurt your soul like that? Butter is king, **IMO**, for that rich, creamy flavor and texture. Margarine just… isn’t the same.
- Do I really need boiling water? It seems a bit extra. Yup, you really do! The hot liquid helps bloom the cocoa powder, releasing its full flavor and ensuring an incredibly moist cake. Trust the process, it’s worth the extra step!
Final Thoughts
You did it! You just made a TWO-LAYER CHOCOLATE CAKE! Take a moment. Breathe in the chocolatey glory. Pat yourself on the back, grab a slice (or three, I’m not judging), and bask in the deliciousness you just created. You’re basically a professional now, so go forth and conquer! Or just eat cake. Both are valid. Now go impress someone—or yourself—with your new culinary skills. You’ve earned it!
