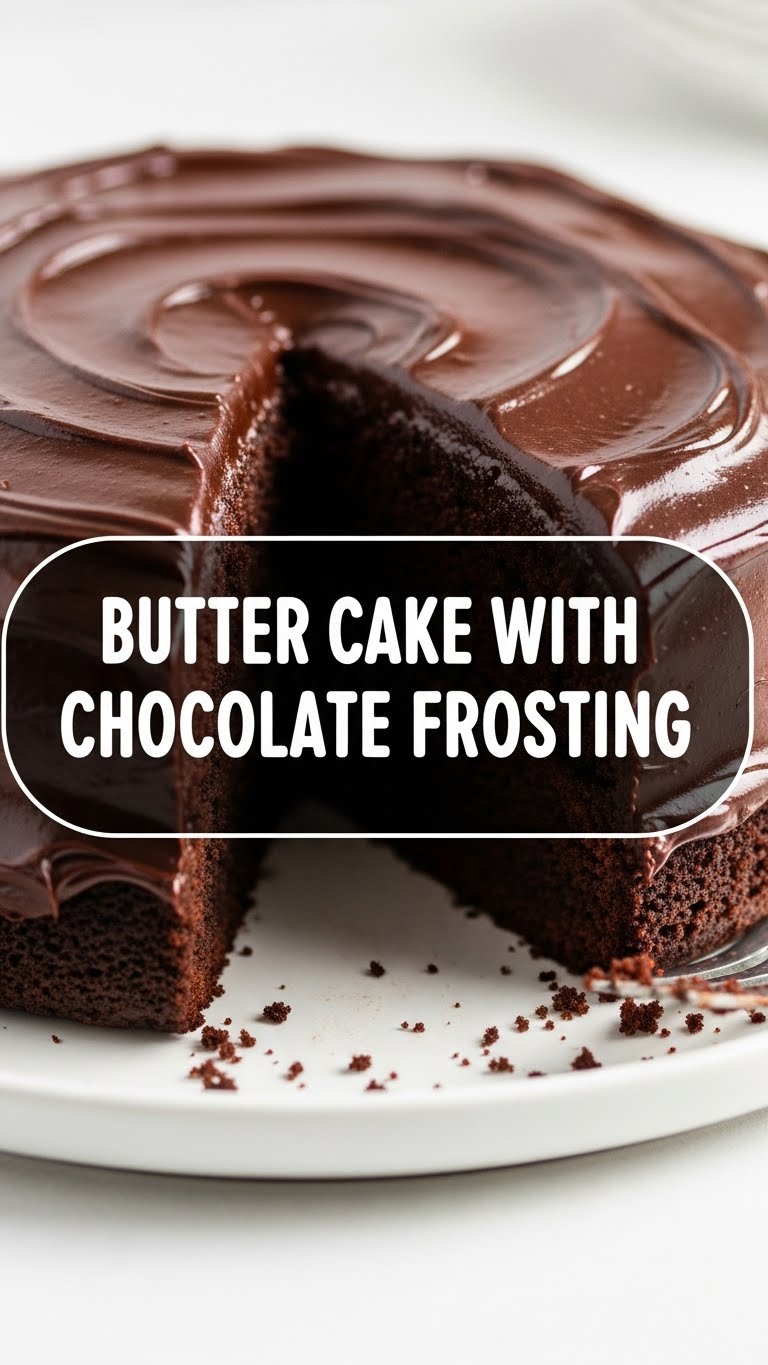
So you’re craving something tasty but too lazy to spend forever in the kitchen, huh? Same. What if I told you there’s a cake so ridiculously simple, so utterly delicious, it’ll make you question all those fancy, multi-layered Pinterest nightmares? Buckle up, buttercup, because we’re making a Butter Cake with Chocolate Frosting that’s practically a hug in dessert form. Prepare for pure, unadulterated joy!
Why This Recipe is Awesome
Okay, let’s be real. We all want to impress, but sometimes “impress” means “didn’t burn the house down.” This recipe? It’s your secret weapon. It’s **idiot-proof**, I swear. Even if your culinary skills usually peak at toast, you’ll nail this. It’s also super versatile, comes together surprisingly fast, and tastes like a dream you don’t want to wake up from. Plus, who doesn’t love chocolate and butter together? Seriously, name one person. You can’t.
Ingredients You’ll Need
For the Cake:
- Unsalted butter: 1 cup (2 sticks), softened to room temp, because cold butter is the enemy of fluffy cake.
- Granulated sugar: 1 ¾ cups, the sweet stuff that makes everything better.
- Large eggs: 3, also at room temp, for maximum fluff and proper emulsification.
- Vanilla extract: 2 teaspoons, don’t skip this, it’s the soul of the cake!
- All-purpose flour: 2 ½ cups, plain old flour, no fancy stuff needed.
- Baking powder: 1 tablespoon, our little lift-me-up agent.
- Salt: ½ teaspoon, just a pinch, to make all those other flavors pop.
- Milk: 1 cup, whole milk for richness, because we’re not cutting corners on deliciousness here.
For the Chocolate Frosting:
- Unsalted butter: ½ cup (1 stick), softened, again with the room temp!
- Powdered sugar: 3-4 cups (aka confectioners’ sugar), sifted if you’re feeling fancy, for that smooth, melt-in-your-mouth texture.
- Unsweetened cocoa powder: ½ cup, the good stuff that brings the chocolatey goodness.
- Vanilla extract: 1 teaspoon, more vanilla, because why not?
- Milk (or heavy cream): 2-4 tablespoons, a splash to get that perfect, spreadable consistency.
Step-by-Step Instructions
- Prep Time: Preheat your oven to 350°F (175°C). Grease and flour a 9-inch round cake pan. Don’t skimp on this step unless you want your cake to be *one* with the pan forever.
- Cream Dream: In a large bowl, using an electric mixer, cream together the softened butter and granulated sugar until it’s light and fluffy. This should take about 3-5 minutes. Don’t rush it; this is where the magic starts.
- Egg-cellent Addition: Beat in the eggs, one at a time, making sure each is fully incorporated before adding the next. Stir in that glorious vanilla extract.
- Dry Mix: In a separate, medium bowl, whisk together the flour, baking powder, and salt. Give it a good whisk to evenly distribute everything.
- Wet Meets Dry: Gradually add the dry ingredients to the wet ingredients, alternating with the milk. Start and end with the dry ingredients. **Mix until *just* combined.** Seriously, overmixing is the enemy here!
- Bake It Up: Pour the batter into your prepared cake pan and smooth the top with a spatula. Bake for 30-35 minutes, or until a wooden skewer or toothpick inserted into the center comes out clean.
- Cool Down: Let the cake cool in the pan for about 10-15 minutes before carefully inverting it onto a wire rack to cool completely. Patience is a virtue, my friend; don’t rush this part!
- Frosting Fun (While Cake Cools): In a medium bowl, beat the softened butter with an electric mixer until creamy. Gradually add the powdered sugar and cocoa powder, alternating with splashes of milk/cream, until smooth and fluffy. Stir in the vanilla extract. If it’s too thick, add more milk; too thin, add more powdered sugar.
- Frost & Devour: Once the cake is *completely* cool (seriously, don’t even *think* about frosting a warm cake unless you want a melted mess), spread that luscious chocolate frosting all over it. Slice, serve, and accept all the compliments!
Common Mistakes to Avoid
- Cold Ingredients: Using cold butter and eggs is a one-way ticket to dense cake city. Room temp is key for proper emulsification and a light crumb. **Don’t skip the room temp part!** You’ve been warned.
- Overmixing: Once the flour hits the wet ingredients, stop mixing as soon as everything is combined. Overmixing develops gluten, leading to a tough, chewy cake. Nobody wants that.
- Not Greasing/Flouring the Pan Properly: Think you can just spray a little cooking oil and be done? Good luck getting that cake out in one piece. Do it right, or risk structural collapse and a very sad baker.
- Frosting a Warm Cake: This isn’t a “warm chocolate sauce on a lava cake” situation. Frosting on warm cake = runny, sad frosting. Be patient! Your future self will thank you.
- Ignoring the Preheat: Baking in a cold oven is like trying to run a marathon without stretching. It just won’t go well, and your cake won’t rise properly.
Alternatives & Substitutions
Feeling a little adventurous, or just out of one tiny ingredient? No worries, I’ve got your back (mostly).
- Dairy-Free? You can definitely swap out regular milk for almond milk or oat milk (unsweetened, please!), and use a good quality plant-based butter (like Miyoko’s or Earth Balance sticks) for both the cake and frosting. Just make sure your plant butter is specifically for baking.
- No Unsweetened Cocoa Powder? You *could* try melted semi-sweet chocolate, but you’d need to significantly adjust the sugar content. Honestly, just get the cocoa powder; it’s worth it for the rich chocolate punch.
- Vanilla Extract Swaps: Want to get fancy? Almond extract is a delightful swap for the cake for a slightly nutty flavor, or try adding a bit of espresso powder (about 1 teaspoon) into the frosting to deepen the chocolate notes without tasting like coffee.
- Gluten-Free Flour: A 1:1 gluten-free baking mix *should* work fine, but results can vary. I haven’t personally tried it with this specific recipe, so proceed with caution, **FYI**.
FAQ (Frequently Asked Questions)
- My cake is dry! What happened? Probably overbaked it. Ovens vary, so start checking earlier than the recipe says. Or you overmixed. Did you read the “Common Mistakes” section? Just sayin’.
- Can I use oil instead of butter for the cake? You can, but then it’s not really a *butter* cake, is it? You’ll lose that rich, distinct buttery flavor and tender texture. **IMO**, stick to butter for this one.
- How long does this cake last? If you manage to not eat it all in one sitting (which, let’s be honest, is a challenge), it’ll last covered at room temperature for 2-3 days, or in the fridge for up to 5 days. Just bring it to room temp before serving for best flavor.
- Can I make this as cupcakes? Absolutely! Divide the batter evenly into cupcake liners. Baking time will be shorter, around 18-22 minutes. Keep an eye on them!
- My frosting is too thin/thick. Help! Too thin? Add more powdered sugar, a tablespoon at a time, until it thickens up. Too thick? Add more milk/cream, a teaspoon at a time, until you get the perfect spreading consistency. It’s an art, not a science!
- Do I *have* to use room temperature ingredients? Yes. Seriously, yes. I’ve said it like, three times now. It makes a huge difference in the texture of your cake. Trust me on this one.
Final Thoughts
See? I told you it wasn’t rocket science! You’ve just whipped up a show-stopping (and ridiculously easy) Butter Cake with Chocolate Frosting. This isn’t just a dessert; it’s a statement. A statement that says, “I can bake, and I have good taste, and yes, you can have a slice if you’re lucky.” Now go impress someone—or yourself—with your new culinary skills. You’ve earned it! And maybe save me a slice?


