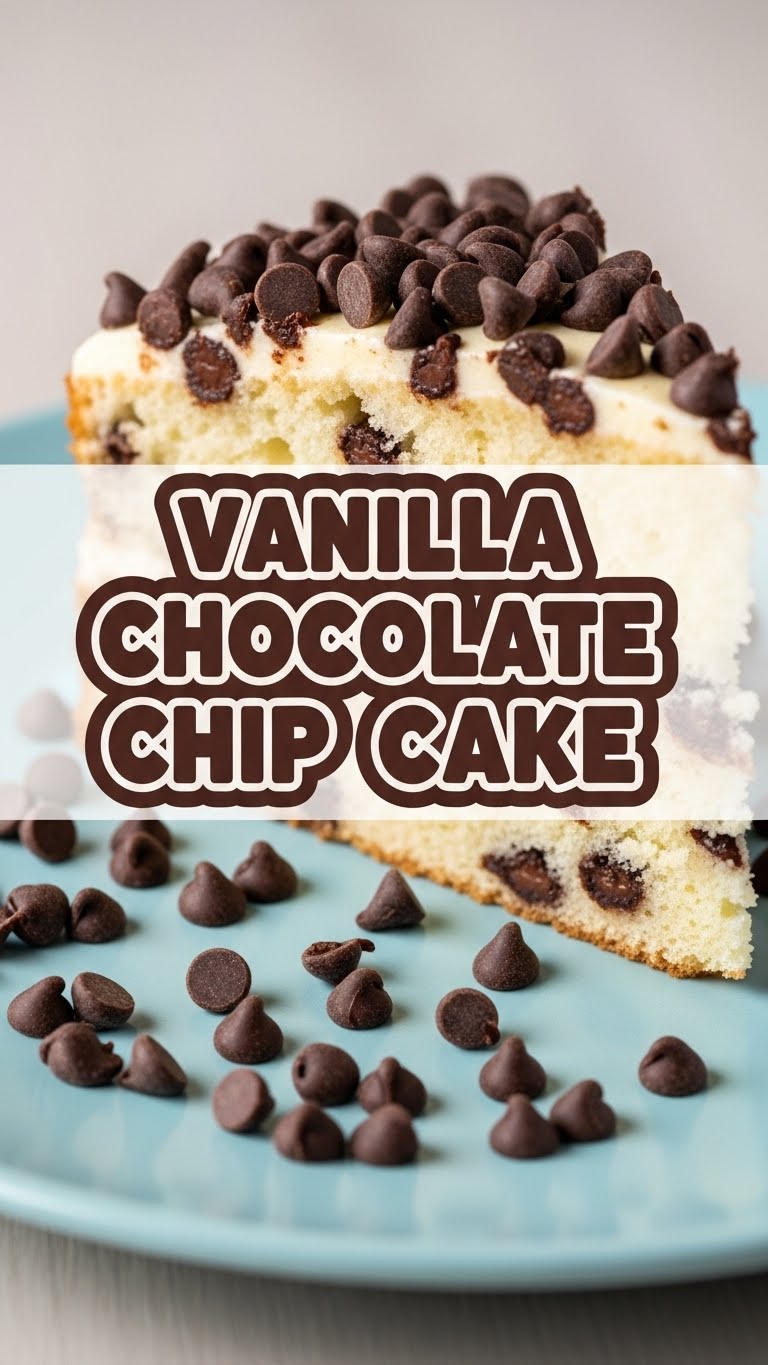
Ever feel like your sweet tooth is staging a full-blown coup, but your energy levels are staging a sit-in? Yeah, me too. This Vanilla Chocolate Chip Cake is your delicious hostage negotiator. It’s the perfect blend of cozy vanilla and melty chocolate, designed to satisfy those cravings without making you feel like you just ran a marathon in the kitchen. Ready to whip up some magic without the drama?
Why This Recipe is Awesome
Okay, so this isn’t just *any* cake recipe. This is “I-woke-up-like-this-and-decided-to-bake-something-epic-without-actually-trying-too-hard” cake. It’s truly idiot-proof, I swear. Even if your culinary skills usually involve calling for takeout, you got this. Seriously, it’s that forgiving. Plus, it tastes like a hug from a cloud that smells of vanilla and chocolate. What’s not to love? It’s quick, it’s easy, and it’s guaranteed to make you the hero of any potluck (or just your couch session).
Ingredients You’ll Need
Gather your troops! Here’s what you’ll need to assemble this delicious masterpiece:
- All-purpose flour: The unsung hero of all baking. Don’t skip it, obviously.
- Granulated sugar: Sweetness, pure and simple. Enough said.
- Baking powder: Our little lift-off agent. Makes things fluffy.
- Salt: Just a pinch! Balances the sweetness, like a wise old sage.
- Unsalted butter: Softened, please! None of that rock-hard stuff straight from the fridge. That’s just mean to your mixer.
- Large eggs: Room temperature is key for a smooth batter and even baking. Trust me on this.
- Vanilla extract: Go for the good stuff, trust me. It’s a *vanilla* chocolate chip cake, after all!
- Milk: Any kind works, but whole milk gives it that extra lushness.
- Chocolate chips: The star sprinkles! Semi-sweet, milk, dark – pick your poison. The more, the merrier, right?
Step-by-Step Instructions
Let’s get this party started! Follow these super simple steps:
- Preheat & Prep: Get your oven to 350°F (175°C). Grease and flour a 9-inch round cake pan. Nobody wants a stuck cake, right? You can also line the bottom with parchment paper for extra insurance.
- Dry Mix: In a medium bowl, whisk together your flour, sugar, baking powder, and salt. Make sure there are no lumpy surprises hiding in there.
- Wet Mix: In another, larger bowl, cream together the softened butter until it’s light and fluffy. Add the eggs one at a time, mixing well after each. Stir in the vanilla extract until everything is beautifully combined.
- Combine: Gradually add the dry ingredients to the wet ingredients, alternating with the milk. Start and end with dry. Don’t overmix! Mix just until combined. Lumps are fine, overmixing makes for a tough cake.
- Fold in Chips: Gently fold in those glorious chocolate chips. Distribute them evenly, so every slice gets some love. Because every bite deserves chocolate.
- Bake: Pour the batter into your prepared pan. Bake for 30-35 minutes, or until a toothpick inserted into the center comes out clean. If it comes out with wet batter, give it a few more minutes.
- Cool: Let the cake cool in the pan for 10 minutes before flipping it onto a wire rack to cool completely. Patience, young padawan. Don’t try to frost a warm cake unless you want a melty mess!
Common Mistakes to Avoid
We’ve all been there! Learn from my (many) mistakes:
- Cold Butter/Eggs: Trying to cream cold butter is like trying to reason with a toddler – messy and unproductive. And cold eggs can make your batter curdle. Room temp, people! It makes a HUGE difference.
- Overmixing: This is a big one. Overmixing develops the gluten too much, giving you a tough, chewy cake. We want light and fluffy, not rubbery. Mix just until everything is combined, then stop!
- Not Greasing the Pan Properly: Ever had half your cake stick to the pan? It’s a tragedy. Grease AND flour, or use parchment paper. Seriously, don’t skimp on this step.
- Opening the Oven Door Too Early: Resist the urge to peek! Your cake needs consistent heat to rise properly. Wait until at least 25 minutes in, then check. Otherwise, it might just sink, and nobody wants a sad cake.
Alternatives & Substitutions
Feeling adventurous? Or just working with what you’ve got? Here are some ideas:
- Butter vs. Oil: You *could* use oil (like vegetable or canola) instead of butter for a super moist cake, but IMO, butter gives that classic rich flavor we’re going for. If you do use oil, reduce the amount slightly (e.g., use 1/2 cup oil for 1/2 cup butter).
- Milk Alternatives: Lactose intolerant? No problem! Almond milk, soy milk, or oat milk all work perfectly fine. The cake might be slightly less rich, but still delicious.
- Chocolate Chip Varieties: Mix it up! Try white chocolate chips, dark chocolate chunks, or even a mix of all three. Peanut butter chips would also be amazing if you’re feeling wild.
- Add-ins: A sprinkle of cinnamon? A handful of chopped nuts? A zest of orange or lemon? Go wild! Just don’t overwhelm the vanilla and chocolate vibe too much.
FAQ (Frequently Asked Questions)
- “Can I use margarine instead of butter?” Well, technically yes, but why hurt your soul like that? Butter just tastes better, period. It gives the cake that lovely texture and flavor you’re after.
- “My cake sank in the middle, what happened?” Oh, the dreaded crater! Usually, this means you either opened the oven door too early, or your baking powder isn’t fresh (it loses potency over time). Make sure your baking powder isn’t expired!
- “How long does this cake last?” If it lasts more than two days, you’re doing something wrong. Kidding! It’ll be good for 3-4 days at room temperature in an airtight container. Pop it in the fridge for a bit longer.
- “Can I make this into cupcakes?” Absolutely! Just adjust the baking time down to about 18-22 minutes. Keep an eye on them—they bake faster!
- “What kind of frosting should I use?” A simple vanilla buttercream is classic, or a chocolate ganache if you want to go all out. Honestly, it’s so good plain, you might not even need frosting!
- “Do I *really* need room temperature ingredients?” Yes, my friend, yes. Cold ingredients don’t emulsify properly with warm ones, leading to a lumpy batter and a less even bake. Trust the process!
Final Thoughts
See? I told you it was easy! Now you’ve got a ridiculously delicious, perfectly moist, and utterly irresistible Vanilla Chocolate Chip Cake just waiting to be devoured. Go on, pat yourself on the back. You’ve earned it. Now go impress someone—or yourself—with your new culinary skills. Happy baking, superstar!

