Okay, real talk. You just *know* you need chocolate cake in your life, but the thought of spending hours in the kitchen making some finicky masterpiece? Hard pass. Right? Same, friend, same. Sometimes, you just want that rich, chocolaty goodness without sacrificing your entire afternoon or your sanity. Good news! Your culinary fairy godparent (that’s me, obvs) has arrived with the perfect solution: a ridiculously easy, super moist, and utterly delicious Chocolate Sponge Cake.
Why This Recipe is Awesome
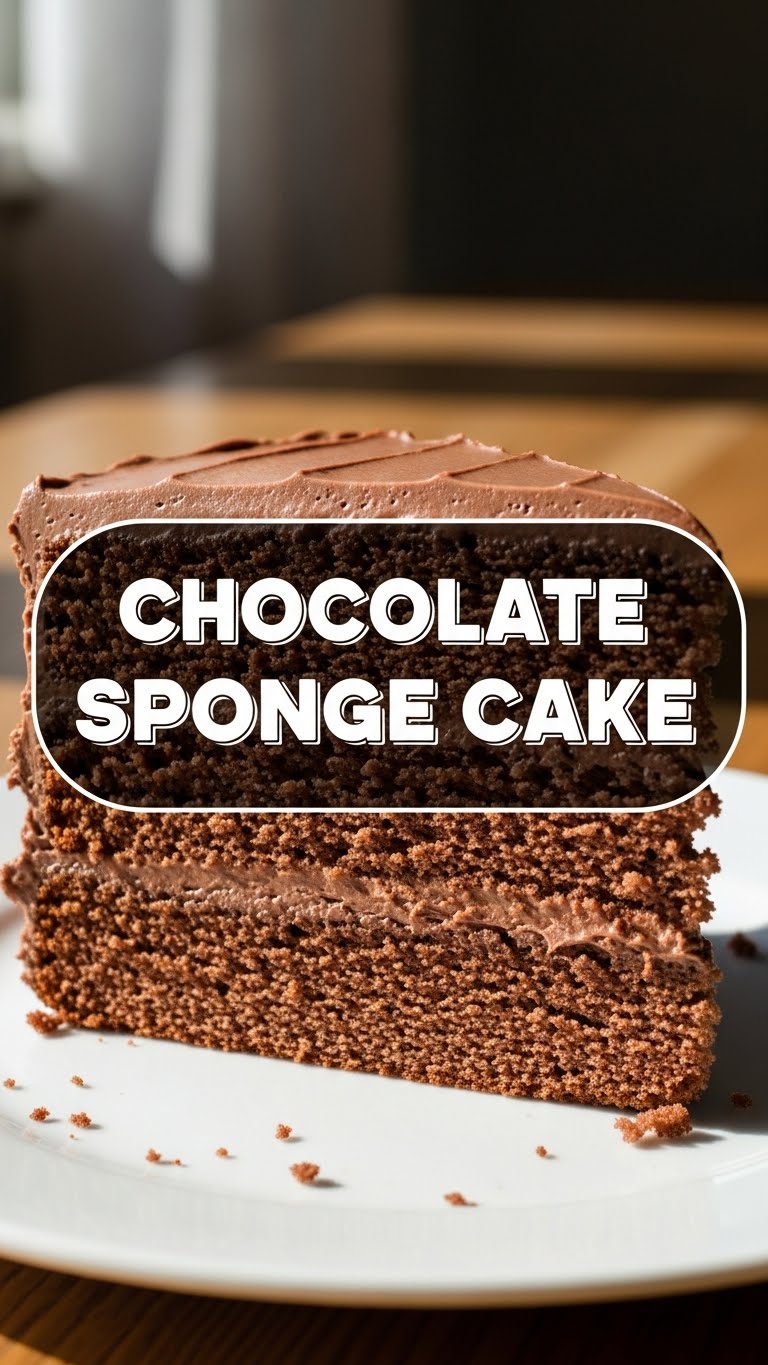
Listen up. This isn’t just *any* chocolate cake recipe. This is THE chocolate cake recipe for when you want maximum deliciousness with minimum effort. Think of it as the ultimate kitchen hack for your sweet tooth. It’s:
- **Stupidly simple:** Seriously, if I can do it without setting off the smoke detector, you totally got this.
- **Surprisingly moist:** No dry, crumbly sadness here. We’re talking melt-in-your-mouth perfection.
- **Begs for frosting:** (But is also amazing naked, just sayin’.)
- **Perfect for any occasion:** Or, you know, just a Tuesday afternoon because, why not?
It’s practically an act of self-care. You’re welcome.
Ingredients You’ll Need
Gather your troops! No exotic stuff here, just your pantry staples ready to become chocolatey magic.
- **1 ½ cups (190g) All-Purpose Flour:** The sturdy backbone of our cake. No fancy flour needed.
- **1 ½ cups (300g) Granulated Sugar:** Because life’s too short for unsweetened cake.
- **¾ cup (75g) Unsweetened Cocoa Powder:** The star of the show! Go for good quality; it makes a difference, trust me.
- **1 ½ teaspoons Baking Soda:** Our leavening MVP, making things light and fluffy.
- **1 teaspoon Salt:** Just a pinch to balance all that sweet and chocolatey goodness. Don’t skip it!
- **1 cup (240ml) Milk:** Whole milk is best, but whatever you’ve got chilling in the fridge will do.
- **½ cup (120ml) Vegetable Oil:** Or any neutral oil. This is our moisture secret weapon.
- **2 Large Eggs:** Room temperature, please! They mix better.
- **2 teaspoons Vanilla Extract:** Liquid gold for flavor. Seriously, don’t skimp.
- **1 cup (240ml) Boiling Water:** Sounds weird, tastes amazing. It blooms the cocoa and makes the cake super moist.
See? Nothing you can’t find without a treasure map!
Step-by-Step Instructions
- **Preheat & Prep:** First things first, get that oven nice and toasty to **350°F (175°C)**. Grease and flour two 8-inch round cake pans. Or line them with parchment paper if you’re feeling fancy (or just want easier cleanup).
- **Dry Mix It Up:** In a large bowl, whisk together the flour, sugar, cocoa powder, baking soda, and salt. Make sure there are no lumpy bits! We want smooth sailing.
- **Wet Mix Wonders:** In another bowl, combine the milk, oil, eggs, and vanilla extract. Whisk ’em good until they’re all friends.
- **Combine Forces:** Pour the wet ingredients into the dry ingredients. Mix on low speed with an electric mixer (or with a whisk and some elbow grease) until *just* combined. Don’t overmix! **Overmixing equals tough cake**, and we don’t want that.
- **The Hot Water Secret:** Carefully, gradually, add the boiling water to the batter. The batter will be thin, and that’s totally normal. Embrace the thinness!
- **Divide & Conquer:** Divide the batter evenly between your two prepared cake pans. Give them a gentle tap on the counter to release any air bubbles.
- **Bake Away!** Pop them in the preheated oven for **30-35 minutes**, or until a wooden skewer or toothpick inserted into the center comes out clean.
- **Cool Down:** Let them cool in the pans for about 10-15 minutes before flipping them out onto a wire rack to cool completely. Patience, young grasshopper! **Don’t try to frost a warm cake** unless you enjoy a melted mess. (Which, honestly, can also be delicious, but not the goal here.)
Common Mistakes to Avoid
Nobody’s perfect, but we can definitely steer clear of these rookie blunders:
- **Not Preheating Your Oven:** Thinking you can just shove it in there and hope for the best? Nah, oven temp consistency is key. **Always preheat!**
- **Overmixing the Batter:** This is probably the biggest cake killer. Mix until *just* combined. Lumps are okay, a tough cake is not.
- **Forgetting the Salt:** “It’s just a teaspoon!” you say. But trust me, it elevates all the other flavors.
- **Not Greasing Your Pans Properly:** Ever had a cake stick? It’s soul-crushing. Grease, flour, or parchment – pick your fighter and do it right.
- **Opening the Oven Door Too Soon:** Resist the urge! That burst of cold air can make your cake sink faster than a bad investment.
- **Frosting a Warm Cake:** We talked about this. Unless you’re going for abstract art, let it cool completely.
Alternatives & Substitutions
Life’s all about options, right? Here are a few tweaks you can make:
- **Milk:** No whole milk? Skim, 2%, or even non-dairy milk (almond, soy, oat) will work. Just know it might alter the richness slightly, but it’ll still be cake!
- **Oil:** Vegetable oil is neutral, but canola or grapeseed oil are fine too. I wouldn’t recommend olive oil unless you want a… *distinct* flavor.
- **Cocoa Powder:** If you have Dutch-processed cocoa, you can use it. It’ll give a darker, less acidic flavor. Just ensure your baking powder/soda ratio is balanced if you’re going fully off-script (but for this recipe, either works).
- **Add-ins:** Feeling spicy? A teaspoon of instant espresso powder will deepen the chocolate flavor without making it taste like coffee. Or throw in a handful of chocolate chips – because more chocolate is never a bad idea.
Experiment! That’s half the fun of baking, IMO.
FAQ (Frequently Asked Questions)
- **”Can I use margarine instead of butter?”** Well, technically yes, but why hurt your soul like that? Butter generally gives better flavor and texture. If you absolutely must, you can, but don’t say I didn’t warn you!
- **”My cake sank in the middle! What happened?”** Oh, the dreaded sinkhole! Could be a few things: oven door opened too soon, too much leavening, or the cake wasn’t fully baked. Next time, try baking a few minutes longer and resisting that peeking urge!
- **”Why boiling water? Isn’t that weird?”** It IS a bit quirky, but it’s pure magic! It “blooms” the cocoa powder, releasing more flavor, and helps create that super moist, tender crumb. Trust the process!
- **”How long does this cake last?”** If you manage not to devour it all in one sitting (which, good luck!), it’ll stay fresh for 3-4 days at room temperature, covered. In the fridge, maybe a day or two longer. But honestly, it rarely lasts that long.
- **”Can I make cupcakes with this recipe?”** Absolutely! Just fill cupcake liners about two-thirds full and bake for a shorter time, usually around 18-22 minutes. Keep an eye on them!
- **”Do I need a stand mixer?”** Nope! A hand mixer works perfectly, or even just a good old whisk and some muscle power. This recipe is pretty forgiving.
Final Thoughts
And there you have it, folks! Your very own, incredibly delicious, and deceptively easy Chocolate Sponge Cake. You just whipped up something amazing without breaking a sweat (or a single expensive piece of equipment). Now go impress someone—or yourself—with your new culinary skills. You’ve earned it! Grab a slice (or three), brew some coffee, and pat yourself on the back. You’re a rockstar. Happy baking!


