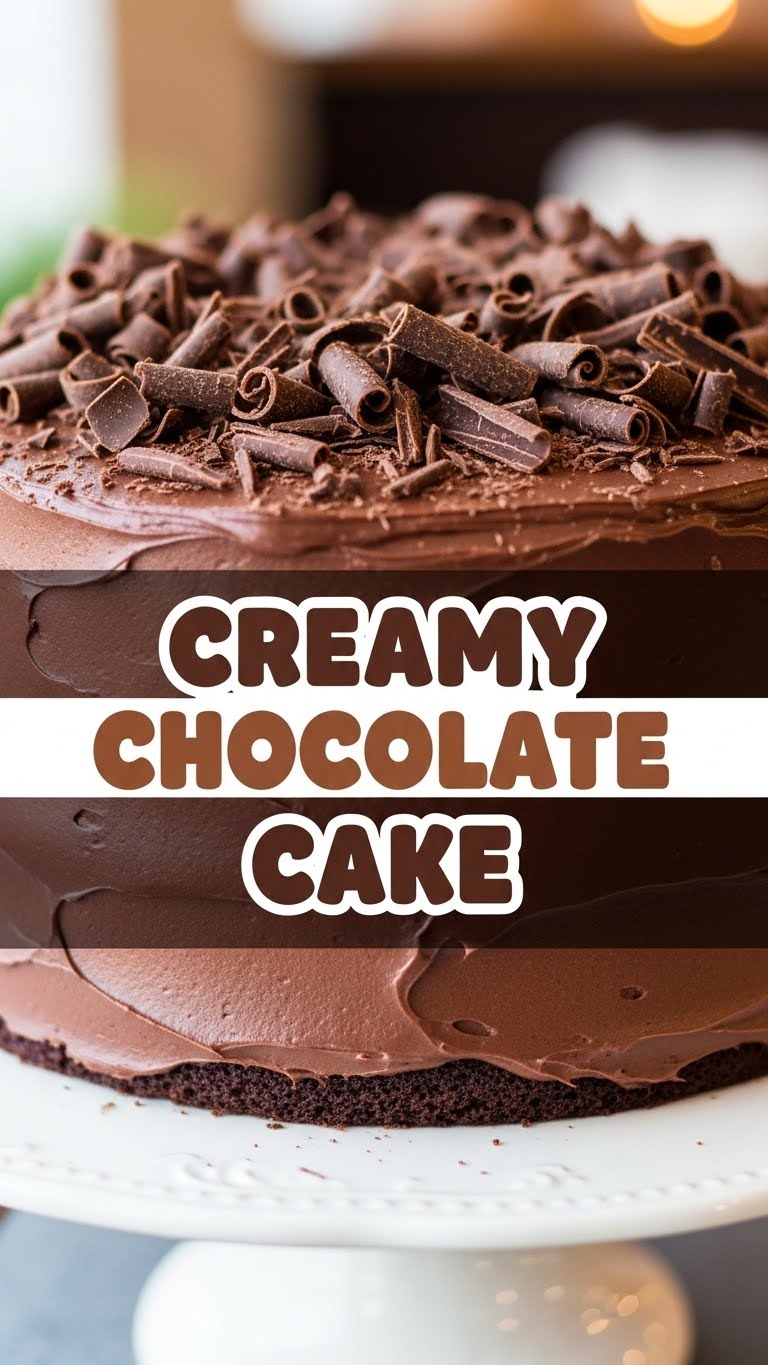
So, you’ve got that undeniable chocolate craving hitting harder than a Monday morning alarm, but you’re also kinda busy… you know, existing? And the idea of making a fancy, complicated cake just sounds like too much adulting? Same, friend, same. That’s why we’re whipping up a Creamy Chocolate Cake that’s so good, so easy, and so utterly divine, you’ll wonder where it’s been all your life. Think deep, dark chocolatey goodness with a creamy dream on top. Let’s dive in!
Why This Recipe is Awesome
Okay, let’s be real. There are a million chocolate cake recipes out there. But this one? This one is special. Why? Because it’s practically **idiot-proof**. Seriously, if I can make it without setting off the smoke alarm (which is a minor miracle, FYI), you totally can too. It’s moist, rich, and has that perfect balance of sweetness without being cloying. Plus, it comes together faster than you can scroll through your entire feed on a Sunday afternoon. No fancy techniques, no standing mixer required (unless you want to!), just pure, unadulterated chocolate bliss. It’s the kind of cake that screams “I tried hard!” even when you barely broke a sweat. Win-win, right?
Ingredients You’ll Need
Gather ’round, my sweet-toothed companions! Here’s your shopping list for ultimate chocolate happiness. Don’t skimp on the good stuff, your taste buds will thank you.
- For the Cake:
- 1 ¾ cups all-purpose flour (your basic flour, nothing fancy)
- 2 cups granulated sugar (because we like things sweet)
- ¾ cup unsweetened cocoa powder (the good stuff, Dutch-processed if you can swing it for extra dark drama)
- 1 ½ teaspoons baking soda (the leavening magic)
- 1 teaspoon baking powder (more magic!)
- 1 teaspoon salt (because balance, darling)
- 2 large eggs (room temp, they just mix better)
- 1 cup whole milk (or buttermilk for extra moisture and tang!)
- ½ cup vegetable oil (or canola oil, for that velvety crumb)
- 2 teaspoons vanilla extract (the soul of any good cake)
- 1 cup boiling water or hot coffee (trust me on the coffee, it amplifies the chocolate like nobody’s business!)
- For the Creamy Frosting:
- 2 cups heavy cream (the full-fat kind, no substitutes here if you want that creamy dream!)
- ½ cup powdered sugar (sifted, unless you like lumps)
- 2 tablespoons unsweetened cocoa powder (optional, but gives it a lovely cocoa tint and flavor)
- 1 teaspoon vanilla extract (because more vanilla is never a bad idea)
Step-by-Step Instructions
- Preheat & Prep: First things first, preheat your oven to 350°F (175°C). Then, grease and flour two 8-inch round cake pans. Or, line them with parchment paper. Don’t skip this; a sticking cake is a sad cake.
- Mix the Dry: In a large bowl, whisk together the flour, sugar, cocoa powder, baking soda, baking powder, and salt. Give it a good whisk until everything is super combined. We’re talking fluffy, uniform dry mix.
- Add the Wet (Almost): Make a well in the center of your dry ingredients. Add the eggs, milk, oil, and vanilla extract. Beat with an electric mixer on low speed for about 2 minutes, or until just combined. Don’t overmix! We’re not trying to develop gluten here; we want tender cake.
- The Hot Secret: Carefully, and slowly, pour the boiling water or hot coffee into the batter while mixing on low speed. The batter will be thin, don’t panic! It’s supposed to be like that. This is the secret to ultimate moisture.
- Bake It Up: Divide the batter evenly between your prepared cake pans. Pop them in the preheated oven and bake for 30-35 minutes, or until a wooden skewer inserted into the center comes out clean.
- Cool Down: Let the cakes cool in their pans on a wire rack for about 10-15 minutes. Then, carefully invert them onto the wire rack to cool completely. **This is crucial – don’t frost a warm cake unless you want a melted mess!**
- Whip Up the Creamy Dream: While the cakes are chilling out, get started on your frosting. In a large, chilled bowl, combine the heavy cream, powdered sugar, cocoa powder (if using), and vanilla extract. Beat with an electric mixer on high speed until stiff peaks form. Watch it closely; you want luscious, not grainy.
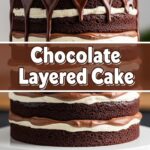
- Assemble Your Masterpiece: Once the cakes are completely cool, place one layer on your serving plate. Spread about a third of the whipped cream frosting evenly over the top. Gently place the second cake layer on top, then frost the top and sides of the entire cake with the remaining creamy goodness.
- Admire & Devour: Garnish with chocolate shavings, sprinkles, or just leave it beautifully naked. Slice, serve, and accept all the compliments!
Common Mistakes to Avoid
Listen up, buttercups! Learning from mistakes is smart, but avoiding them altogether is even smarter. Here are some pitfalls to dodge on your path to chocolate cake glory:
- Not Preheating the Oven: Rookie move! An unheated oven means your cake won’t rise properly, leading to a dense, sad little puck instead of a fluffy, happy cake. Always preheat!
- Overmixing the Batter: Once the wet and dry ingredients are combined, stop! Mixing too much develops the gluten, making your cake tough. Gentle hands, people.
- Frosting a Warm Cake: Unless you’re aiming for a soupy, drippy, melted frosting situation, let your cakes cool completely. We’re talking room temperature, folks. Patience is a virtue here.
- Using Cold Ingredients: Especially for the cake, room temperature eggs and milk emulsify better and create a smoother, more uniform batter. It’s a little thing, but it makes a big difference.
- Opening the Oven Door Too Soon: Curiosity killed the cake! Opening the oven door during the first 20-25 minutes can cause your cake to collapse. Resist the urge to peek!
Alternatives & Substitutions
Life’s about options, right? This recipe is pretty flexible, so feel free to play around. Just don’t go too wild, we’re still making cake here!
- Gluten-Free Flour: If you’re GF, swap the all-purpose flour for a good quality 1:1 gluten-free baking blend. I’ve had success with Bob’s Red Mill or King Arthur’s.
- Dairy-Free Milk: For a dairy-free version, use unsweetened almond milk or oat milk. The taste might be slightly different, but still delicious!
- Different Frosting: Not feeling the whipped cream? You could go for a classic buttercream, a silky chocolate ganache, or even a tangy cream cheese frosting. They all play nicely with chocolate.
- Baking Pans: No two 8-inch pans? One 9×13 inch pan works great for a sheet cake (adjust baking time slightly, usually 35-40 mins). Or, make cupcakes – bake for 20-25 minutes!
- Flavor Boost: Add a pinch of espresso powder to the cake batter (even if you’re using water instead of coffee) for an extra depth of chocolate flavor. Or a splash of Kahlua or rum for a boozy kick!
FAQ (Frequently Asked Questions)
Got questions? I’ve got answers. Mostly. Probably.
- Can I use margarine instead of butter for the cake? Well, technically yes, but why hurt your soul like that? Vegetable oil provides a moist crumb, which is what we want here, so stick to that or a neutral oil. Margarine is just… not as good for flavor, IMO.
- Why hot water/coffee? Does it really matter? Oh, it absolutely matters! The hot liquid helps to “bloom” the cocoa powder, releasing more of its chocolatey goodness and dissolving it better. It also makes for a super moist cake. So, yes, it’s a non-negotiable step for max flavor.
- My whipped cream isn’t getting stiff, what gives? A few things could be wrong. Was your cream cold enough? Your bowl and beaters should ideally be chilled too. Are you using heavy cream, not half-and-half? And make sure you’re beating it long enough. If all else fails, pop it in the fridge for 15 minutes and try again!
- Can I make this cake ahead of time? You betcha! The unfrosted cake layers can be wrapped tightly in plastic wrap and stored at room temperature for up to 2 days, or frozen for up to a month. The whipped cream frosting is best made fresh, though, as it can deflate over time.
- My cake looks dry. What went wrong? Most likely culprits are overbaking or overmixing. Remember, a skewer coming out clean is the key, not bone dry. Also, don’t forget the hot liquid step!
- How do I store the finished cake? Because of the creamy frosting, this cake needs to be refrigerated. Cover it loosely with plastic wrap or a cake dome. It’s best enjoyed within 3-4 days.
Final Thoughts
And there you have it, folks! Your new go-to recipe for a creamy, dreamy chocolate cake that’s so good, it should probably be illegal. This isn’t just a dessert; it’s an experience. A deliciously simple, deeply satisfying, “I totally baked this myself” experience. So, go on, unleash your inner baker. Make this cake, bask in the glory, and maybe, just maybe, share a slice (or don’t, I won’t tell). Now go impress someone—or yourself—with your new culinary skills. You’ve earned it!

