So, you’re standing in front of your fridge, mindlessly scrolling social media, and suddenly BAM! A wild craving for something warm, gooey, and chocolatey appears. But, like, without the whole “baking for an hour” commitment, right? Same, friend, *same*. This isn’t just a recipe; it’s a magic trick for your taste buds, a three-minute therapy session in a mug. Get ready to meet your new favorite chocolate obsession: the Chocolate Lava Mug Cake.
Why This Recipe is Awesome
Let’s be real. We all have those moments when we want to feel like a culinary genius, but our energy levels are firmly stuck at “sloth.” This recipe is your secret weapon. It’s **idiot-proof** – seriously, if I can do it without setting off the smoke alarm, you can too. It takes less time than deciding what to watch on Netflix, requires minimal cleanup (one mug, people!), and delivers maximum molten chocolate joy. Plus, it’s portion-controlled, which means you *technically* don’t have to share. You’re welcome.
Ingredients You’ll Need
Gather ’round, my lazy gourmands! Here’s your minimal shopping list. Most of this is probably already lurking in your pantry, judging you.
- **Flour:** 2 tablespoons all-purpose flour. Just regular ol’ flour. Don’t overthink it.
- **Sugar:** 2 tablespoons granulated sugar. For sweetness, duh.
- **Cocoa Powder:** 1 ½ tablespoons unsweetened cocoa powder. This is where the chocolate party starts.
- **Baking Powder:** ¼ teaspoon. Our little leavening fairy dust.
- **Salt:** A tiny pinch. Don’t skip it; it magically makes the chocolate taste even more chocolatey.
- **Milk:** 3 tablespoons milk (any kind works!).
- **Oil/Melted Butter:** 1 tablespoon vegetable oil or melted unsalted butter. Oil makes it super moist, butter adds richness. Your call!
- **Vanilla Extract:** ¼ teaspoon. Because vanilla makes everything better.
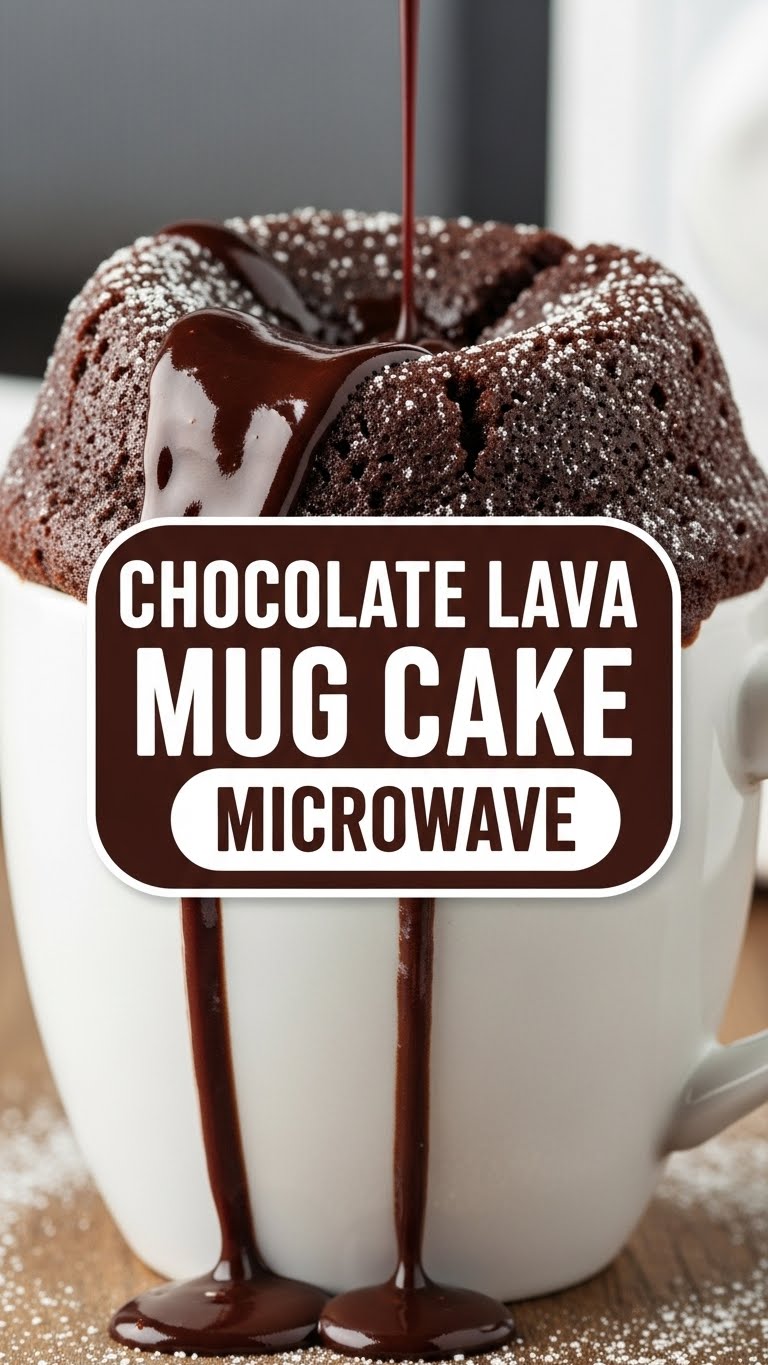
- **Chocolate Chips/Chunks:** 1-2 tablespoons (or more, no judgment here!) of semi-sweet or dark chocolate chips. This is the “lava” secret weapon.
Step-by-Step Instructions
Alright, let’s get down to business. You’ll be eating cake before you can say “is it done yet?!”
- **Mug Life:** Grab your favorite microwave-safe mug. Make sure it’s big enough – roughly 10-12 oz is ideal to avoid any overflow drama.
- **Dry Mix Magic:** In your mug, whisk together the flour, sugar, cocoa powder, baking powder, and salt. Make sure there are no lumpy bits trying to hide.
- **Wet Ingredients Waltz:** Pour in the milk, oil (or melted butter), and vanilla extract. Stir everything together really well until you have a smooth, glorious chocolate batter. Don’t overmix, though; we’re not trying to build arm muscles here.
- **The Lava Core:** Now for the star of the show! Gently fold in about half of your chocolate chips into the batter. Then, place the remaining chips right in the center of the batter. These will be your molten core.
- **Microwave Moment:** Pop that mug into the microwave. Cook on high for about **60-90 seconds**.
- **The Reveal:** Keep an eye on it! The cake should be puffed up and the edges set, but the center should still look a little gooey and moist. When in doubt, undercook slightly for maximum lava flow.
- **Serve & Savor:** Carefully take the mug out (it’ll be hot!). Let it cool for a minute or two, then grab a spoon and dig in! Add a scoop of ice cream or a dollop of whipped cream if you’re feeling fancy.
Common Mistakes to Avoid
Even though this is practically fail-proof, there are a few rookie errors that can turn your lava cake dream into a sad, rubbery reality. Don’t be that person!
- **Overcooking:** This is the #1 culprit for a dry, non-lava cake. **Start with 60 seconds** and add 10-15 second bursts if it’s still too wet. You want a slightly gooey center, remember?
- **Wrong Mug Size:** Too small and you’ll have a chocolate volcano eruption in your microwave (fun to watch, not fun to clean). Too big and the cake spreads thin and bakes too fast. Stick to that 10-12 oz sweet spot.
- **Skipping the Chocolate Chunks:** Yes, the cocoa powder gives it flavor, but those hidden chocolate chips are what make it *lava*. Don’t skimp, my friend.
- **Not Mixing Properly:** You don’t want pockets of dry flour or unmixed baking powder. Give it a good, but gentle, stir!
Alternatives & Substitutions
Feeling adventurous? Or just realized you’re out of something crucial? No worries, we’ve got options!
- **Dairy-Free:** Swap regular milk for almond, soy, or oat milk. Use coconut oil or a plant-based butter alternative. Easy peasy.
- **Gluten-Free:** You can totally use a 1:1 gluten-free flour blend. Just make sure it has xanthan gum!
- **Different Chocolate:** Want a white chocolate lava cake? Go for it! Or mix in some peanut butter chips. The world is your chocolate oyster.
- **Spice it Up:** A tiny pinch of cayenne pepper or espresso powder can really elevate the chocolate flavor. Trust me, it’s a game-changer.
FAQ (Frequently Asked Questions)
Got questions? I’ve got answers (and maybe a bit of sass).
- **Can I make this in advance?** Well, you *could*, but why? It takes like, three minutes. The whole point is instant gratification! It’s best enjoyed fresh out of the microwave for peak lava flow.
- **My cake didn’t get a lava center, what happened?!** You, my friend, probably overcooked it. Or didn’t put enough chocolate chips in the middle. Live and learn! Next time, pull it out a little earlier.
- **Can I double the recipe?** IMO, it’s better to make two individual mug cakes than try to cram a double recipe into one mug. Different microwave powers, different mug sizes… it just gets messy.
- **What if I don’t have vanilla extract?** The world won’t end, but your cake might miss that extra oomph. It’s not a deal-breaker, but definitely recommended for maximum flavor impact.
- **My microwave is super strong/weak, how do I adjust?** Ah, the age-old microwave mystery! **Always start with 60 seconds** and then go in 10-15 second increments until it’s just right for your specific microwave. Every microwave has its own personality, after all.
Final Thoughts
So there you have it! A ridiculously easy, incredibly fast, and unbelievably delicious Chocolate Lava Mug Cake. You’ve officially mastered the art of “gourmet dessert in minutes.” Now go forth and impress someone—or more realistically, just yourself—with your new culinary wizardry. You’ve earned every single gooey, chocolatey bite. Enjoy!


