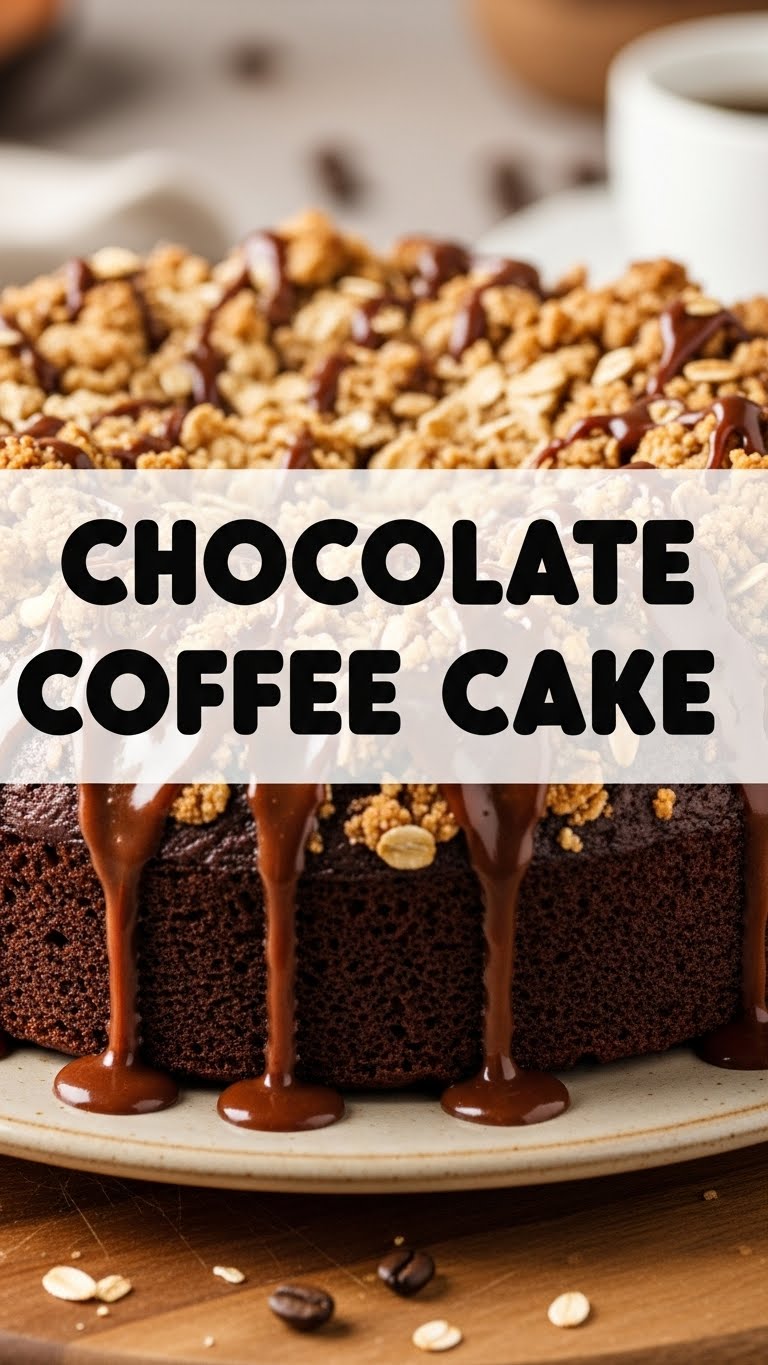
So, you’ve got that pesky sweet tooth acting up, but your energy levels are screaming ‘nap time,’ right? And you probably want something that screams ‘fancy baker’ without, you know, *being* a fancy baker? My friend, I’ve got your back. This Chocolate Coffee Cake is about to become your new secret weapon. It’s so good, you might actually fool yourself into thinking you spent hours on it.
Why This Recipe is Awesome
Okay, let’s spill the beans. Why this cake, out of all the cakes in the universe? First off, it’s chocolate AND coffee. Name a more iconic duo. I’ll wait. Secondly, it’s a coffee cake, which means it’s perfectly acceptable to eat for breakfast. That’s just science. Thirdly, and perhaps most importantly, it’s practically fail-proof. Seriously, if I can make this without setting off the smoke detector, you’re golden. It looks impressive, tastes divine, and requires minimal ‘adulting’ in the kitchen. Win-win-win, am I right?
Ingredients You’ll Need
For the Cake:
- All-purpose flour: The backbone of all good baked things. Don’t cheap out.
- Granulated sugar: Because sweetness. Duh.
- Unsweetened cocoa powder: The chocolatey goodness. Get the good stuff.
- Baking powder & Baking soda: Our leavening dream team. Don’t mix them up; it’s not a chemistry experiment you want to fail.
- Salt: Just a pinch to make everything else sing.
- Large eggs: Room temp, please! They play nicer.
- Milk: Any kind, but whole milk makes it extra lush.
- Vegetable oil (or melted unsalted butter): For moisture. Use oil if you’re feeling lazy; melted butter for extra flavor points.
- Vanilla extract: A hug in a bottle. Don’t skip it.
- Strong brewed coffee (cooled): The secret weapon! It enhances the chocolate without making it taste like a latte.
- Chocolate chips (optional, but highly recommended): Because more chocolate is always the answer.
For the Crumb Topping:
- All-purpose flour: Again, essential.
- Granulated sugar: Sweetness for the crunch.
- Unsweetened cocoa powder: To keep the chocolate theme strong.
- Ground cinnamon: A warm hug for your taste buds.
- Unsalted butter (cold, cubed): This is crucial for crumbly goodness. Don’t melt it!
Step-by-Step Instructions
- Preheat & Prep: Get that oven heated to 350°F (175°C). Grease and flour an 8×8 or 9×9 inch baking pan. Or, line with parchment paper for super easy removal. You choose your adventure!
- Whisk Dry (Cake): In a large bowl, whisk together your flour, sugar, cocoa powder, baking powder, baking soda, and salt. Make sure there are no lumps—we’re aiming for smooth sailing.
- Mix Wet (Cake): In another medium bowl, combine the eggs, milk, oil (or melted butter), vanilla, and cooled coffee. Give it a good whisk until everything is friendly.
- Combine & Conquer: Pour the wet ingredients into the dry ingredients. Mix until just combined. Do not overmix! Lumps are okay here; we don’t want tough cake. Stir in those chocolate chips if you’re feeling fancy.
- Crumb Time: In a separate medium bowl, combine flour, sugar, cocoa powder, and cinnamon for the topping. Cut in the cold, cubed butter with a pastry blender or your fingers until it looks like coarse crumbs. Embrace the mess!
- Assemble: Pour about half of the cake batter into your prepared pan. Sprinkle half of the crumb topping over it. Carefully spoon the remaining cake batter over the crumbs, then sprinkle the rest of the crumb topping on top.
- Bake It, Baby! Pop it in the preheated oven for 35-45 minutes. The exact time depends on your oven’s mood. A toothpick inserted into the center should come out with moist crumbs, not wet batter.
- Cool Down: Let it cool in the pan for about 10-15 minutes before transferring to a wire rack. Patience, grasshopper!
Common Mistakes to Avoid
- Not preheating the oven: Rookie mistake! Your cake won’t rise properly, and you’ll end up with a dense, sad disc.
- Overmixing the batter: This is a biggie. Overmixing develops the gluten, making your cake tough. Mix until just combined, like you’re gently coaxing it, not aggressively stirring.
- Melting the butter for the crumb topping: No, no, a thousand times no! Cold butter creates those delicious, crumbly pockets. Melted butter just makes a paste.
- Opening the oven door constantly: Resist the urge! Each peek drops the oven temperature, messing with your cake’s delicate rise. Wait until at least the 30-minute mark.
- Skipping the cool-down period: It’s tempting, but let that cake set up a bit in the pan. Otherwise, it might fall apart when you try to move it.
Alternatives & Substitutions
- No strong brewed coffee? No problem! You can use instant espresso powder dissolved in hot water (let it cool!), or simply use hot water for the liquid. The coffee just boosts the chocolate flavor, but it’ll still be delicious without.
- No cocoa powder for the topping? Just skip it! A plain cinnamon sugar crumb is classic and equally delish.
- Milk alternatives: Almond milk, oat milk, soy milk – whatever you’ve got in the fridge works. Just make sure it’s unsweetened if you want to control the sugar.
- Different chocolate chips: White chocolate chips, dark chocolate chunks, even chopped up candy bars (hello, Snickers coffee cake!) would be amazing. Get creative!
- Spice it up: A pinch of cardamom or a dash of nutmeg in the crumb topping can add a fun twist.
FAQ (Frequently Asked Questions)
- Q: Can I use instant coffee instead of brewed?
A: Absolutely! Just make it a strong brew and let it cool. We want that coffee punch, not a weak tea.
- Q: My crumb topping isn’t crumbly; it’s more like a paste. What happened?
A: Oh dear. You probably used melted or soft butter. Remember: cold butter is your best friend for crumbs! Also, don’t overwork it too much.
- Q: Can I make this in a Bundt pan?
A: You can, but you’ll likely need to double the recipe and adjust the baking time. It might be trickier to get the crumb layers even. Stick to a square or round pan for your first go-round, IMO.
- Q: How do I store leftovers?
A: In an airtight container at room temperature for up to 3 days. If it lasts that long, you’re a stronger person than me. You can also freeze individual slices for up to a month.
- Q: It looks a bit dry. What did I do wrong?
A: Usually, this means you either overbaked it or overmixed the batter. Keep an eye on that baking time and remember to stop mixing as soon as the wet and dry ingredients are just combined.
Final Thoughts
So there you have it, folks! Your new go-to recipe for when you need a little chocolatey, coffee-infused hug. This cake is proof that you don’t need to be a Michelin-star chef to bake something truly spectacular (and deceptively easy). Now go impress someone—or yourself—with your new culinary skills. You’ve earned it! And hey, if you end up eating half of it straight from the pan, I won’t tell. Pinky swear.


