So, you’re looking for that chocolate cake that makes you wanna hug the baker, but, like, you *are* the baker today? Excellent. And you want it to taste like you spent all day fussing over it, but secretly, you whipped it up in under an hour (baking time excluded, obvs)? My friend, you’ve come to the right place. Get ready to bake a chocolate cake so good, it might just make you weep happy, chocolatey tears. No fancy degree needed, just a love for all things decadent and a willingness to get a little flour on your nose.
Why This Recipe is Awesome
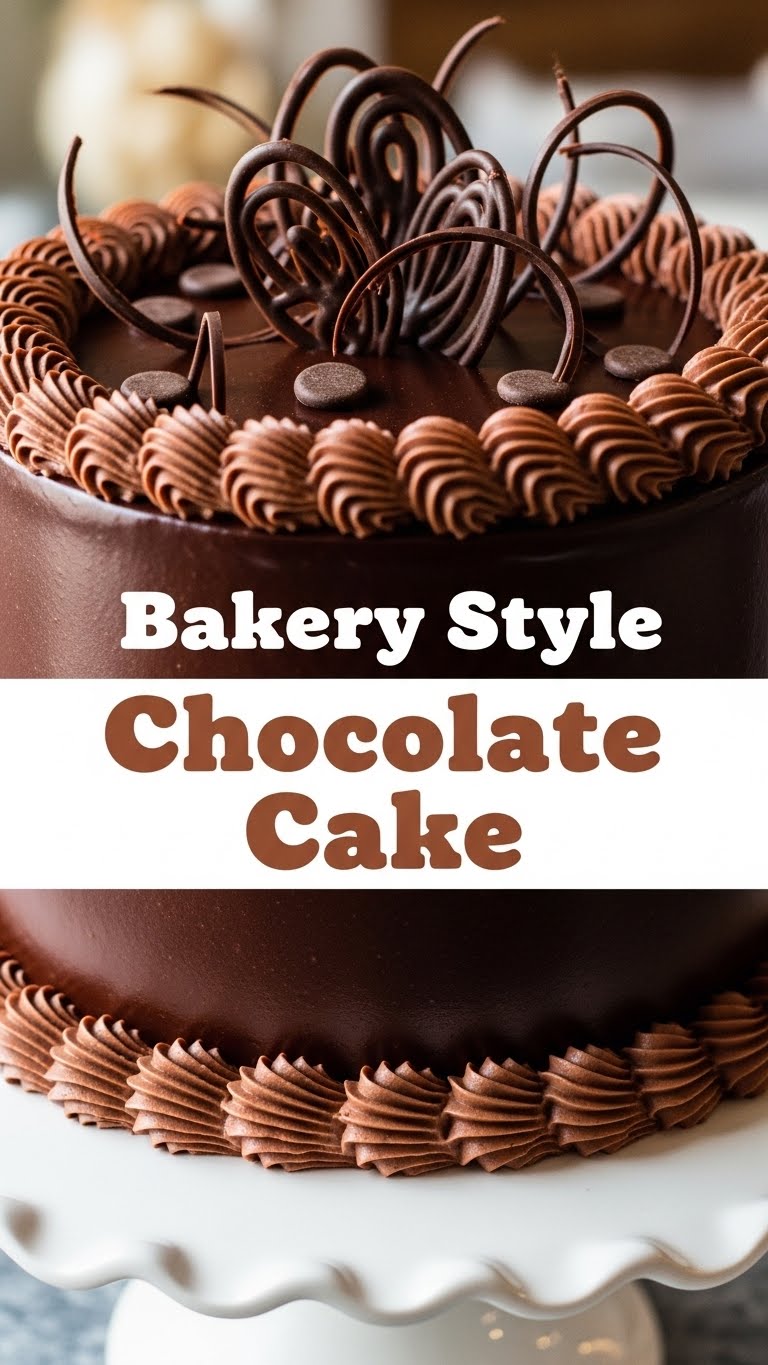
Okay, let’s cut to the chase. This isn’t just *a* chocolate cake recipe; it’s *the* chocolate cake recipe that will make people think you secretly trained in a Parisian patisserie. Why is it so awesome? Because it’s practically **idiot-proof**. Seriously, even I, someone who once mistook salt for sugar (don’t ask), managed to pull this off. It’s incredibly moist, intensely chocolatey, and has that perfect crumb that screams “bakery quality.” Plus, it’s super forgiving. Forgot an ingredient for 5 minutes? No biggie. Slightly overbaked? Don’t tell anyone, it’ll still be delicious. **It’s the kind of cake that makes you look like a domestic god/goddess without breaking a sweat (or a bank account).** And let’s be real, who doesn’t want that kind of glory?
Ingredients You’ll Need
Gather your troops! No need for a scavenger hunt, these are mostly pantry staples. Go forth and conquer your kitchen!
- All-Purpose Flour: About 1 ½ cups. The backbone of our chocolatey dreams.
- Granulated Sugar: 1 ½ cups. Because sweetness is next to godliness.
- Unsweetened Cocoa Powder: ¾ cup. And I mean *unsweetened*. This is where the magic (and deep chocolate flavor) happens.
- Baking Soda: 1 ½ teaspoons. Our little rising agent.
- Baking Powder: 1 ½ teaspoons. Its equally important rising sidekick.
- Salt: 1 teaspoon. Don’t skip it; it brings out all the flavors!
- Large Eggs: 2, at room temperature. Give ’em a warm bath if you forgot.
- Milk: 1 cup, at room temperature. Whole milk is best, but whatever you’ve got works.
- Vegetable Oil: ½ cup. For that incredible moistness.
- Vanilla Extract: 2 teaspoons. Essential. Don’t cheap out on the good stuff!
- Boiling Water or Hot Coffee: 1 cup. **This is the secret weapon!** It truly makes the chocolate sing. Hot coffee takes it to a whole new level of “OMG!”
Step-by-Step Instructions
- **Prep for Glory:** Preheat your oven to 350°F (175°C). Grease and flour two 8-inch or 9-inch round cake pans. Or, even easier, line the bottoms with parchment paper. Trust me on the parchment.
- **Dry Mix Magic:** In a large bowl, whisk together the flour, sugar, cocoa powder, baking soda, baking powder, and salt. Make sure there are no lumpy bits. **Sifting helps here, but a good whisking will do.**
- **Wet Mix Wonders:** In a separate medium bowl, whisk together the eggs, milk, vegetable oil, and vanilla extract until well combined.
- **Combine & Conquer:** Pour the wet ingredients into the dry ingredients. Mix on low speed (or by hand) until *just* combined. Don’t overmix; we want tender cake, not tough cake.
- **The Secret Ingredient:** Carefully pour in the boiling water (or hot coffee). Mix on low speed again until the batter is smooth. It’ll be thin, but that’s perfectly normal. **Don’t panic!**
- **Divide and Bake:** Divide the batter evenly between your prepared cake pans. Pop them into the preheated oven.
- **Bake ‘Til Beautiful:** Bake for 30-35 minutes, or until a wooden skewer inserted into the center comes out clean.
- **Cool Down:** Let the cakes cool in the pans for about 10-15 minutes. Then, gently invert them onto a wire rack to cool completely. **Patience, young grasshopper!** Don’t try to frost warm cake unless you enjoy a melted, messy disaster.
Common Mistakes to Avoid
Look, we all make mistakes. It’s part of the journey. But here are a few classic blunders to dodge if you want bakery-level perfection!
- **Not Preheating the Oven:** Rookie mistake! Your cake won’t rise properly if it goes into a cold oven. Treat your oven like it’s a VIP waiting for its entrance.
- **Overmixing the Batter:** This is a big one. Overmixing develops the gluten too much, resulting in a tough, chewy cake instead of a light, fluffy one. Mix until *just* combined. When you think you’re done, stop.
- **Skipping the Room Temperature Ingredients:** Cold eggs and milk don’t emulsify as well with the other ingredients, leading to a less smooth batter and a potentially denser cake. A quick warm water bath for eggs works wonders!
- **Not Greasing/Flouring Your Pans Properly:** Ever had half your cake stuck to the bottom? Yeah, not fun. Take your time here. **Parchment paper bottoms are your best friend.**
- **Opening the Oven Door Too Early:** Resist the urge! Opening the door lets out heat and can cause your cake to sink in the middle. Wait until at least ¾ of the way through baking time.
Alternatives & Substitutions
Life happens, sometimes you don’t have exactly what the recipe calls for. Fear not, creative baker!
- **Buttermilk Boost:** If you want an even more tender cake, use buttermilk instead of regular milk. No buttermilk? No problem! Add 1 tablespoon of white vinegar or lemon juice to your regular milk and let it sit for 5 minutes before using. DIY buttermilk, baby!
- **Coffee vs. Water:** While boiling water works perfectly, hot brewed coffee truly enhances the chocolate flavor without making the cake taste like coffee. **Seriously, don’t skip this if you can help it.** It’s a game-changer.
- **Oil Swap:** You can use melted butter instead of vegetable oil for a slightly different flavor profile, but vegetable oil really shines for keeping cakes extra moist.
- **Gluten-Free Flour:** You can totally make this GF! Use a good quality 1:1 gluten-free baking flour blend.
FAQ (Frequently Asked Questions)
- **Can I make this into cupcakes?** Absolutely! Line a cupcake tin with liners and fill them about 2/3 full. Bake for 18-22 minutes, or until a toothpick comes out clean. Yields about 24 cupcakes.
- **How long does this cake last?** Covered at room temperature, it’s typically good for 3-4 days. In the fridge, it can last up to a week. If it lasts that long, you’re stronger than I am!
- **Can I freeze this cake?** Heck yeah! Wrap cooled cake layers tightly in plastic wrap and then foil. Freeze for up to 2-3 months. Thaw in the fridge overnight before frosting.
- **My cake is dense, what did I do wrong?** Probably overmixed the batter, or your leavening agents (baking soda/powder) might be old. **Always check expiration dates on those!**
- **Can I use margarine instead of butter?** Well, technically yes, but why hurt your soul like that? Butter generally gives better flavor and texture. Stick with butter for the best results, IMO.
Final Thoughts
So there you have it, your ticket to chocolate cake nirvana! You just made bakery-level chocolate cake from scratch, and you barely broke a sweat. Seriously, give yourself a pat on the back, or better yet, a generous slice of this amazing creation. Now go impress someone—or yourself—with your new culinary skills. You’ve earned it!


