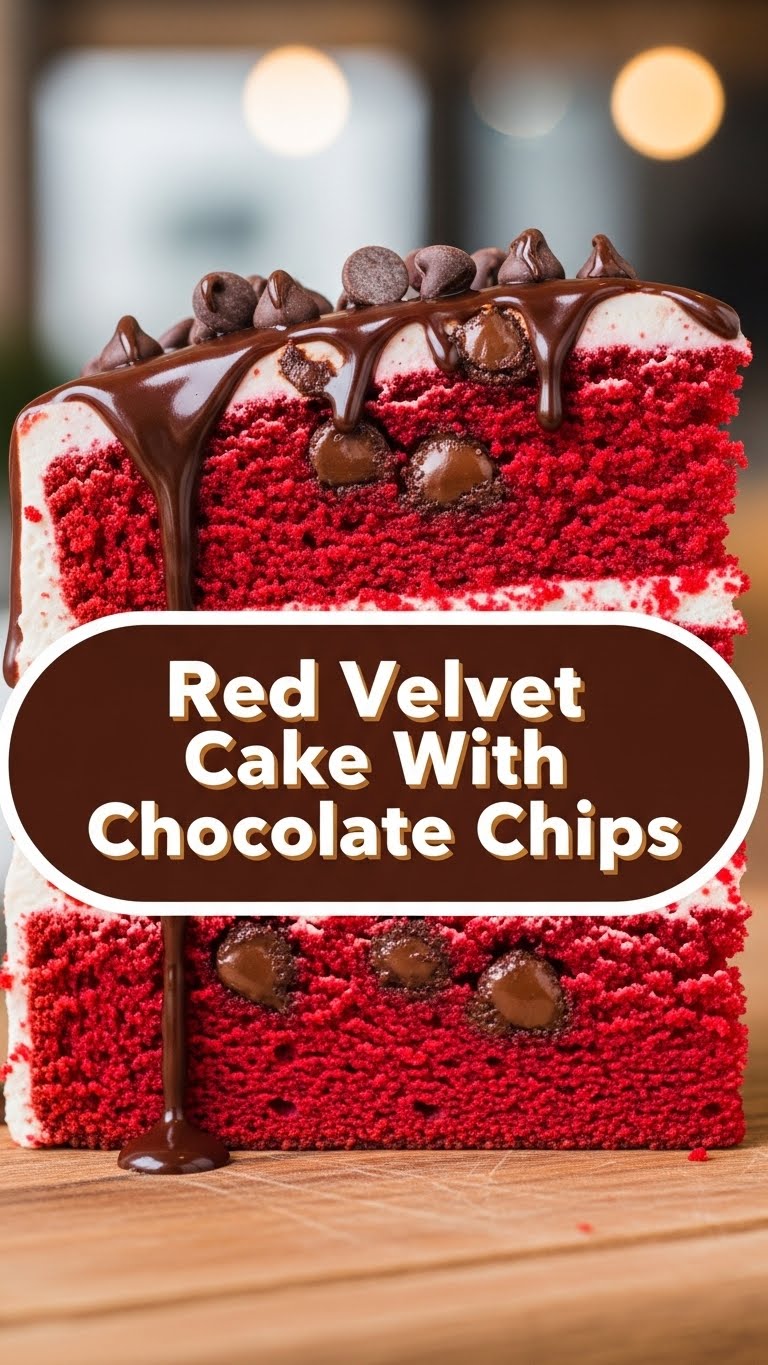
So, you’re scrolling, a little peckish, and suddenly BAM! The thought of a Red Velvet Cake hits you. But not just any red velvet – we’re talking about a party in your mouth, a vibrant crimson dream, *loaded* with chocolate chips! Because, honestly, life’s too short for plain cake, right?
Why This Recipe is Awesome
Seriously, this isn’t one of those recipes that requires a culinary degree or an ancient scroll of baking wisdom. This gem is surprisingly simple, utterly delicious, and basically guarantees you’ll be everyone’s favorite human for at least a week. It’s a classic with a rebel twist (hello, chocolate chips!), making it both comforting and exciting. Think of it as a fancy cake that doesn’t actually require you to be fancy. It’s also **super moist** and stays fresh for ages, if it even lasts that long. So, get ready to impress yourself (and maybe a few lucky friends).
Ingredients You’ll Need
Gather your baking squad! Here’s what we’re wrangling:
For the Cake:
- All-Purpose Flour: About 2 ½ cups. The backbone of our cakey dreams.
- Granulated Sugar: 1 ½ cups. Because sweet.
- Unsweetened Cocoa Powder: 2 tablespoons. Just enough to give it that subtle cocoa depth without turning it fully chocolate. It’s a red velvet, not a brown velvet!
- Baking Soda: 1 teaspoon. Our magical leavening friend.
- Salt: 1 teaspoon. Balances everything out like a pro.
- Large Eggs: 2, at room temperature. Give ’em a warm up, they’ll thank you.
- Vegetable Oil: 1 ½ cups. For ultimate moisture, because nobody likes a dry cake.
- Buttermilk: 1 cup, at room temperature. The secret ingredient for that tender crumb.
- White Vinegar: 1 teaspoon. Reacts with the baking soda and buttermilk to make magic happen. Don’t skip it!
- Vanilla Extract: 2 teaspoons. Essential for all things delicious.
- Red Food Coloring: 1-2 tablespoons (gel works best for vibrant color!). Don’t be shy; embrace the crimson.
- Semi-Sweet Chocolate Chips: 1 cup. Our star twist! Go big or go home.
For the Cream Cheese Frosting (because what’s Red Velvet without it?):
- Cream Cheese: 8 oz block, softened. Not the spreadable tub stuff, get the block!
- Unsalted Butter: ½ cup (1 stick), softened. Room temp is key, folks.
- Powdered Sugar (Confectioners’ Sugar): 3-4 cups, sifted. Start with 3, add more if you want it sweeter/thicker.
- Vanilla Extract: 1 teaspoon. More vanilla, more joy.
- Milk or Cream: 1-2 tablespoons (optional, for consistency). Just a splash if it’s too thick.
Step-by-Step Instructions
Alright, apron on, game face ready. Let’s bake this beauty!
- Prep Your Stage: Preheat your oven to 350°F (175°C). Grease and flour two 9-inch round cake pans. Or, if you’re fancy, line the bottoms with parchment paper. This prevents sticky situations.
- Dry Mix Party: In a large bowl, whisk together the flour, sugar, cocoa powder, baking soda, and salt. Give it a good whisk to make sure everything’s evenly distributed.
- Wet Mix Whirlwind: In a separate, medium bowl, whisk together the eggs, vegetable oil, buttermilk, vinegar, and vanilla extract until well combined.
- Color Me Red: Now for the fun part! Stir the red food coloring into the wet ingredients. Watch it transform into that iconic crimson hue.
- Combine & Conquer: Pour the wet ingredients into the dry ingredients. Mix with a spatula or on low speed with an electric mixer **just until combined**. Don’t overmix, or your cake will be tough (and we don’t want tough cake, do we?).
- Chocolate Chip Surprise: Gently fold in your chocolate chips. We want them evenly distributed for maximum chocolatey goodness in every bite.
- Pan It Up: Divide the batter evenly between your prepared cake pans. Give each pan a gentle tap on the counter to release any air bubbles.
- Bake It ‘Til Done: Bake for 25-30 minutes, or until a wooden skewer or toothpick inserted into the center comes out clean. **Don’t open the oven too early!**
- Cool Down: Let the cakes cool in their pans for about 10-15 minutes before inverting them onto a wire rack to cool completely. This is crucial! Resist the urge to frost a warm cake, or you’ll have a frosting puddle.
- Frosting Time! While the cakes cool, make your frosting. In a large bowl, beat the softened cream cheese and butter together until smooth and creamy.
- Sweeten & Smooth: Gradually add the sifted powdered sugar, beating until light and fluffy. Stir in the vanilla extract. If it’s too thick, add a tablespoon or two of milk/cream until it reaches your desired consistency.
- Assemble Your Masterpiece: Once the cakes are *completely* cool, level them with a serrated knife if needed. Place one layer on your serving plate, spread a generous amount of frosting, then top with the second layer. Frost the top and sides, making it as rustic or as polished as you like.
Common Mistakes to Avoid
- Not Preheating the Oven: Rookie mistake! A cold oven means uneven baking and sad cakes. Always preheat!
- Overmixing the Batter: This is a big one. Overmixing develops the gluten in the flour, leading to a dense, tough cake. Mix **just until combined**.
- Not Letting Cakes Cool: Seriously, I get it, you’re excited. But frosting warm cakes will result in a melty, sliding mess. Be patient, my friend.
- Using Cold Ingredients: Especially eggs, buttermilk, and butter/cream cheese for the frosting. Room temperature ingredients emulsify better, giving you a smoother, more uniform batter and frosting.
- Being Shy with Food Coloring: If you want that deep, gorgeous red, you gotta commit. Gel food coloring is your best bet for intensity.
Alternatives & Substitutions
Feeling adventurous or missing an ingredient? No stress, we’ve got options!
- Buttermilk Substitute: No buttermilk? No problem! Add 1 tablespoon of white vinegar or lemon juice to a measuring cup, then fill the rest with regular milk until it reaches 1 cup. Let it sit for 5-10 minutes until it slightly curdles. Voila!
- Oil vs. Butter: This recipe uses oil for maximum moisture, which is key for Red Velvet. If you prefer butter for flavor, you *can* use melted butter, but your cake might be a tad less moist. IMO, stick with the oil for this one.
- Chocolate Chip Varieties: Semi-sweet is classic, but feel free to experiment! White chocolate chips would be a fun contrast, or even dark chocolate for an extra intense cocoa kick.
- Frosting Flavors: While cream cheese frosting is iconic, you could try a simple vanilla buttercream if you’re not a fan of the tangy cream cheese. But honestly, **cream cheese frosting is where it’s at for Red Velvet.**
FAQ (Frequently Asked Questions)
- Can I use natural food coloring? You can! Be aware that natural options might not give you the same vibrant, intense red as artificial gel colors. You might end up with a more subdued, reddish-brown hue.
- My cake isn’t very red. What went wrong? You likely didn’t use enough food coloring, or you used a liquid variety that isn’t as concentrated. **FYI:** gel food coloring is your best friend for a truly red velvet.
- Can I make this into cupcakes? Absolutely! Divide the batter into cupcake liners, reduce the baking time to about 18-22 minutes, and keep an eye on them.
- How long does Red Velvet Cake last? Covered and stored in the fridge (because of that cream cheese frosting), it’ll last for about 3-5 days. It’s even better the next day!
- Can I freeze this cake? Yep! You can freeze the unfrosted cake layers, wrapped tightly in plastic wrap, for up to a month. Thaw at room temperature before frosting.
- Can I skip the chocolate chips? Well, technically yes, but why would you want to hurt my feelings like that? Just kidding! You can skip them if you prefer a traditional Red Velvet, but you’d be missing out on a delightful surprise.
Final Thoughts
And there you have it! Your very own Red Velvet Cake with a glorious chocolate chip twist. This cake isn’t just dessert; it’s a statement. It says, “I’m classy, I’m fun, and I definitely know my way around a kitchen (even if I just followed a super easy recipe).” So go on, bask in the glory, share a slice (or three), and enjoy every single delightful bite. You’ve earned it!

