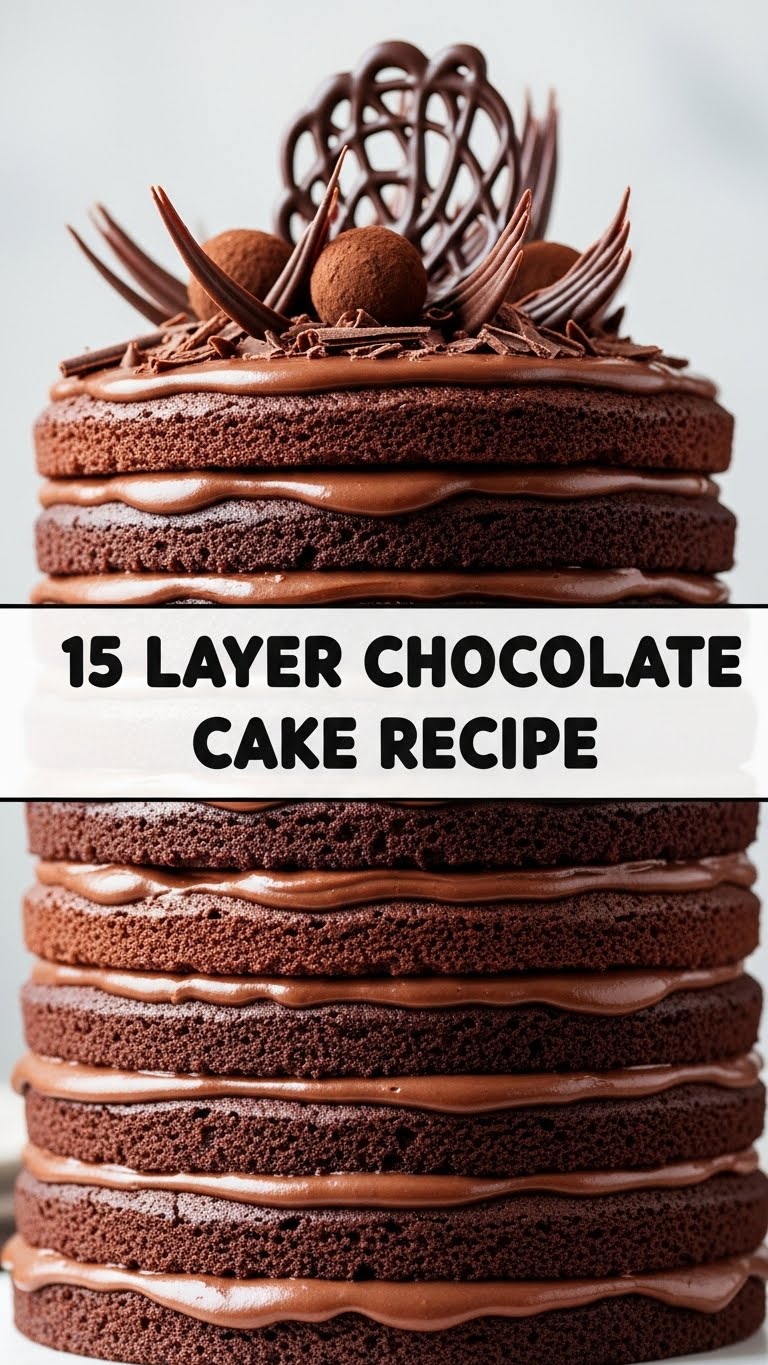
You’re either feeling incredibly ambitious, slightly unhinged, or you just really, *really* love chocolate. Welcome, friend, you’re in good company! Today, we’re not just baking a cake; we’re building a monument. A chocolate-y, sky-high, ‘did-you-really-make-that?!’ kind of monument. That’s right, we’re tackling the legendary 15-Layer Chocolate Cake. And no, you don’t need a culinary degree or a secret team of pastry elves. Just a whisk, some good vibes, and maybe a strong coffee for moral support.
Why This Recipe is Awesome
Look, we both know “15 layers” sounds like a cry for help. But trust me, this isn’t nearly as hard as it sounds (or as hard as explaining why you need 15 layers of cake to your significant other). Here’s why you’re about to fall in love with this deliciously excessive creation:
- It’s a **showstopper**. Seriously, prepare for gasps. And maybe a standing ovation.
- Despite the layer count, the actual cake recipe is super straightforward. It’s essentially just making a few batches of thinner cakes. **You’ve got this!**
- Every bite is pure bliss. The cake is moist, the frosting is rich, and the sheer joy of cutting into it? Unbeatable.
- **Bragging rights.** Oh, the bragging rights. You’ll be dining out on this story for months.
Ingredients You’ll Need
Time to gather your troops! Think of these as your building blocks for edible greatness. Don’t skimp on the good stuff; your taste buds will thank you.
For the Chocolate Cake Layers (we’ll be making a few batches, so adjust accordingly!):
- **2 cups (240g) All-Purpose Flour:** The basic building material. Don’t worry, it’ll get chocolate-fied soon.
- **1 ½ cups (300g) Granulated Sugar:** Because adulting is hard, and sugar makes it better.
- **¾ cup (75g) Unsweetened Cocoa Powder (Dutch-processed for extra dark cake!):** The star of the show. Go dark or go home.
- **2 teaspoons Baking Soda:** Our little lift-off agent.
- **1 teaspoon Salt:** Balances everything out, like that friend who keeps you grounded.
- **1 cup (240ml) Buttermilk:** Adds moisture and tenderness. If you don’t have it, a cup of regular milk with a tablespoon of vinegar or lemon juice, let sit for 5 mins, works in a pinch.
- **½ cup (120ml) Vegetable Oil:** Keeps things super moist.
- **2 Large Eggs:** Our binding agents. Let’s not make scrambled cake.
- **1 teaspoon Vanilla Extract:** The “je ne sais quoi” that makes everything taste better.
- **1 cup (240ml) Hot Water or Hot Coffee:** Coffee actually deepens the chocolate flavor without making it taste like coffee. Shhh, it’s our secret.
For the Best Darn Chocolate Buttercream Frosting Ever:
- **2 cups (4 sticks / 450g) Unsalted Butter, softened:** The good stuff. Don’t even *think* about margarine. We’re better than that.
- **6-8 cups (720-960g) Powdered Sugar (Confectioners’ Sugar):** Sifted, please! No lumpy frosting on our monument.
- **1 ½ cups (150g) Unsweetened Cocoa Powder:** More chocolate, always more chocolate.
- **¾ cup (180ml) Heavy Cream or Milk:** For creaminess and just the right consistency.
- **2 teaspoons Vanilla Extract:** Again, essential.
- **Pinch of Salt:** Just a tiny bit to cut the sweetness.
Step-by-Step Instructions
Deep breaths! We’re doing this. The key is to break it down. Think of it as a marathon, not a sprint.
- **Prep for Glory:** Preheat your oven to 350°F (175°C). Line and grease **two to three** 9-inch round cake pans (or 8-inch for taller, narrower layers) with parchment paper. We’ll be doing a few rounds of baking.
- **Dry Mix Magic:** In a large bowl, whisk together the flour, sugar, cocoa powder, baking soda, and salt. Make sure there are no lumps.
- **Wet Mix Wonders:** In a separate medium bowl, whisk together the buttermilk, oil, eggs, and vanilla extract until well combined.
- **Combine Forces:** Pour the wet ingredients into the dry ingredients. Mix on low speed with an electric mixer (or by hand) until *just* combined. Don’t overmix!
- **The Hot Stuff:** Slowly add the hot water or coffee to the batter, mixing until smooth. The batter will be thin, and that’s okay!
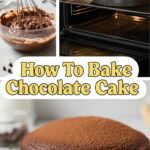
- **Bake Those Layers (Batch 1):** Divide the batter evenly between your prepared cake pans. Bake for 18-22 minutes, or until a wooden skewer inserted into the center comes out with moist crumbs. **Seriously, don’t overbake!**
- **Cool Down:** Let the cakes cool in the pans for about 10-15 minutes, then invert them onto a wire rack to cool completely. **This is crucial.** Wash, re-line, and grease your pans for the next batches. Repeat steps 5-7 until you have about **3-4 total cakes**.
- **Slice and Dice:** Once all your cakes are completely cool (and I mean *completely*), use a long serrated knife to carefully slice each cake horizontally into 3-4 thin, even layers. Aim for roughly 1/2 inch thick per layer. Now you should have around 12-16 layers! Trim any domed tops to make them flat.
- **Frosting Time!** While the cakes cool, make your buttercream. In a large bowl, beat the softened butter with an electric mixer until light and fluffy (about 2-3 minutes).
- **Sweeten It Up:** Gradually add the sifted powdered sugar, cocoa powder, and salt, alternating with the heavy cream/milk. Start with 6 cups of powdered sugar, then add more if you want a thicker frosting. Add the vanilla extract and beat until smooth, light, and fluffy.
- **Assemble Your Masterpiece:** Place one cake layer on your serving plate or cake stand. Spread a thin, even layer of frosting over the top. Repeat with the remaining cake layers, stacking them carefully. **Keep your layers even!**
- **The Grand Finale:** Once all layers are stacked, use the remaining frosting to crumb coat the entire cake (a thin layer to trap crumbs), then apply a final, thicker layer of frosting around the sides and top. You can make it smooth, swirl it, or just go wild!
- **Chill Out:** Pop your cake in the fridge for at least 30 minutes to let the frosting set. This makes it easier to cut and ensures stability.
Common Mistakes to Avoid
We’ve all been there, staring at a baking disaster. Here’s how to sidestep the most common blunders when building your chocolate tower:
- **Not Preheating the Oven:** Thinking you’re above the laws of thermodynamics. Rookie mistake. **Always preheat!**
- **Overmixing the Batter:** Treating your batter like it owes you money. Overmixing develops the gluten too much, leading to tough, dry cake. Gentle hands, my friend!
- **Frosting Warm Cakes:** Trying to frost a warm cake. You’ll have chocolate soup running down the sides, not cake. **Patience is a virtue here.**
- **Uneven Layers (or No Trimming):** Eyeballing it and ending up with a leaning tower of Pisa. Take the time to trim off any domed tops and try to slice your layers evenly. A ruler isn’t a bad idea for a cake this tall!
- **Skimping on Ingredients:** Using low-quality cocoa or trying to substitute butter with something… less buttery. Your taste buds will know. And they will judge.
Alternatives & Substitutions
Feeling a little rebellious? Here are some ways to tweak this recipe to your liking:
- **Buttermilk Hack:** No buttermilk? No problem! As mentioned, a cup of regular milk with a tablespoon of white vinegar or lemon juice, let sit for 5 minutes, works beautifully.
- **Coffee vs. Water:** While I wholeheartedly recommend hot coffee for that deep chocolate flavor, hot water is perfectly fine if you’re not a coffee fan or just don’t have any on hand.
- **Flavor Boosts:** A tiny dash of **espresso powder** (about 1 teaspoon) added to the cake batter will *really* amplify the chocolate without tasting like coffee. You could also swap some vanilla for almond extract in the frosting for a different twist.
- **Gluten-Free Option:** You can totally make this GF! Just swap the all-purpose flour for your favorite 1:1 gluten-free baking blend. Results may vary slightly, but it’ll still be delicious.
- **Less Layers, Still Awesome:** Look, if 15 layers feels like too much of a commitment after all this, **it’s okay to do 5, 7, or 10 layers!** The cake will still be magnificent. Don’t let the number intimidate you.
FAQ (Frequently Asked Questions)
You’ve got questions, I’ve got (casual) answers!
- **Can I use margarine instead of butter?** Well, technically yes, but why hurt your soul like that? For the best flavor and texture, **butter is your best friend.**
- **How do I get my cake layers perfectly even?** A digital kitchen scale is your secret weapon! Weigh the total batter and then divide by the number of pans for perfectly equal portions. For slicing, a cake leveling tool or even a ruler and a steady hand can help.
- **Can I make this cake ahead of time?** Absolutely! Unfrosted cake layers can be wrapped tightly in plastic wrap and stored at room temperature for up to 2 days, or frozen for up to a month. The buttercream can be made a few days ahead and stored in the fridge, then re-whipped before use.
- **What if my cake turns out dry?** You probably overbaked it, my friend. **Keep an eye on that oven!** Every oven is a little different. A simple trick is to brush cooled cake layers with a light simple syrup (equal parts sugar and water, boiled then cooled) before frosting for extra moisture.
- **Do I *really* need 15 layers?** “Need” is a strong word. Do you *want* to be a legend? Then yes. Is it still a fantastic cake with fewer layers? Also yes! **IMO, the more layers, the more fun.**
- **My frosting is too thin/thick! Help!** No worries! If it’s too thin, gradually add more sifted powdered sugar. If it’s too thick, add a tiny splash of heavy cream or milk until it reaches your desired consistency.
- **How long does this cake last?** Covered at room temperature, it’s probably best for 2-3 days. In the fridge, it’ll last a bit longer, maybe 5-6 days. But let’s be real, it’ll be gone way before then!
Final Thoughts
Phew! You made it. And honestly, if you’ve followed along, you’ve not just baked a cake; you’ve achieved a minor miracle. This 15-Layer Chocolate Cake isn’t just a dessert; it’s an experience. It’s a testament to your ambition, your patience, and your undeniable love for all things chocolate.
So, take a bow. High-five yourself. And then, for goodness sake, cut yourself a massive slice. You’ve earned every single delicious layer. Now go impress someone—or yourself—with your new culinary skills. Don’t forget to share a pic with me when you’re done! Happy baking!

