So, you’re craving something ridiculously tasty, chocolatey, and maybe a little bit nutty, but you’re also deeply committed to the idea of minimal effort? Same, friend, same. Welcome to your new favorite recipe: a dreamy Chocolate Cake with a dangerously addictive Peanut Butter Icing. This isn’t just a recipe; it’s an intervention for your sweet tooth that doesn’t require a culinary degree or even pants (if you’re baking alone, no judgment here!).
Why This Recipe is Awesome
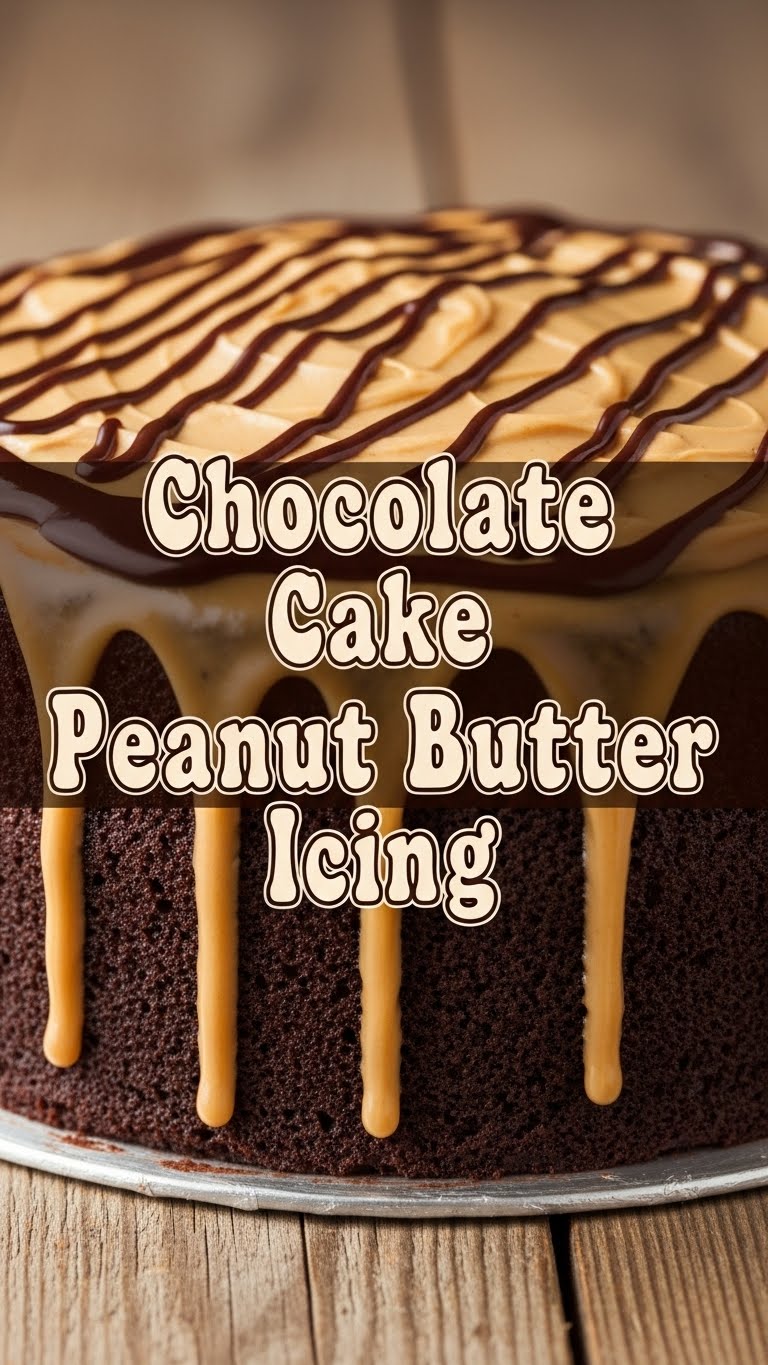
Let’s be real, you clicked because “chocolate” and “peanut butter” are practically soulmates. But this particular recipe? It’s **stupid simple**. Like, “I can make this on a Tuesday night after a long day without crying” simple. The cake is moist, rich, and just chocolatey enough to satisfy without being overwhelmingly intense. And the peanut butter icing? Oh, honey. It’s creamy, perfectly sweet, and has that salty-sweet kick that makes you want to lick the bowl (and maybe the spatula, the mixer, and your fingers).
Plus, it’s a guaranteed crowd-pleaser. Or, if you’re like me, a guaranteed “I’m not sharing a single crumb” pleaser. It looks impressive enough to fool people into thinking you spent hours, but **FYI**, you totally didn’t. It’s basically a culinary magic trick.
Ingredients You’ll Need
Get ready to raid your pantry. We’re keeping it simple and delicious.
For the Chocolate Cake:
- 1 ½ cups all-purpose flour (the basic stuff)
- 1 ½ cups granulated sugar (sweetness central!)
- ¾ cup unsweetened cocoa powder (the good dark kind, not hot chocolate mix!)
- 1 ½ tsp baking soda (our lift-off agent)
- 1 tsp salt (brings out all those amazing flavors)
- 1 cup milk (any kind works, whole milk makes it extra rich)
- ½ cup vegetable oil (or canola, for moisture)
- 1 tsp vanilla extract (don’t skip this, it’s the MVP)
- 1 cup boiling water (yup, boiling water – secret to super moist cake!)
For the Peanut Butter Icing:
- 1 cup (2 sticks) unsalted butter, softened (the real deal, no margarine!)
- 1 cup creamy peanut butter (Jif or Skippy are my jam, no natural separation woes here)
- 3-4 cups powdered sugar (confectioners’ sugar, for that silky smooth texture)
- ¼ cup milk (just a splash to get the consistency right)
- 1 tsp vanilla extract (more vanilla, because why not?)
Step-by-Step Instructions
Let’s get baking! Don’t overthink it; just follow along.
Making the Chocolate Cake:
- **Preheat Power:** Get that oven heated to **350°F (175°C)**. Grease and flour a 9×13 inch baking pan, or two 8 or 9-inch round cake pans. Don’t skip this, unless you love cake stuck to a pan.
- **Dry Mix It:** In a large bowl, whisk together the flour, sugar, cocoa powder, baking soda, and salt. Make sure there are no lumps—we want a smooth operation here.
- **Wet Mix It:** In a separate medium bowl, combine the milk, oil, and vanilla extract. Give it a quick stir.
- **Combine Forces:** Pour the wet ingredients into the dry ingredients. Mix with a spoon or spatula until just combined. Don’t go crazy and overmix; we’re making cake, not bread!
- **The Hot Stuff:** Carefully pour the boiling water into the batter. It will be very thin—don’t panic! This is the magic. Stir until just combined.
- **Bake It Up:** Pour the batter evenly into your prepared pan(s). Bake for 30-35 minutes for a 9×13, or 25-30 minutes for rounds, or until a toothpick inserted into the center comes out clean.
- **Cool Down:** Let the cake cool completely in the pan on a wire rack. **Seriously, cool it completely.** Warm cake + icing = melty disaster.
Whipping Up the Peanut Butter Icing:
- **Butter Up:** In a large bowl with an electric mixer, beat the softened butter until light and fluffy. This usually takes about 2-3 minutes.
- **PB Power:** Add the creamy peanut butter to the butter and beat until fully combined and smooth.
- **Sugar Rush:** Gradually add the powdered sugar, one cup at a time, beating well after each addition. Start with 3 cups and add the fourth if you want it thicker or sweeter.
- **Liquid Love:** Pour in the milk and vanilla extract. Beat on medium-high speed until the icing is light, fluffy, and spreadable. If it’s too thick, add a tiny bit more milk; if too thin, a bit more powdered sugar.
- **Frost Away!** Once your cake is *completely* cool, spread that glorious peanut butter icing all over it. Go wild!
Common Mistakes to Avoid
- **Not Preheating the Oven:** Rookie mistake! Your cake won’t rise properly if it doesn’t hit that consistent heat from the get-go.
- **Overmixing the Batter:** This is a biggie. Overmixing develops too much gluten, leading to a tough, dry cake. Mix until *just* combined, then stop.
- **Not Cooling the Cake:** Patience, grasshopper! Frosting a warm cake is a one-way ticket to “soup on cake” city.
- **Using Cold Butter for Icing:** Softened butter is key for fluffy, lump-free icing. Take it out of the fridge an hour or two beforehand. Don’t zap it in the microwave unless you want melted mess.
- **Eating Half the Icing Before It Hits the Cake:** Look, I get it. But try to save some for the actual cake. For real.
Alternatives & Substitutions
Feeling adventurous? Or just missing an ingredient? No stress!
- **Milk:** Any milk works here – almond, soy, oat, skim. Whole milk just gives it a richer taste, IMO.
- **Oil:** Vegetable oil is pretty neutral, but you could try canola oil if that’s what you have. I wouldn’t recommend olive oil for this, unless you’re into that vibe (I’m not).
- **Add-ins:** Feeling fancy? Throw in a handful of chocolate chips or chopped peanuts into the cake batter for extra crunch and chocolatey goodness.
- **Peanut Butter:** While creamy is generally easier for icing, if you’re a crunchy PB fanatic, go for it! Just know your icing might have a more textured look and feel.
- **Spice it Up:** A pinch of cinnamon in the cake batter can add a nice warmth and depth. Try it!
FAQ (Frequently Asked Questions)
Got questions? I’ve got (casual) answers!
- **Can I make this cake ahead of time?** Absolutely! The cake itself can be baked a day in advance, wrapped tightly, and stored at room temp. Frost it the day you plan to serve.
- **How do I store leftovers?** Keep it covered in an airtight container at room temperature for up to 3 days, or in the fridge for up to a week. If you manage to have leftovers, that is.
- **What if my icing is too thin/thick?** If too thin, gradually add more powdered sugar. If too thick, add milk in tiny increments (half a teaspoon at a time) until it’s perfect.
- **Can I use a different pan size?** Sure! You could make cupcakes (bake for 18-22 mins) or a bundt cake (bake for 45-55 mins), just adjust baking times and keep an eye on it.
- **Is this good for parties?** Are you kidding? This cake is a rockstar at parties. It’s the one that disappears first. You’ll be the hero of the dessert table!
Final Thoughts
There you have it, folks! A chocolate cake that’s so easy and delicious, it should probably be illegal. Go forth, bake this masterpiece, and prepare to be showered with compliments (or just enjoy it all by yourself, which is also a perfectly valid option). Now go impress someone—or yourself—with your new culinary skills. You’ve earned it!


