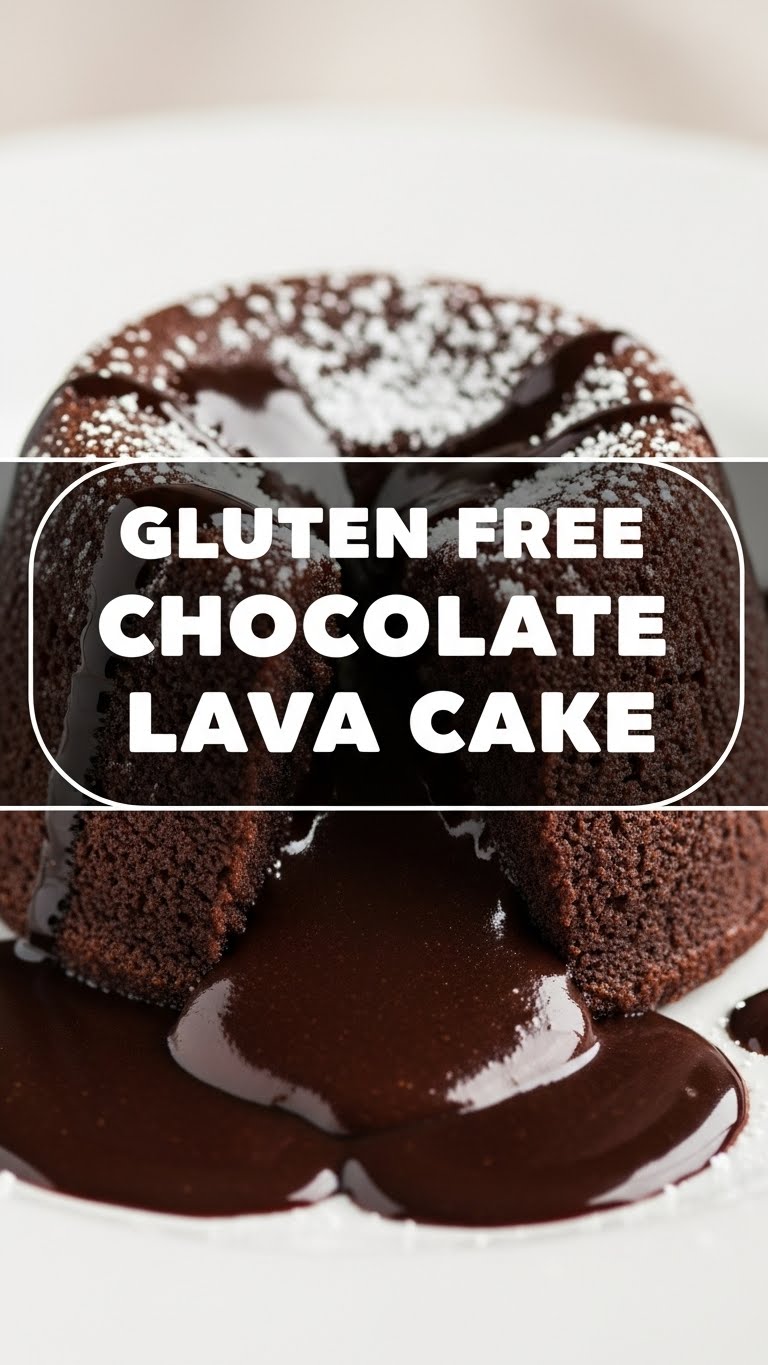
So you’re craving something gooey, chocolatey, and utterly decadent, but also, like, secretly trying to avoid the gluten monster? And maybe you’re too lazy to spend an entire afternoon baking a five-tier monstrosity? Same, friend, *same*. Let’s make some magic with minimal effort and maximum deliciousness. Prepare yourself for the Gluten-Free Chocolate Lava Cake that will literally change your life (or at least your evening).
Why This Recipe is Awesome
Okay, let’s be real. This isn’t just *any* lava cake. This is THE lava cake. It’s so absurdly easy, honestly, my toddler could probably make it (if I let her near a hot oven, which, for safety, I do not). We’re talking minimal ingredients, maximum impact, and a molten chocolate center that will make you question all your life choices – in a good way, obviously. Plus, it’s gluten-free, so you can pretend it’s practically a health food. You’re welcome.
- It’s ridiculously fast: From zero to hero in less than 30 minutes, **oven time included**!
- It’s idiot-proof: Seriously, if I can do it without setting off the smoke alarm, anyone can.
- That molten center: The absolute star of the show. Get ready for some serious ooey-gooey action.
- Gluten-free goodness: No compromise on flavor, just happy tummies.
Ingredients You’ll Need
Gather your troops, folks! These are your culinary warriors in the battle against boring desserts.
- Unsalted Butter (1/2 cup / 113g): The good stuff. Don’t skimp here; it adds richness.
- Good Quality Dark Chocolate (6 oz / 170g): Think 60-70% cacao. This is your moment to shine, so no wimpy milk chocolate unless that’s your jam (we don’t judge, much). **Chop it up** if it’s a big bar.
- Large Eggs (2 whole eggs + 2 egg yolks): Yes, that’s four eggs total. The yolks bring the richness; the whites provide structure. It’s a team effort.
- Granulated Sugar (1/4 cup / 50g): Just enough sweetness to balance the dark chocolate.
- Gluten-Free All-Purpose Flour (2 tablespoons): Just a tiny bit to give it some body. Make sure it’s a **good GF blend** with xanthan gum.
- Vanilla Extract (1 teaspoon): Because everything is better with vanilla. It’s like a warm hug.
- Salt (pinch): Seriously, don’t skip this. It makes the chocolate taste even *more* chocolatey. Magical.
- For Dusting (optional, but highly recommended): Cocoa powder or powdered sugar. For that “I’m fancy” look.
Step-by-Step Instructions
Alright, apron on, game face on. Let’s do this! These steps are so simple, you might even think you missed one. You didn’t.
- Preheat & Prep: Preheat your oven to a scorching 425°F (220°C). Grab four 6-ounce ramekins. Lightly butter and dust them with cocoa powder or gluten-free flour. **Don’t skip this step**, unless you enjoy fighting with your cake later. Place them on a baking sheet for easier transport.
- Melt the Magic: In a microwave-safe bowl (or a double boiler if you’re feeling extra Martha Stewart), combine the butter and chopped dark chocolate. Microwave in 30-second intervals, stirring after each, until smooth and totally melted. Or, if using a double boiler, stir until glossy and combined. Let it cool for a minute.
- Egg-cellent Mixture: In a separate medium bowl, whisk together the 2 whole eggs, 2 egg yolks, granulated sugar, and vanilla extract until light and slightly frothy. You’re basically making a fluffy dream base here.
- Combine Forces: Pour the slightly cooled chocolate mixture into the egg mixture. Whisk them together until they’re just combined. Don’t overmix; we’re going for gooey, not chewy.
- Flour Power: Gently fold in the gluten-free flour and that tiny pinch of salt. Mix just until no streaks of flour remain. **Overmixing is the enemy of tenderness!**
- Fill ‘Em Up: Divide the batter evenly among your prepared ramekins. They should be about 3/4 full.
- Bake It Baby: Carefully transfer the baking sheet with the ramekins to the preheated oven. Bake for **12-14 minutes**. You want the edges to look set and slightly puffed, but the center should still be jiggly when you gently shake a ramekin. That jiggly bit is your molten gold, FYI.
- Serve & Devour: Let the cakes cool in their ramekins for just 1-2 minutes. Then, carefully invert each cake onto a serving plate. A little tap on the bottom usually helps. Dust with cocoa powder or powdered sugar, maybe add a scoop of ice cream if you’re feeling extra fancy. **Eat immediately** while it’s still warm and gooey!
Common Mistakes to Avoid
Listen, we’ve all been there. Learning from mistakes is character-building, but avoiding them is even better. Take note, young padawan!
- Not Preheating the Oven: Rookie mistake! Your oven needs to be blazing hot to create that perfect crust and gooey center. Don’t rush it.
- Overbaking: This is the cardinal sin of lava cakes. Bake too long, and you’ve got yourself a dense chocolate cake, not a molten masterpiece. Keep an eye on the clock and trust the jiggle test!
- Forgetting to Butter/Dust Ramekins: Unless you enjoy scraping delicious cake from ceramic, **do not forget this crucial step**. Future you will thank past you.
- Using Low-Quality Chocolate: The chocolate is the star here. If you use sub-par chocolate, you’ll get a sub-par cake. Spend a few extra bucks; it’s worth it, IMO.
- Overmixing the Batter: As mentioned, mix just until combined. Aggressive mixing develops gluten (even in GF flour!) and can lead to a tougher cake. We want tender and gooey.
Alternatives & Substitutions
Feeling adventurous? Or maybe you’re out of something crucial? Here are some ideas to keep the lava cake dream alive!
- Chocolate Varieties: While dark chocolate is king, you can experiment. Try milk chocolate for a sweeter, milder flavor (adjust sugar down slightly). White chocolate lava cakes are also a thing, but you’ll need to adjust sugar and maybe add food coloring for fun.
- Flour Power: If you’re not strictly GF, regular all-purpose flour works perfectly fine. Just use the same amount.
- Dairy-Free Delight: For a dairy-free version, use a good quality dairy-free butter alternative (like Miyoko’s Kitchen or Earth Balance sticks) and dairy-free dark chocolate. Easy peasy!
- Flavor Boosters: Add a pinch of espresso powder with the flour to deepen the chocolate flavor. A dash of almond extract or even a splash of orange liqueur (like Grand Marnier) can also elevate the cake.
- Spice it Up: A tiny pinch of cayenne pepper in the batter can give you a fun, subtle heat that pairs incredibly well with chocolate. Don’t overdo it, though!
FAQ (Frequently Asked Questions)
Got questions? I’ve got answers. Probably. Let’s see!
- Can I make these ahead of time? You can! Prepare the batter, pour it into the ramekins, and cover them tightly with plastic wrap. Refrigerate for up to 24 hours. When ready to bake, add 2-4 minutes to the baking time.
- My lava cake didn’t “lava” – what happened? Oh no! Most likely, you overbaked it. The internal temperature got too high, solidifying the center. Don’t worry, it’s still chocolate cake, just not the molten kind. Next time, try baking for 1-2 minutes less.
- Do I really need to use both whole eggs and yolks? Yes, yes you do. The extra yolks are what give these cakes their incredibly rich, custardy, gooey texture. It’s the secret sauce!
- Can I use margarine instead of butter? Well, technically yes, but why hurt your soul like that? Butter just tastes better and contributes to a richer flavor. If you must use margarine, make sure it’s a good quality stick variety.
- What if I don’t have ramekins? You can use a muffin tin! Just butter and cocoa-dust the muffin cups generously. They’ll be smaller, so reduce baking time to around 8-10 minutes. Keep a close eye on them!
- How do I store leftovers? Haha, “leftovers.” Good one! But seriously, if by some miracle you have any, cover and refrigerate. Reheat gently in the microwave for 15-20 seconds for a soft center, but it won’t be as molten as fresh.
Final Thoughts
And there you have it, folks! A gluten-free chocolate lava cake that’s so good, you’ll want to marry it. This recipe is your new secret weapon for impressing guests, treating yourself, or just, you know, having an excuse to eat warm chocolate straight out of the oven. It’s proof that gluten-free baking doesn’t have to be a dull affair, and that sometimes, the simplest things are the most satisfying.
Now go forth and bake! You’ve earned this chocolatey goodness. And don’t forget to send me a virtual slice!

