So you’re craving something rich, chocolatey, and utterly decadent but the thought of a multi-bowl, multi-step baking adventure makes you want to just order takeout? Yeah, me too. But guess what? We can have our cake and eat it too, with minimal fuss! Get ready to fall in love with the ultimate lazy baker’s dream: The Sheet Chocolate Cake.
Why This Recipe is Awesome
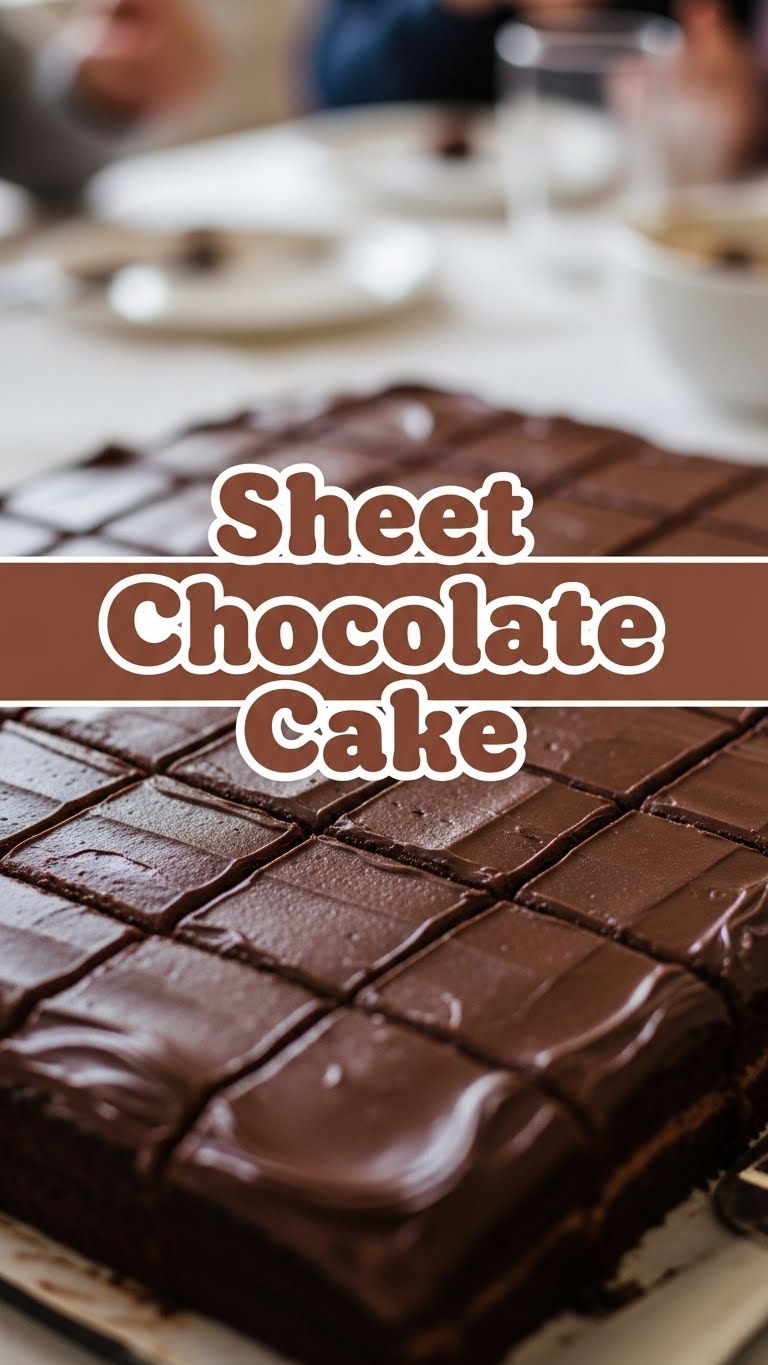
Listen up, buttercup. This isn’t just any chocolate cake. This is a **Sheet Chocolate Cake** – the MVP of effortless indulgence. It’s like your favorite comfy sweatpants: reliable, always a good idea, and requires minimal effort for maximum comfort. Plus, it bakes up in one glorious sheet, meaning fewer dishes and more cake-eating time. It’s practically a health food… if you squint really hard.
Seriously though, it’s **idiot-proof**. I once made this after a particularly long day, and even then, it turned out divine. So if I can do it, you absolutely can. It’s moist, it’s fudgy, and it feeds a crowd (or just you over several glorious days, no judgment. IMO, that’s peak self-care).
Ingredients You’ll Need
- All-Purpose Flour: 1 ½ cups. Because we’re not fancy bakers here, just efficient ones.
- Granulated Sugar: 1 ½ cups. For that sweet, sweet bliss.
- Unsweetened Cocoa Powder: ½ cup. We control the sweetness, not the chocolate.
- Baking Soda: 1 teaspoon. One half of the dynamic duo for lift.
- Baking Powder: ½ teaspoon. The other half! Don’t skip ’em!
- Salt: ½ teaspoon. Just a pinch to make everything pop.
- Milk: 1 cup (any kind, but whole milk makes it extra luscious).
- Vegetable Oil: ½ cup. Keeps it moist and delicious. Don’t fear the fat!
- Large Eggs: 2, preferably at room temperature if you’re feeling fancy, straight from the fridge if you’re like me and forget.
- Vanilla Extract: 1 teaspoon. A splash for that comforting aroma.
- Hot Water or Coffee: 1 cup. The secret weapon! Makes the chocolate really sing. **(Hot coffee is a game-changer!)**
For the Easy Chocolate Glaze (Optional but Highly Recommended):
- Unsalted Butter: ½ stick (¼ cup), melted
- Unsweetened Cocoa Powder: 3 tablespoons
- Powdered Sugar: 2 cups
- Milk: 3-4 tablespoons
- Vanilla Extract: ½ teaspoon
Step-by-Step Instructions
- Preheat Power-Up: Get your oven to 350°F (175°C) and grease and lightly flour a 9×13 inch baking sheet. Or, line it with parchment paper for extra easy cleanup if you’re feeling organised.
- Dry Mix Magic: In a large bowl, whisk together the flour, sugar, cocoa powder, baking soda, baking powder, and salt. Make sure there are no lumpy bits, okay? We want a smooth start.
- Wet Wonders: In a separate medium bowl (or directly into the dry if you’re a rebel who hates extra dishes), whisk together the milk, oil, eggs, and vanilla extract until well combined.
- Combine Forces: Pour the wet ingredients into the dry ingredients. Mix with a spoon or whisk until just combined. **Do NOT overmix!** We’re not making glue here, just cake.
- The Hot Stuff: Carefully pour in the hot water (or coffee—**seriously, use coffee!**). Stir until the batter is smooth. It will be thin, so don’t panic; that’s exactly how it should be! This step really brings out the chocolate flavor.
- Bake It Up: Pour the thin batter into your prepared sheet pan. Pop it into the preheated oven for 25-30 minutes, or until a toothpick inserted into the center comes out clean. **Keep an eye on it!** Ovens vary, so your time might be slightly different.
- Cool Down: Let the cake cool in the pan for about 10-15 minutes, then transfer it to a wire rack to cool completely before frosting. Patience, young padawan, it’s worth it!
- Glaze Glory (If you’re frosting): While the cake cools, melt your butter. Whisk in the cocoa powder. Then, gradually add the powdered sugar, alternating with the milk, until you have a smooth, spreadable glaze. Stir in the vanilla. Pour (or spread) over the completely cooled cake.
Common Mistakes to Avoid
- Thinking you don’t need to preheat the oven. Seriously? Rookie mistake. Your cake will thank you for the warm welcome. Cold ovens lead to sad, uneven cakes.
- Overmixing the batter. You’re not churning butter. Mix until just combined, or you’ll end up with a tough, chewy cake. Nobody wants a tough cake.
- Skipping the hot liquid. That hot water/coffee isn’t just for show; it “blooms” the cocoa, making the chocolate flavor super intense and delicious. Don’t deny yourself this joy!
- Cutting into it while it’s still hot. I know, I know, the smell is intoxicating. But trust me, a slightly cooled cake holds its shape better and tastes even fudgier. Plus, frosting a hot cake is a disaster waiting to happen—unless you’re aiming for melted frosting soup.
- Not greasing your pan properly. You want the cake to slide out gracefully, not stick for eternity. Be generous with the grease and flour, or just use parchment paper. Your future self will thank you.
Alternatives & Substitutions
- Coffee vs. Water: Definitely use hot coffee instead of hot water if you have it. It won’t make your cake taste like coffee; it’ll just make the chocolate taste *more* chocolatey. It’s a culinary hack, FYI.
- Milk Options: Any milk works! If you’re feeling plant-based, almond milk or oat milk are great substitutes. Don’t expect *exactly* the same richness as whole milk, but still totally delicious.
- Oil Alternatives: You can use melted butter instead of vegetable oil, but honestly, the oil usually makes for a moister cake that stays soft longer. Your call!
- Frosting Fun: Don’t want a simple chocolate glaze? Try a cream cheese frosting, a peanut butter frosting, or even just a dusting of powdered sugar. Or heck, just eat it plain with a scoop of vanilla ice cream! Live a little!
FAQ (Frequently Asked Questions)
- Can I use self-rising flour? Technically, yes, but then you’d need to adjust (or omit) the baking powder and soda. Why complicate things? Stick to all-purpose unless you’re feeling adventurous and love math.
- My cake is dry, what went wrong? Chances are you overbaked it! Or didn’t use enough liquid. **Always check with a toothpick!** If it comes out clean with just a few moist crumbs, you’re good. If it’s bone dry, you went too far.
- Can I make this ahead of time? Absolutely! This cake is actually fantastic the next day as the flavors deepen. Store it covered at room temperature for up to 3 days, or in the fridge for longer (if it lasts that long!).
- What if I don’t have a 9×13 pan? You can use an 8×8 pan for a much thicker cake, but you’ll need to increase the baking time (and keep a close eye on it). Or, halve the recipe for an 8×8. Don’t try to cram it all into a smaller pan, that’s just asking for an overflow disaster in your oven!
- Can I add chocolate chips? Oh, you bet your sweet bottom you can! Stir in about a cup of your favorite chocolate chips (semi-sweet, milk, dark—whatever your heart desires) when you add the wet ingredients to the dry. More chocolate is always the answer.
- Is this recipe good for cupcakes? It totally is! Just adjust the baking time down to about 18-22 minutes. You’ll get about 24 glorious cupcakes.
Final Thoughts
See? I told you it was easy! Now you’ve got a killer Sheet Chocolate Cake recipe up your sleeve that will impress everyone (including yourself). Go forth and conquer those chocolate cravings, my friend. You’ve officially leveled up your baking game. Now go impress someone—or yourself—with your new culinary skills. You’ve earned it! And maybe save me a slice?


