Ever stare at a perfectly baked (or okay, fine, *store-bought*) cake and think, “Now what?” Or maybe you just need an excuse to play with food and make something look fancy without, you know, actually being fancy. You, my friend, are in the right place. We’re diving into the ridiculously easy, yet incredibly impressive, art of Raspberry Chocolate Cake Decoration. Get ready to fool everyone into thinking you’re a pastry chef!
Why This Recipe is Awesome
Because let’s be real, you’ve probably already done the hard part (or paid someone else to do it, which is also a valid life hack). This isn’t about baking; it’s about taking that beautiful, chocolatey canvas and turning it into a masterpiece with minimal effort and maximum impact. It’s the culinary equivalent of putting on a fresh pair of sneakers with an old outfit – instant upgrade!
Seriously, this is **idiot-proof**. Even I, who once mistook baking soda for baking powder (don’t ask), can nail this. It’s quick, it’s fun, and it makes you look like you have your life together, at least in the dessert department. Plus, chocolate and raspberries? Name a more iconic duo. I’ll wait.
Ingredients You’ll Need
Gather your edible art supplies! You don’t need much, just some good vibes and these essentials:
- Fresh Raspberries: About a cup or two. The brighter red, the better! Avoid the squishy ones, unless you’re making jam, which is a different article entirely.
- Good Quality Chocolate: 4-6 oz (about 110-170g) of dark or semi-sweet chocolate. Chunks, chips, a fancy bar you snuck from your secret stash—whatever works. This is for your dreamy chocolate drip and/or shavings.
- Heavy Cream: 1/2 cup (about 120ml). This is the magic potion for your silky ganache drip. Don’t skimp here; no half-and-half imposters!
- Optional: Powdered Sugar: A sprinkle for that elegant, “I just walked through a sugar cloud” look.
- Optional: Fresh Mint Leaves: A few sprigs for a pop of green. Makes it look extra professional, like you just stepped out of a Michelin-star kitchen.
Step-by-Step Instructions
Alright, let’s get messy (but in a chic way)!
- Chill Your Cake: First things first, make sure your cake is already frosted and **nice and cold**. A chilled cake gives you a much better surface for the ganache drip to set beautifully. We’re aiming for elegance, not a chocolate landslide.
- Whip Up Your Chocolate Drip (Ganache): Chop your chocolate into small, even pieces (or just use chips, you rebel). Heat the heavy cream in a small saucepan until it’s just simmering, but not boiling. Pour the hot cream over the chocolate in a heatproof bowl. Let it sit for 5 minutes, then stir gently until smooth and glossy. If it’s not fully melted, a quick 10-second zap in the microwave will do the trick.
- Perfect the Drip: Let your ganache cool down a bit – **this is crucial!** It should be warm enough to pour but not hot enough to melt your frosting. Test a small drip on the side of the cake. If it slides too fast, cool it more. If it’s too thick, gently warm it a tiny bit. Use a spoon or a squeeze bottle (if you’re feeling fancy) to apply the ganache around the edge of the cake, letting it cascade down the sides. Then fill in the top.
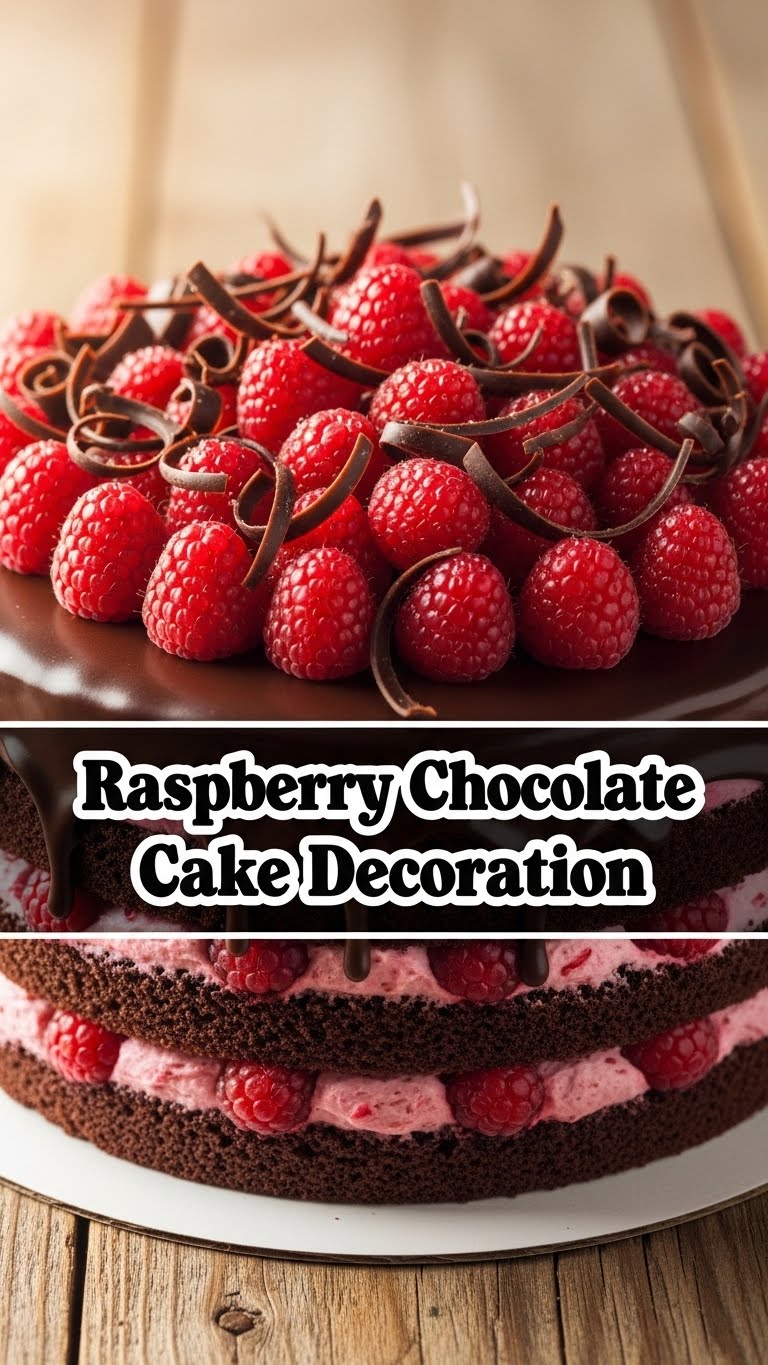
- Arrange the Raspberries: This is where your artistic flair comes in! While the ganache is still wet (or just starting to set), artfully place your fresh raspberries on top of the cake. You can pile them high in the center, arrange them in a circle, or scatter them playfully. Some folks like to tuck a few around the base too.
- Add Chocolate Shavings (Optional but Recommended): Take a bar of good quality chocolate and, using a vegetable peeler or a sharp knife, create delicate chocolate curls or shavings. Sprinkle them over the raspberries and ganache for extra texture and visual appeal. It’s like edible glitter!
- Dust with Sugar and Mint: For that final touch, lightly dust the cake with powdered sugar using a fine-mesh sieve. Then, strategically place a few fresh mint leaves. Boom! Instant fancy.
Common Mistakes to Avoid
We’ve all been there, making rookie errors. Learn from my chocolatey misfortunes!
- Hot Ganache Hazard: Pouring ganache when it’s still piping hot? Congrats, you just melted your perfectly frosted cake. Your masterpiece will turn into a runny mess. **Always let it cool down!**
- Mushy Raspberry Mayhem: Don’t try to decorate with raspberries that look like they’ve seen better days. They’ll just collapse and weep all over your beautiful cake. Use fresh, firm berries.
- Overcrowding the Canvas: Less is often more, folks. Don’t turn your cake into a fruit and chocolate avalanche. Give your decorations room to shine!
- Forgetting to Chill: Seriously, a warm cake and warm ganache are a recipe for disaster. **Chill your cake first!** You’ll thank me later.
Alternatives & Substitutions
Feeling rebellious? Here are some ways to switch things up!
- Other Berries: Strawberries, blackberries, or even a mix of berries would be totally cute. However, **raspberries and chocolate are just superior, IMO.**
- White Chocolate Drip: For a different look, you can use white chocolate for the ganache. Just be warned, white chocolate can be a bit trickier to get that perfect smooth consistency.
- Chocolate Chips vs. Bar: Chocolate chips work fine for ganache, but a good quality chocolate bar melts smoother and makes much nicer shavings/curls. Your call!
- No Drip? No Problem!: If the drip feels too intimidating, skip it! Just frost your cake, pile on the raspberries, and add chocolate shavings. Still looks amazing!
- Store-Bought Bling: Hey, no shame in adding some edible glitter, sprinkles, or even those little chocolate pearls if you’re feeling extra.
FAQ (Frequently Asked Questions)
Got questions? I’ve got answers (and probably a joke or two).
- My ganache isn’t dripping right! Help! Is it too hot? Too cold? Goldilocks principle applies here. If it’s too runny, let it cool a bit more. If it’s too thick, gently warm it over a double boiler or 5 seconds in the microwave. Find that “just right” consistency!
- Can I use frozen raspberries? You *can*, but they tend to get watery and mushy when thawed, which isn’t ideal for decoration. **Fresh is best** for making your cake look its prime, my friend.
- How far in advance can I decorate the cake? Ideally, a few hours before serving. Raspberries can get soggy or start to “weep” after a while, and chocolate can lose its shine if left too long. **Best to do it closer to serving time.**
- What kind of chocolate is best for shaving? A solid bar of good quality dark or semi-sweet chocolate works wonders. Chill it slightly first, then use a vegetable peeler for those lovely curls.
- Do I need special tools for the drip? Nah! A regular spoon works perfectly fine for spooning and guiding the drip. For more control, a piping bag with the tip snipped off is great, but absolutely not essential.
- My cake is already frosted. Will the ganache drip work? Absolutely! Just make sure your frosting is firm and chilled for the best, cleanest results. **FYI, a buttercream or cream cheese frosting works great!**
- Can I make the ganache ahead of time? Yes! Store it in an airtight container in the fridge for up to a week. When ready to use, gently rewarm it in the microwave or over a double boiler, stirring until it reaches the right dripping consistency.
Final Thoughts
See? I told you it wasn’t hard! You just transformed a humble cake into a showstopper, and you barely broke a sweat. Now you’ve got this gorgeous creation that looks like it came straight out of a fancy bakery, but with all your personal charm (and zero extra cost for “artistic labor”).
Now go grab a slice (or two, I’m not judging, promise) and bask in the glory of your new culinary skills. You earned those bragging rights! Don’t forget to snap a pic, and maybe, just maybe, share it with a friend. Or don’t, and eat it all yourself. Your call!


