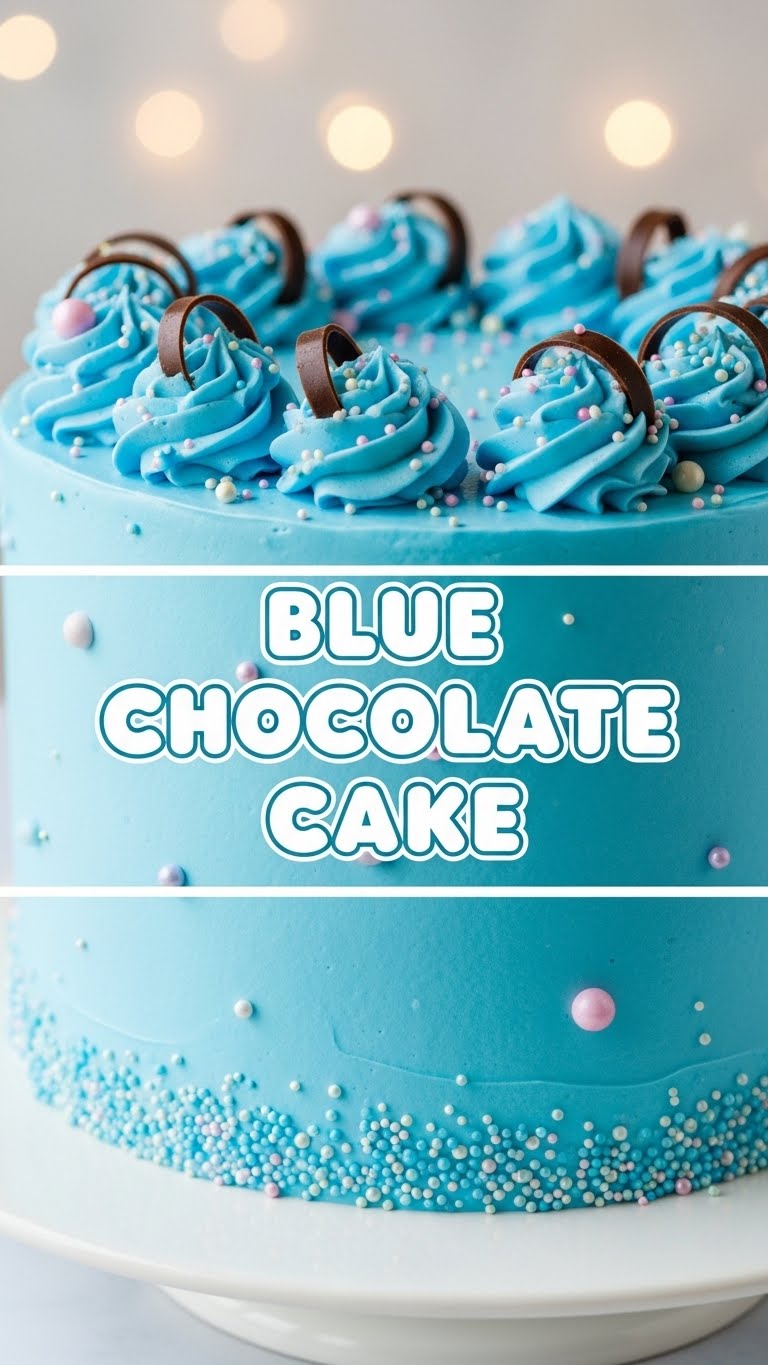
So, you’ve scrolled past one too many perfect-looking cakes on Instagram and now you’re thinking, “I want that, but, like, without the stress and the need for a professional photoshoot,” right? Totally get it. Or maybe you just want to confuse your friends in the best possible way. Either way, you’re in the right place, because today we’re diving headfirst into the glorious, slightly unhinged world of Blue Chocolate Cake!
Why This Recipe is Awesome
Let’s be real, most cakes are, well, brown. Or white. Bor-ing! This blue beauty is here to shake things up. It’s not just a cake; it’s a statement. It screams, “I’m fun, I’m unpredictable, and yes, I put food coloring in my dessert because I can!”
And guess what? It’s practically **idiot-proof**. Seriously, I’ve tested this theory extensively. You don’t need fancy equipment, a culinary degree, or even perfect baking skills. Just a bowl, a whisk, and a desire for something delightfully bizarre and delicious. Plus, it tastes like a normal chocolate cake, so no weird blue flavor (unless you accidentally use blue raspberry extract, which, to be fair, could be a vibe).
Ingredients You’ll Need
Gather your troops! Here’s what you’ll need to make this whimsical wonder:
- 1 ½ cups (190g) All-Purpose Flour: The backbone of our cake. No fancy stuff needed.
- 1 ½ cups (300g) Granulated Sugar: Sweetness is mandatory.
- ¾ cup (65g) Unsweetened Cocoa Powder: The “chocolate” in our blue chocolate cake. Go for a good quality one, it makes a difference.
- 1 ½ teaspoons Baking Soda: Our lift-off engineer.
- 1 teaspoon Salt: Just a pinch to balance all that sweetness.
- 1 cup (240ml) Milk: Any kind works – dairy or your favorite plant-based friend.
- ½ cup (120ml) Vegetable Oil: For maximum moistness. You can use melted butter too if you’re feeling extra fancy.
- 2 Large Eggs: The binders of destiny. Room temp if you can remember, but not the end of the world if you don’t.
- 2 teaspoons Vanilla Extract: Flavor fairy dust. Don’t skip it!
- ½ cup (120ml) Boiling Water (or very hot coffee): This is the secret to an incredibly rich chocolate flavor. Trust me.
- Loads of Blue Gel Food Coloring: This is the *real* star. Go gel, it’s more vibrant, **FYI**.
For the Frosting (optional, but highly recommended for peak blueness):
- 1 cup (226g) Unsalted Butter: Softened, not melted!
- 3-4 cups (360-480g) Powdered Sugar (Confectioners’ Sugar): Sifted, unless you like lumpy frosting (nobody likes lumpy frosting).
- ¼ cup (60ml) Milk or Cream: For creaminess.
- 1 teaspoon Vanilla Extract: More flavor!
- More Blue Gel Food Coloring: Because why stop at the cake?
Step-by-Step Instructions
- Get Your Oven Ready: Preheat your oven to 350°F (175°C). Grease and flour two 8-inch round cake pans. Or line with parchment paper circles. Whatever your preferred stick-prevention method is, do that.
- Dry Mix Magic: In a large bowl, whisk together the flour, sugar, cocoa powder, baking soda, and salt. Make sure there are no lumps hiding.
- Wet Mix Whirlwind: In a separate medium bowl, whisk together the milk, oil, eggs, and vanilla extract until well combined.
- Combine & Conquer: Pour the wet ingredients into the dry ingredients. Mix on low speed with an electric mixer, or by hand with a whisk, until *just* combined. Don’t overmix!
- The Blue Transformation: Now for the fun part! Gradually add your blue gel food coloring to the batter. Start with a good dollop, mix it in, and keep adding until you get that vibrant, “did an alien make this?” blue you’re aiming for. It might take more than you think.
- Hot Liquid Boost: Carefully pour the boiling water (or hot coffee) into the blue batter. Stir gently until it’s just incorporated. The batter will be quite thin – that’s normal! This is the magic that keeps it super moist.
- Divide & Conquer (Again): Pour the batter evenly into your two prepared cake pans.
- Bake It Till You Make It: Bake for 30-35 minutes, or until a wooden skewer inserted into the center comes out clean.
- Cool Down: Let the cakes cool in the pans for about 10-15 minutes before inverting them onto a wire rack to cool completely. **Patience is a virtue here!**
- Frosting Fun (Optional): While the cakes cool, whip up your blue buttercream! Beat the butter until fluffy, then gradually add the powdered sugar, milk/cream, and vanilla. Add blue food coloring until you hit your desired shade. Frost those beautiful blue layers!
Common Mistakes to Avoid
- Overmixing the Batter: Unless you want a dense, chewy hockey puck instead of a fluffy cake, mix until just combined. Lumps are okay!
- Not Greasing Your Pans Properly: The horror of a cake stuck to the bottom. Don’t be that person. Use butter and flour, or parchment paper.
- Opening the Oven Door Too Early: Your cake needs its space! Opening the door lets out heat and can cause your cake to sink. Wait until at least the minimum bake time.
- Being Shy with the Blue Food Coloring: You want BLUE, not ‘slightly depressed greyish-brown.’ Add it until you’re happy with the intensity.
- Trying to Frost a Warm Cake: This is a recipe for disaster. Your frosting will melt, your cake will crumb, and tears will be shed. **Always cool your cakes completely!**
Alternatives & Substitutions
- Milk: Any plant-based milk (almond, oat, soy) works perfectly if you’re dairy-free. Oat milk can even add a lovely creaminess!
- Oil: Melted coconut oil or a neutral oil like canola or grapeseed oil are great. Melted butter will give a richer flavor but might make the cake slightly less moist than oil.
- Hot Water: Hot coffee enhances the chocolate flavor without making it taste like coffee. If you don’t have it, just use boiling water. No biggie.
- Food Coloring: Not feeling blue? Pink, purple, green – this recipe is a blank canvas for your wildest color dreams. Or skip it for a truly “classic” chocolate cake. (But why would you?)
- Frosting: If buttercream isn’t your jam, a simple blue glaze (powdered sugar, milk, blue food coloring) or even a scoop of blue-tinted whipped cream would be fantastic. **IMO**, a contrasting white or even red frosting would also look pretty wild!
FAQ (Frequently Asked Questions)
Got questions? I’ve got (casual) answers!
- Can I use liquid food coloring? You *can*, but you’ll need a ton, and it might thin your batter too much, messing with the texture. **Gel food coloring is your best bet** for vibrant color without messing with consistency. Trust me on this one.
- My cake turned green! What happened? Ah, the old green mystery! Usually, it means your cocoa powder has a reddish-brown undertone that, when mixed with blue, creates a green hue. No worries, it’s still edible! Next time, try an ‘ultra-dark’ cocoa or a different brand of blue food coloring.
- Does it taste like blueberries? Nope, zero blueberries involved! It’s just a regular chocolate cake that decided to wear a fabulous blue outfit. Pure chocolatey goodness, with a visual surprise.
- Can I make cupcakes instead? Absolutely! Fill cupcake liners about 2/3 full and bake for a shorter time, usually 18-22 minutes. Keep an eye on them with a skewer test!
- How do I store this masterpiece? Covered, at room temperature for 2-3 days, or in the fridge for up to a week. If it lasts that long, you’re doing better than I am.
- Is this cake naturally blue? Haha, if only! No, this cake’s stunning hue comes from a little help from our friend, food coloring. It’s magic, but not *that* kind of magic.
Final Thoughts
You’ve done it! You’ve successfully navigated the treacherous (but mostly delicious) waters of blue chocolate cake baking. Now go ahead, show off your magnificent creation! Or, let’s be real, grab a fork and eat it all yourself. You’ve earned it.
Remember, baking should be fun, even when things don’t go perfectly. So what if it’s slightly lopsided or the blue isn’t *quite* as vibrant as you pictured? It’s still blue chocolate cake, and that’s inherently awesome. Happy baking (and eating)!
