So you’re craving something sweet, cute, and ridiculously easy to make, but maybe also want to feel like a baking wizard without actually doing wizard-level work? You’ve come to the right place, my friend. Forget those complicated desserts; we’re diving headfirst into the magical world of White Chocolate Cake Pops! Get ready to impress everyone (or just yourself, no judgment here).
Why This Recipe is Awesome
Okay, listen up. This isn’t just *any* recipe. This is ‘I-can-totally-do-this-even-if-my-oven-is-mostly-for-storage’ awesome. It’s **idiot-proof** – seriously, if I managed it without setting off the smoke detector, you’re golden. We’re talking minimal effort for maximum “oohs” and “aahs.” Plus, cake pops are basically edible confetti on a stick. Who doesn’t want that kind of joy in their life? They’re perfect for parties, gifts, or just a Tuesday when you need a little pick-me-up. And the best part? No fancy decorating skills required. Unless you count “sprinkling” as a skill, which, honestly, you should.
Ingredients You’ll Need
Gather ’round, my sweet-toothed companions! Here’s your shopping list for cake pop glory:
- 1 Box of White Cake Mix (any brand, we’re not fancy here): Because who has time to bake from scratch *and* make cake pops? Not us.
- Ingredients listed on your cake mix box (usually eggs, oil, water): Just follow the box, we’re outsourcing the first step.
- 1/2 cup Cream Cheese (softened): The secret weapon for turning cake crumbs into pure, rollable magic. Don’t skip it!
- 1 cup Powdered Sugar (also known as confectioners’ sugar): To make that cream cheese frosting super smooth and sweet.
- 1 teaspoon Vanilla Extract: A little splash of happiness.
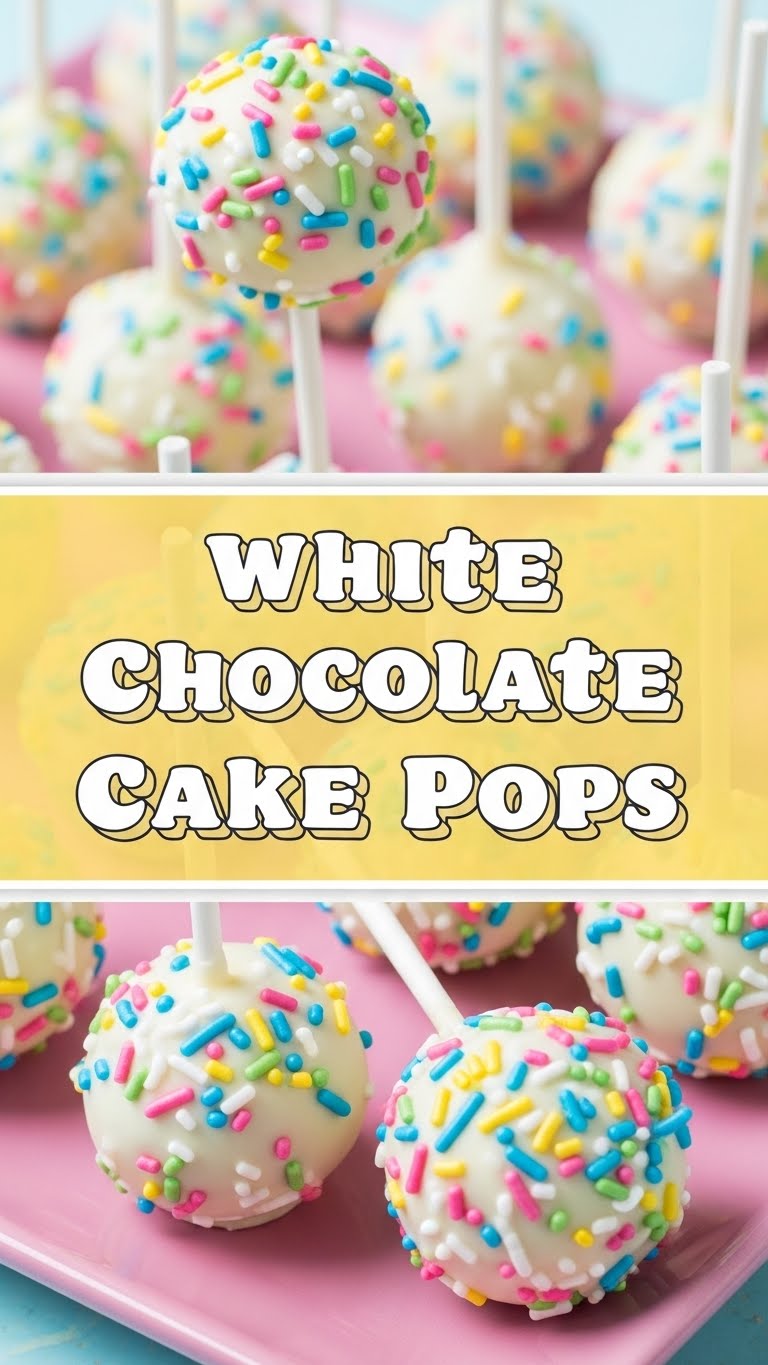
- 16 oz White Candy Melts (or good quality white chocolate chips): For that glorious outer shell. The candy melts are easier, IMO.
- Lollipop sticks: Crucial for the “pop” part. Can you really call it a cake pop if there’s no stick?
- Optional: Sprinkles, edible glitter, extra candy melts in different colors: For making them extra fabulous and Instagram-ready. Because why be basic when you can be bedazzled?
Step-by-Step Instructions
- Bake the Cake: Prepare and bake your white cake mix according to package directions. Let it cool completely. **Do not rush this step!** A warm cake means soggy cake pops, and nobody wants that.
- Crumble it Up: Once cool, crumble the cake into a large bowl. You want fine crumbs, no big chunks. Your clean hands are the best tool here for a quick, satisfying crumble.
- Make the Frosting: In a separate bowl, beat the softened cream cheese, powdered sugar, and vanilla extract until smooth and creamy. This is your binding agent, your cake pop glue!
- Combine & Roll: Add the cream cheese frosting to the cake crumbs. Mix well until it forms a dough-like consistency. It should be moist enough to roll into balls without falling apart, but not so wet it’s sticky.
- Shape the Pops: Roll the mixture into 1-inch to 1.5-inch balls. Place them on a parchment-lined baking sheet. Now, **pop them in the fridge for at least 30 minutes** (or freezer for 15) to firm up. This is absolutely key for successful dipping!
- Melt the Coating: Melt your candy melts (or white chocolate) in a microwave-safe bowl according to package directions. Do it in short bursts (30 seconds at a time), stirring often, to avoid scorching. Burnt chocolate is a sad, sad sight.
- Dip & Chill (Part 1): Dip the very tip of each lollipop stick into the melted chocolate, then insert it about halfway into a chilled cake ball. This acts as glue, securing your cake ball to its stick. Return them to the fridge for another 10-15 minutes to set the “glue.”
- Dip & Decorate: One by one, dip each chilled cake pop into the melted white chocolate, rotating to fully coat. Gently tap off any excess chocolate against the rim of the bowl. Before the chocolate sets, quickly unleash your inner artist and sprinkle with decorations!
- Set ‘Em Up: Stand the finished cake pops upright in a block of styrofoam, a tall glass, or even an egg carton (poke holes in the top!) until the chocolate coating is completely set.
- Enjoy! Once they’re firm, you’re ready to devour your masterpieces. Or, you know, share them if you’re feeling generous.
Common Mistakes to Avoid
Listen up, buttercup. We all make mistakes, but some are easily sidestepped with a little foresight:
- Skipping the chilling step: Oh, you think you’re above refrigeration, do you? You’ll end up with crumbly messes or sliding cake balls. **Don’t be that person.** Chilling is your cake pop’s best friend.
- Over-mixing the cake ball dough: Too much mixing makes them tough and chewy, not the soft, delicious texture we’re aiming for. Mix just until combined.
- Overheating your chocolate: Scorched chocolate is a lumpy, sad, unusable mess. Go low and slow in the microwave, stirring often. Patience, young padawan.
- Dipping cold pops into *too warm* chocolate: Thermal shock! This can cause cracks in your beautiful chocolate coating. Let your melted chocolate cool slightly after melting, but keep it fluid.
- Thinking you don’t need to preheat the oven for the cake: Rookie mistake, your cake will thank you for the warmth and cook evenly.
Alternatives & Substitutions
Feeling adventurous? Or just realized you’re missing an ingredient? No stress, we’ve got options:
- Cake Mix Flavor: Want something different? Try chocolate, red velvet, or funfetti! White chocolate goes with everything, practically. Experiment and find your favorite combo.
- Cream Cheese: While it’s my fave for that perfect tangy sweetness, you *can* use canned vanilla frosting instead for an even quicker (but maybe less unique) binder. Just use less, as it’s typically sweeter.
- White Candy Melts: Good quality white chocolate chips work, but be aware they can be a bit fussier. You might need to temper them properly or add a tiny bit of coconut oil/shortening to make them smoother for dipping. Candy melts are formulated for ease!
- Lollipop Sticks: No sticks? Make cake balls! Just skip the stick part and arrange them in cute cupcake liners or on a platter. Still delicious, just less “pop.”
- Decorations: Go wild! Colored candy melts, crushed Oreos, nuts, sprinkles of every shape and size. Your cake pop, your rules. You could even drizzle with dark chocolate for a classy contrast.
FAQ (Frequently Asked Questions)
- Q: My cake balls are too sticky to roll. What gives?
A: You might have added too much frosting, or your cake was extra moist. **Add a tablespoon or two of extra powdered sugar** to the mix until it’s workable. Or chill the mixture a bit longer before rolling – cold helps! - Q: Can I use regular white chocolate bars instead of candy melts?
A: Technically, yes, but be warned, regular chocolate is a bit pickier. It needs to be tempered correctly to look glossy and not melt in your hands. Candy melts are formulated for easy, no-fuss dipping. - Q: How long do these last?
A: Stored in an airtight container in the fridge, they’re good for about **5-7 days**. But let’s be real, do they ever last that long? My house has a strict ‘consume immediately’ policy. - Q: My chocolate is too thick for dipping. Help!
A: Try adding a **tiny bit (1/2 teaspoon at a time) of coconut oil or vegetable shortening** to your melted chocolate and stir until it reaches a smoother, dippable consistency. It works wonders! - Q: Can I freeze the cake balls before dipping?
A: Absolutely! You can freeze the rolled cake balls (without sticks or coating) for up to a month in an airtight container. Thaw them slightly in the fridge before proceeding with dipping. It’s a great make-ahead trick for future you! - Q: Do I really need to chill them so many times?
A: Yes, my friend, **yes!** Chilling is the secret sauce to perfectly coated, non-crumbly cake pops. Patience is a virtue, especially in cake pop making. Trust the process!
Final Thoughts
See? That wasn’t so scary, was it? You just made gourmet-level treats with minimal fuss, transforming a humble cake mix into something truly delightful. Now go forth and conquer your sweet cravings, impress your friends with your newfound baking prowess, or just hoard them all for yourself (again, no judgment here!). You’ve earned it, baking superstar! Enjoy every single delicious bite.


