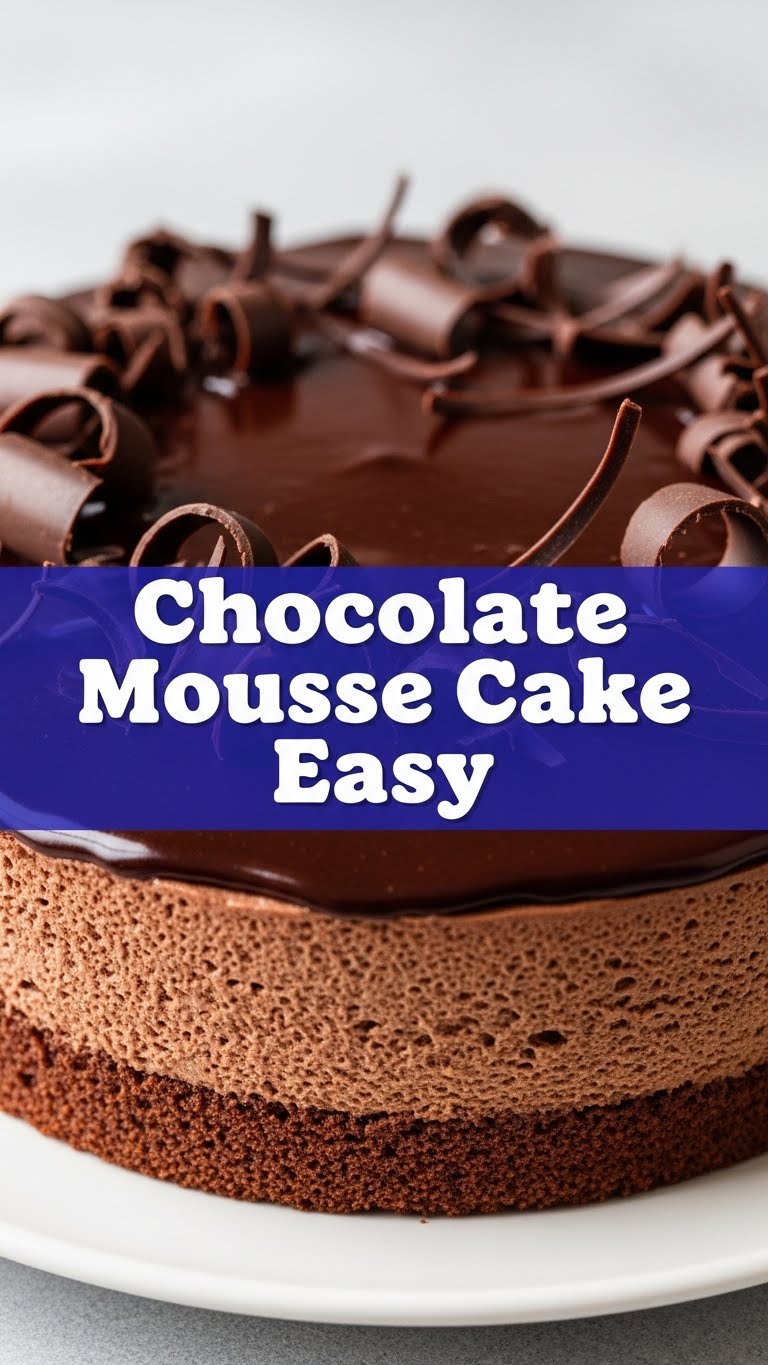
Ever found yourself staring into the fridge, wishing a gourmet chocolate cake would magically appear? Same, friend. But since teleportation of desserts isn’t a thing yet, let’s make the next best (and easiest) thing: a mind-blowingly delicious Chocolate Mousse Cake. And yes, “easy” is the operative word here. Because who has time for complicated?
Why This Recipe is Awesome
Okay, real talk. This isn’t just any chocolate mousse cake. This is the chocolate mousse cake you whip up when you want to look like a culinary genius without actually breaking a sweat. It’s shockingly simple, outrageously delicious, and practically fool-proof. Seriously, if I can make it without setting off the smoke detector, you’re golden. Plus, it’s rich, decadent, and requires zero oven time for the mousse itself. Win-win-win!
Ingredients You’ll Need
- For the Crust (aka the crunchy base of dreams):
- 1 ½ cups chocolate cookie crumbs (like Oreos, sans cream, crushed into submission) – Because who doesn’t love a chocolate foundation?
- ¼ cup unsalted butter, melted – The glue that holds your dreams together.
- For the Mousse (aka the cloud of chocolate bliss):
- 1 ½ cups heavy cream, very cold – Essential for whipped perfection. Don’t skimp here, trust me.
- 1 cup powdered sugar – Sweetness, no gritty bits.
- ¾ cup unsweetened cocoa powder – The heart and soul of your chocolatey adventure.
- 1 tsp vanilla extract – A little extra somethin’ somethin’.
- Pinch of salt – Balances all that lovely sweetness.
- Optional: Chocolate shavings or sprinkles for ultimate fancy vibes.
Step-by-Step Instructions
- Crust Time: Grab a 9-inch springform pan. In a medium bowl, mix your cookie crumbs and melted butter. Press this mixture firmly into the bottom of the springform pan. Stick it in the fridge for at least 15 minutes to firm up while you conquer the mousse.
- Mousse Magic: In a large, very cold bowl (pop it in the freezer for 10 mins first, it helps!), combine the heavy cream, powdered sugar, cocoa powder, vanilla extract, and salt.
- Whip It Good: Using an electric mixer (or a strong arm, but why torture yourself?), whip the mixture on medium-high speed until it forms stiff peaks. This means when you lift the beaters, the peaks stand up proudly. Don’t over-whip, or you’ll get butter. (Unless you want butter, then by all means.)
- Assemble the Dream: Spoon your glorious chocolate mousse over the chilled crust in the springform pan. Smooth out the top with a spatula.
- Chill Out: Cover the cake loosely with plastic wrap and refrigerate for at least 4 hours, or ideally, overnight. Patience is a virtue here, my friend. It needs time to set properly.
- Garnish and Glory: Once set, carefully remove the sides of the springform pan. Decorate with chocolate shavings, cocoa powder, or sprinkles if you’re feeling extra. Slice, serve, and accept all the compliments!
Common Mistakes to Avoid
- Warm Cream Woes: Trying to whip cream that isn’t super cold. You’ll be whipping all day, and it’ll probably just stay liquid. Cold bowl, cold cream, happy mousse.
- Over-whipping: Going too far with the mixer. Stiff peaks are good; chunky, grainy butter is not. Stop when it’s just right!
- Skipping the Chill: Thinking “a quick hour in the fridge will be fine.” Nope. You’ll end up with a sad, sloppy puddle. Give it time to set.
- Not firmly pressing the crust: If you don’t press it down well, your crust might crumble when you slice. Be firm, but gentle.
Alternatives & Substitutions
- Crust variations: Not a chocolate cookie fan? You could totally use graham cracker crumbs or even digestive biscuits. Just remember to adjust the sugar if your new crumbs are less sweet.
- Boozy Kick: Want to adult-ify it? Add a tablespoon of Kahlua, Bailey’s, or rum to your mousse mixture before whipping. Trust me, it’s a game-changer for sophisticated palates.
- White Chocolate Mousse: Feeling adventurous? Swap out the cocoa powder for melted white chocolate (cooled, of course!) and create a contrasting layer or a whole new cake!
- Toppings Galore: Whipped cream, fresh berries (raspberries are divine!), a dusting of powdered sugar, or a drizzle of chocolate ganache can all elevate your masterpiece. Go wild!
FAQ (Frequently Asked Questions)
- “Do I really need a springform pan?” Can you use a regular pie dish? Technically yes, but getting it out will be… challenging. A springform pan makes it super easy to unmold your beautiful creation without a disaster. So, yes, if you want it to look good.
- “My mousse isn’t getting stiff, what gives?” Is your cream cold? Is your bowl cold? Did you give it enough time? Sometimes it just needs a little more vigorous whipping. If it’s warm, it’s probably a lost cause for stiff peaks, sorry!
- “Can I make this ahead of time?” Absolutely! In fact, it tastes even better the next day once all those flavors have mingled. Make it the night before your event, and you’re golden.
- “Is this healthy?” Let’s be real. It’s a chocolate mousse cake. It’s delicious. It’s for joy. If you’re looking for health food, you’re in the wrong place. 😉
- “Can I use low-fat cream?” Short answer: no. Long answer: the fat content in heavy cream is what allows it to whip up into those glorious stiff peaks. Low-fat alternatives just won’t cut it, sadly.
- “How long does it last?” This cake is best enjoyed within 3-4 days when stored properly in the fridge. But honestly, it rarely lasts that long!
- “Can I freeze leftovers?” You can, but the texture might change slightly after thawing. It’s best eaten fresh, but if you must, cut into slices, wrap individually, and freeze for up to a month. Thaw in the fridge.
Final Thoughts
So there you have it, folks! Your new go-to, impress-everyone-without-breaking-a-sweat Chocolate Mousse Cake recipe. It’s simple, it’s scrumptious, and it’s calling your name. Now go forth and conquer that kitchen (or at least that mixing bowl). You’ve totally got this. And hey, if you mess up, there’s always ice cream. But I have a feeling you won’t need it. Enjoy your chocolatey triumph!


