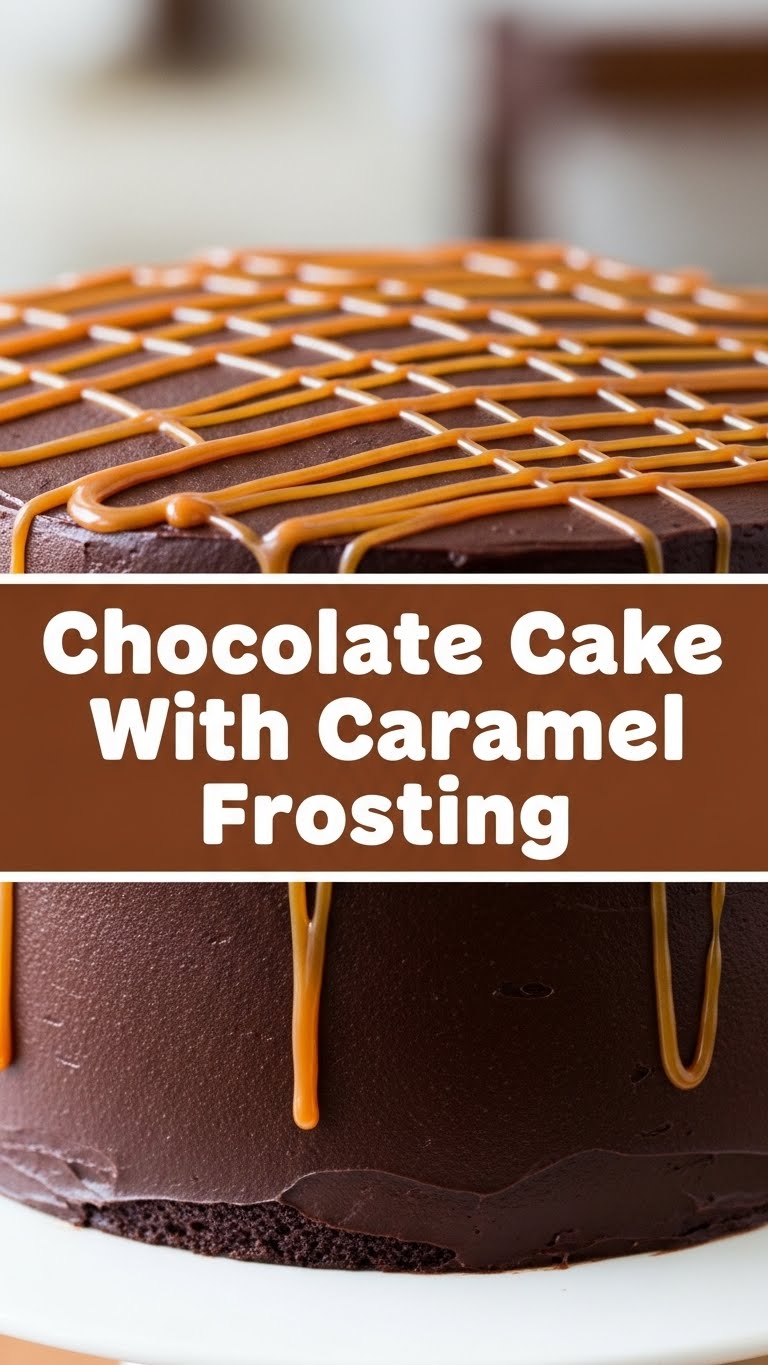
So you’re craving something tasty but too lazy to spend forever in the kitchen, huh? Same. We’ve all been there: that deep, primal urge for something chocolatey, something sweet, something that practically melts in your mouth and screams “I love you” in dessert form. And if it comes with a dreamy, sticky, utterly irresistible caramel frosting? Honey, you’ve hit the jackpot.
Why This Recipe is Awesome
Let’s be real, life’s too short for complicated recipes that require a chemistry degree. This chocolate cake with caramel frosting recipe is your new best friend for a few glorious reasons. First off, it’s **ridiculously moist**. Like, so moist it practically apologizes for being so good. Second, it’s **idiot-proof**. Seriously, if I can make it without turning it into a sad, deflated puck, you absolutely can too. No fancy equipment, no obscure ingredients, just pure, unadulterated deliciousness. Plus, the caramel frosting? It’s not just an afterthought; it’s the star of the show that turns a great cake into an *OMG* cake. Prepare for compliments, my friend.
Ingredients You’ll Need
Time to round up your culinary crew! Think of these as your squad for creating pure joy.
**For the Chocolate Cake:**
- 1 ½ cups all-purpose flour: The foundation of our cakey dreams.
- 1 ½ cups granulated sugar: Because sweetness is happiness.
- ¾ cup unsweetened cocoa powder: The darker, the better, IMO. Get the good stuff!
- 1 ½ teaspoons baking soda: Our magical lift-off agent.
- 1 teaspoon baking powder: More lift, because we like our cakes to soar.
- 1 teaspoon salt: Balances everything out like a culinary tightrope walker.
- 2 large eggs: Room temperature, please! They mix better.
- ¾ cup milk: Any kind works, but whole milk gives that extra richness.
- ½ cup vegetable oil: The secret to that super moist texture.
- 1 teaspoon vanilla extract: Don’t skimp on this! It’s flavor magic.
- ¾ cup hot water or hot coffee: Coffee enhances chocolate flavor like nothing else. Trust me on this one.
**For the Caramel Frosting:**
- ½ cup (1 stick) unsalted butter: Room temperature, soft and ready to mingle.
- 1 cup packed light brown sugar: The base for our glorious caramel.
- ½ cup heavy cream: For that luscious, silky smooth texture.
- 1 teaspoon vanilla extract: A must for deepening that caramel goodness.
- ¼ teaspoon salt: A little salt really makes the caramel pop!
- 3-4 cups powdered sugar: Sifted, please! We don’t want lumpy frosting.
Step-by-Step Instructions
Alright, apron up! Let’s get baking.
**Part 1: The Glorious Chocolate Cake**
- First things first: Preheat your oven to 350°F (175°C). Grease and flour two 8 or 9-inch round cake pans. Or, if you’re smart like me, use parchment paper circles at the bottom.
- In a large bowl, whisk together the flour, sugar, cocoa powder, baking soda, baking powder, and salt. Give it a good whisk until everything is super combined. We’re aiming for no lumps, just pure dry deliciousness.
- Now for the wet stuff! Add the eggs, milk, oil, and vanilla extract to the dry ingredients. Beat with an electric mixer on medium speed for about 2 minutes. The batter will be thick, but don’t worry.
- Carefully pour in the hot water (or coffee). The batter will get thin, and that’s exactly what we want. Mix until just combined; **don’t overmix!** A few tiny lumps are okay.
- Divide the batter evenly between your prepared cake pans. Pop them into the preheated oven and bake for 30-35 minutes, or until a toothpick inserted into the center comes out clean.
- Let the cakes cool in their pans for about 10-15 minutes before flipping them out onto a wire rack to cool completely. Patience is a virtue here, my friend. Seriously, **let them cool completely** before even thinking about frosting.
**Part 2: The Dreamy Caramel Frosting**
- In a medium saucepan, melt the butter over medium heat. Add the brown sugar and heavy cream. Stir constantly until the mixture comes to a gentle boil. Let it boil for 1 minute, still stirring.
- Remove the saucepan from the heat. Stir in the vanilla extract and salt. Let this glorious caramel mixture cool slightly, just until it’s warm but not hot (about 15-20 minutes).
- Pour the caramel mixture into a large bowl. Gradually add the sifted powdered sugar, one cup at a time, beating with an electric mixer on medium speed until smooth and creamy. You might not need all 4 cups, so add until you reach your desired consistency – thick enough to spread, but still gloriously gooey.
- Once your cakes are completely cool (and I mean COMPLETELY!), it’s frosting time! Spread that luscious caramel frosting generously between the layers, on top, and all around the sides. Go wild!
Common Mistakes to Avoid
Nobody’s perfect, but we can avoid some major baking faux pas with a little foresight.
- Frosting a Warm Cake: This isn’t a “warm cake + frosting melts = delicious mess” situation. This is a “warm cake + frosting melts = sad, runny, crying mess” situation. **Always let your cakes cool completely.**
- Overmixing the Batter: Once you add the wet ingredients, mix until just combined. Overmixing develops gluten, leading to a tough, dry cake. Nobody wants a rubbery cake!
- Skipping the Sifted Powdered Sugar: Lumps in frosting are not chic. Take the extra minute to sift that powdered sugar; your taste buds will thank you.
- Not Using Room Temperature Eggs/Milk: Cold ingredients don’t emulsify as well with others, which can affect the texture of your cake. Set them out 30 minutes before you start!
Alternatives & Substitutions
Feeling frisky? Want to play around? Here are some ideas:
- Make it Dairy-Free: Swap out dairy milk for your favorite plant-based milk (almond or oat work great!). For the frosting, use a good quality dairy-free butter substitute and a dairy-free heavy cream alternative.
- Coffee Haters Unite: If coffee isn’t your jam, simply use hot water for the cake. The coffee just deepens the chocolate flavor; it won’t make your cake taste like a latte.
- Nuts for Topping: Want extra crunch? Sprinkle some toasted pecans or walnuts on top of the caramel frosting. Divine!
- Salted Caramel FTW: If you’re a true salted caramel fanatic, sprinkle a little flaky sea salt over the finished frosting. It’s a game-changer.
FAQ (Frequently Asked Questions)
Got questions? I’ve got (casual) answers!
- Can I use margarine instead of butter? Well, technically yes, but why hurt your soul like that? Butter just tastes better, period. It’s worth it, trust me.
- How long does this cake last? If you manage to not devour it all in one sitting, it’ll keep at room temperature for 2-3 days, or in the fridge for up to 5 days. Just make sure it’s covered!
- Can I make the cake ahead of time? Absolutely! Bake the cake layers, wrap them tightly in plastic wrap (once completely cool!), and freeze them for up to a month. Thaw at room temp before frosting. You can also make the frosting a day ahead and store it in the fridge; just re-whip it to loosen before spreading.
- My frosting is too thin/too thick! Help! Too thin? Add more sifted powdered sugar, a tablespoon at a time. Too thick? Add a tiny splash of milk or cream until it loosens up. Easy peasy!
- What if I don’t have two cake pans? No stress! You can bake the cake in batches, just make sure to let the pan cool down slightly between bakes. Or, use a 9×13 inch pan for a single-layer sheet cake (baking time might be slightly less, so keep an eye on it!).
Final Thoughts
And there you have it! Your very own, incredibly delicious, chocolate cake with caramel frosting. This isn’t just a cake; it’s a testament to your newfound baking prowess, your commitment to deliciousness, and your ability to follow instructions (mostly). Now go impress someone—or yourself—with your new culinary skills. You’ve earned it! Seriously, go grab a slice and pat yourself on the back. You’re awesome.

