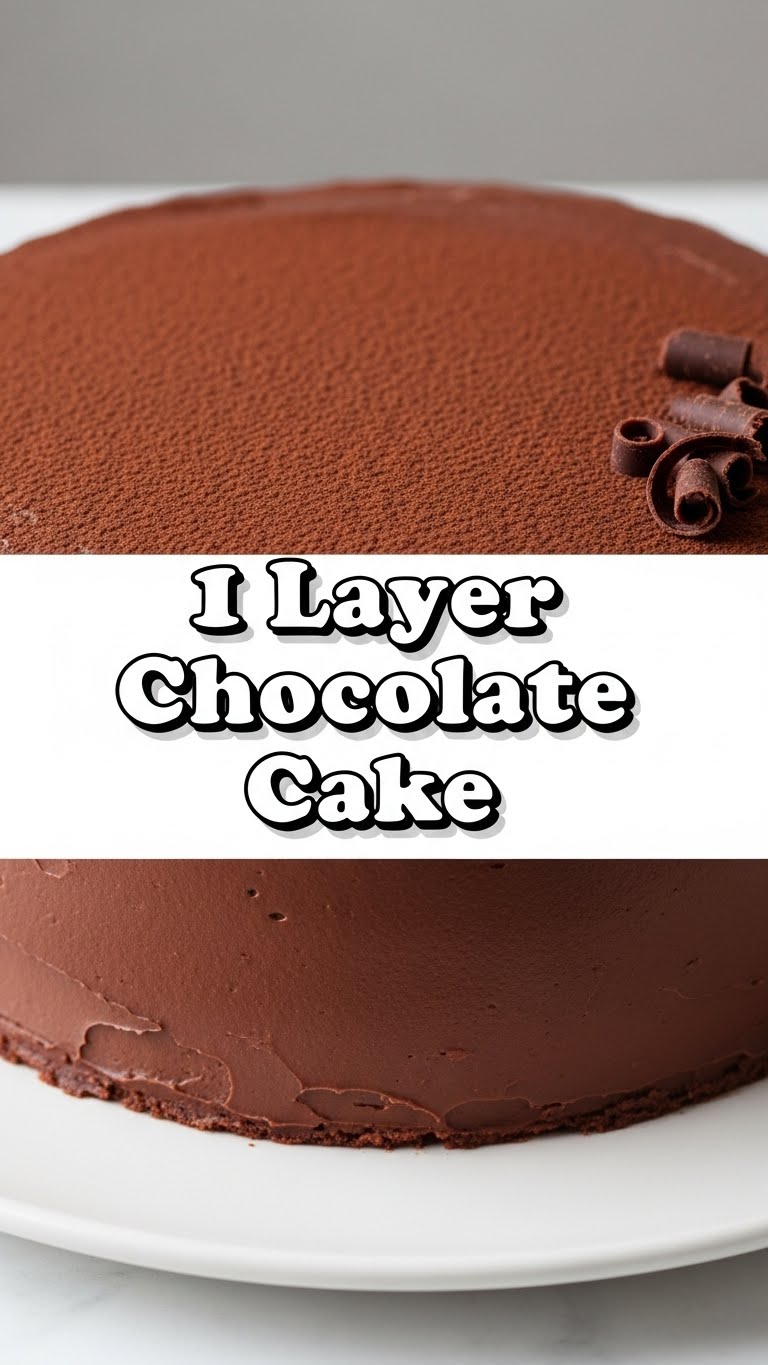
So, your sweet tooth is staging a full-blown coup, but your motivation to build a multi-story cake masterpiece is… let’s say, on vacation? No judgment here, friend. I got you. We’re diving headfirst into the glorious world of the One-Layer Chocolate Cake. It’s decadent, it’s easy, and it screams “I made this!” without you actually having to break a sweat or sacrifice your entire afternoon.
Why This Recipe is Awesome
Listen, this isn’t just a cake; it’s a *statement*. A statement that says, “I want chocolate NOW, and I don’t have all day to bake it.” It’s basically foolproof. **Seriously, even I haven’t messed this up**, and my track record with anything more complex than toast can be… spotty. You get maximum chocolate impact for minimal effort, fewer dishes to wash (hallelujah!), and a result that will make everyone think you spent hours slaving away. Spoiler alert: you didn’t. You’re welcome.
Ingredients You’ll Need
Gather ’round, my fellow lazy gourmands! Here’s your simple shopping list. Nothing fancy, just the good stuff:
- 1 ½ cups All-Purpose Flour: The basic building block. Don’t use self-rising unless you’re feeling adventurous and like cake surprises.
- 1 ½ cups Granulated Sugar: For sweetness, obviously. And because life is too short for unsweetened cake.
- ¾ cup Unsweetened Cocoa Powder: The MVP of our chocolate dreams. Use good quality stuff; it makes a difference!
- 1 ½ teaspoons Baking Soda: Our lift-off agent! This is what makes it light and fluffy.
- 1 teaspoon Salt: Don’t skip this! It balances the sweetness and makes all the chocolatey flavors pop.
- 2 Large Eggs: Room temp, please! They mix better and give a smoother batter.
- ¾ cup Milk: Any kind works. Whole, skim, almond – pick your poison. Also room temp, for consistency.
- ¼ cup Vegetable Oil: Or any neutral oil. This keeps our cake super moist.
- 1 teaspoon Vanilla Extract: The universal enhancer. A good splash makes everything better.
- ¾ cup Hot Water or Hot Coffee: Your secret weapon! **Coffee really deepens the chocolate flavor** without making the cake taste like coffee. Trust me on this one.
Step-by-Step Instructions
- **Preheat your oven to 350°F (175°C).** This isn’t a suggestion; it’s a command. Nobody likes a cold oven. Lightly grease and flour an 8-inch or 9-inch round cake pan. Line the bottom with parchment paper if you’re feeling extra fancy (and want guaranteed non-stickage).
- In a large bowl, whisk together the flour, sugar, cocoa powder, baking soda, and salt. Make sure there are no lumpy bits. We’re going for smooth sailing here.
- In a separate medium bowl, whisk together the eggs, milk, oil, and vanilla extract until well combined.
- Pour the wet ingredients into the dry ingredients. Stir just until combined. **Don’t overmix!** Overmixing leads to tough cake, and we’re aiming for tender love and chocolate.
- Carefully pour in the hot water or coffee. Stir until the batter is smooth. It will be thin, and that’s totally okay!
- Pour the glorious, thin batter into your prepared cake pan. Give the pan a gentle tap on the counter a few times to release any air bubbles.
- Bake for 30-35 minutes, or until a wooden skewer or toothpick inserted into the center comes out clean. Your kitchen should smell divine right about now, FYI.
- Let the cake cool in the pan on a wire rack for about 10-15 minutes. Then, invert it onto the rack to cool completely. **Patience is a virtue, especially with cake.**
- Once completely cool, slather it with your favorite frosting, a simple glaze, or just a dusting of powdered sugar. Or, honestly, just eat it plain. I won’t tell.
Common Mistakes to Avoid
- **Not preheating your oven properly:** Rookies! An unevenly heated oven means unevenly baked cake. Don’t do it.
- **Overmixing the batter:** This is a biggie. Once the wet and dry ingredients are *just* combined, stop. Seriously. Every extra stir develops more gluten, making your cake dense and chewy instead of light and fluffy.
- **Opening the oven door too early:** Resist the urge! The first 20-25 minutes are crucial for the cake to set. Opening the door can cause it to collapse. Let it bake in peace!
- **Cutting into it hot:** I know, I know, the smell is intoxicating, and the chocolate siren song is strong. But trust me, you’ll end up with a delicious crumbly mess instead of a neat slice. **Patience, young padawan!**
- **Forgetting to grease/flour the pan:** This is how cakes stick and break. A sticky situation indeed. Don’t be that person.
Alternatives & Substitutions
- No coffee? No problem! Hot water works perfectly fine. The coffee just subtly enhances the chocolate flavor.
- Milk alternatives: Feel free to use almond milk, soy milk, oat milk, or whatever plant-based goodness you prefer.
- Oil vs. Butter: I use oil for ultimate moistness, but melted butter works too! It’ll give a slightly different, richer flavor.
- Frosting Fun: This cake is fantastic with a simple chocolate ganache, a classic buttercream, or even just a quick powdered sugar glaze (powdered sugar + milk + vanilla). My personal fave? Just whipped cream and some berries. Less fuss, more deliciousness, IMO.
- Add-ins: Want extra chocolate? Throw in ½ cup of chocolate chips with the dry ingredients. Feeling nutty? A handful of chopped walnuts or pecans could be divine.
FAQ (Frequently Asked Questions)
Got questions? I’ve got (casual) answers!
- Can I use margarine instead of butter? Well, technically yes, you can, but why hurt your soul like that? Butter just tastes better. For the sake of this cake and your taste buds, stick with butter if you’re not using oil.
- My cake sank in the middle! What happened? Oh no! This often happens if you opened the oven door too early, your baking soda is old (check the expiration date!), or you overmixed the batter. Learn from your mistakes, bake another cake!
- How do I store this masterpiece? At room temperature, covered, for up to 3 days. Or in the fridge for up to a week. If it lasts that long, you have more willpower than I do.
- Can I make it gluten-free? Absolutely! Swap out the all-purpose flour for a 1:1 gluten-free baking flour blend (one that contains xanthan gum). Follow the rest of the recipe as is.
- What if I don’t have a round cake pan? A square 8×8 or 9×9 inch pan will work too! Just adjust baking time, checking it a little earlier as square pans might bake slightly faster due to different surface area.
- Should I use Dutch-process cocoa or natural cocoa? This recipe uses baking soda, which needs an acid to react with. Natural cocoa is acidic, so it’s a perfect match here. If you use Dutch-process (which is neutralized), you might get less lift, so **stick to natural unsweetened cocoa for best results!**
Final Thoughts
So there you have it, your new go-to chocolate cake recipe! It’s ridiculously easy, incredibly satisfying, and proof that you don’t need to be a pastry chef to whip up something truly delicious. Now go impress someone—or yourself—with your new culinary skills. You’ve earned it! Grab a slice (or two), put your feet up, and bask in the glory of your chocolatey accomplishment. You’re basically a professional baker now, just without the fancy apron (unless you want one, no judgment).

