Ever stared at those forgotten frozen apples in your freezer and thought, “What the heck am I supposed to do with these sad, icy fruit chunks?” Well, stop looking at them like they’ve personally offended you! Those frozen apple pieces are about to become the hero ingredient in what might be the easiest, most delicious apple crisp you’ve ever thrown together. Yes, FROZEN apples. No peeling required. No judging here if you just did a little happy dance.
Why This Recipe is Awesome
Let me count the ways this frozen apple crisp will change your dessert game forever:
First off, it’s the ultimate “I’m an adult who has their life together” dessert that actually requires zero adulting skills. Your freezer did half the work already! Plus, there’s something deeply satisfying about transforming those forgotten freezer dwellers into something that’ll make your kitchen smell like you’ve got your act together.
The best part? While everyone else is painstakingly peeling and slicing fresh apples (and probably cutting their fingers in the process), you’re over here being a kitchen genius using frozen fruit. Work smarter, not harder, people!
Ingredients You’ll Need
For the filling:
- 4-5 cups frozen apple slices (the ones you panic-froze during apple picking season)
- 2-3 tablespoons cornstarch (to thicken all that delicious apple juice that’s gonna happen)
- ⅓ cup granulated sugar (or more if you’ve got a serious sweet tooth)
- 1 tablespoon lemon juice (bottled is fine—no judgment here)
- 1 teaspoon cinnamon (the more, the better IMO)
- ¼ teaspoon nutmeg (optional, but why wouldn’t you?)
For the crisp topping (aka the best part):
- 1 cup old-fashioned oats (not the instant kind, you’re better than that)
- ¾ cup all-purpose flour (measured chaotically or precisely, your choice)
- ½ cup brown sugar, packed (really get in there and pack it!)
- ½ teaspoon cinnamon (yes, more cinnamon—deal with it)
- ¼ teaspoon salt (to make the sweet taste sweeter, science!)
- ½ cup cold butter, cubed (cold is key—don’t be rebellious here)
Step-by-Step Instructions
- Preheat your oven to 350°F (175°C). I know you want to skip this step, but resist the urge. A cold oven is the enemy of crispiness.
- Prepare your frozen apples. No need to thaw them completely! Just let them sit for about 5-10 minutes while you prep other ingredients. If they’re stuck together in a giant apple iceberg, give them a few gentle taps to break them up.
- Mix your filling. Toss those semi-frozen apple pieces with cornstarch, sugar, lemon juice, and spices in a large bowl. Make sure everything’s coated evenly—no dry cornstarch patches allowed!
- Make the topping. In another bowl, mix the oats, flour, brown sugar, cinnamon, and salt. Add the cold butter cubes and use your fingers to work it in until you get a crumbly mixture. Yes, your hands will get messy. Yes, it’s worth it.
- Assemble your masterpiece. Pour the apple mixture into a greased 8×8 baking dish (or whatever similar-sized dish you can find in your cabinet Jenga). Sprinkle the oat mixture evenly on top.
- Bake until bubbly and golden. This takes about 45-50 minutes. You’re looking for a beautiful golden brown top and edges that are bubbling with sweet apple goodness.
- Let it cool slightly. I know it’s torture, but give it 15 minutes to set up. This prevents mouth burns and allows the filling to thicken properly.
Common Mistakes to Avoid
Completely thawing your apples. Don’t do it! You’ll end up with apple soup. The beauty of using frozen apples is that they release moisture slowly while baking.
Skimping on the cornstarch. Frozen apples release more liquid than fresh ones. That cornstarch is the only thing standing between you and apple crisp soup.
Using warm or softened butter in the topping. This isn’t a chocolate chip cookie recipe. Cold butter = crumbly topping = texture heaven.
Covering the crisp with foil for the entire baking time. The whole point is the “crisp” part! If the top browns too quickly, then you can add foil for the last 10-15 minutes.
Alternatives & Substitutions
No oats? Make a streusel topping instead with 1½ cups flour, ¾ cup sugar, and the same amount of butter. It won’t have the same texture, but it’ll still be delicious.
Gluten concerns? Swap the all-purpose flour for almond flour or a gluten-free blend. The oats should be certified gluten-free too if you’re cooking for someone with celiac disease.
Want to fancy it up? Add ½ cup of chopped nuts (walnuts or pecans are amazing) to the topping. Or throw in some dried cranberries with the apples for a tart twist.
Need this vegan? Use coconut oil or a plant-based butter substitute instead of regular butter. Just make sure it’s cold!
FAQ (Frequently Asked Questions)
Do I really need to use cornstarch?
Unless you want apple soup with a side of oat islands, yes. Frozen apples release more liquid than fresh ones, so cornstarch is your thickening hero here.
Can I use a different fruit?
Absolutely! Frozen peaches, berries, or a mixed bag of frozen fruits work beautifully. Just adjust the sugar depending on how sweet the fruit naturally is.
My crisp topping isn’t, well, crispy. What went wrong?
You probably used warm butter or packed the topping down too firmly. Next time, keep that butter cold and sprinkle the topping loosely.
How do I store leftovers? As if there will be any…
Cover and refrigerate for up to 4 days. Reheat in the oven at 350°F for 15 minutes to crisp it back up, because microwaved crisp is just sad and soggy.
Can I make this ahead of time?
You can assemble it up to 24 hours in advance and keep it refrigerated until baking time. Just add 5-10 minutes to the baking time if you’re cooking it straight from the fridge.
Is this breakfast food or dessert?
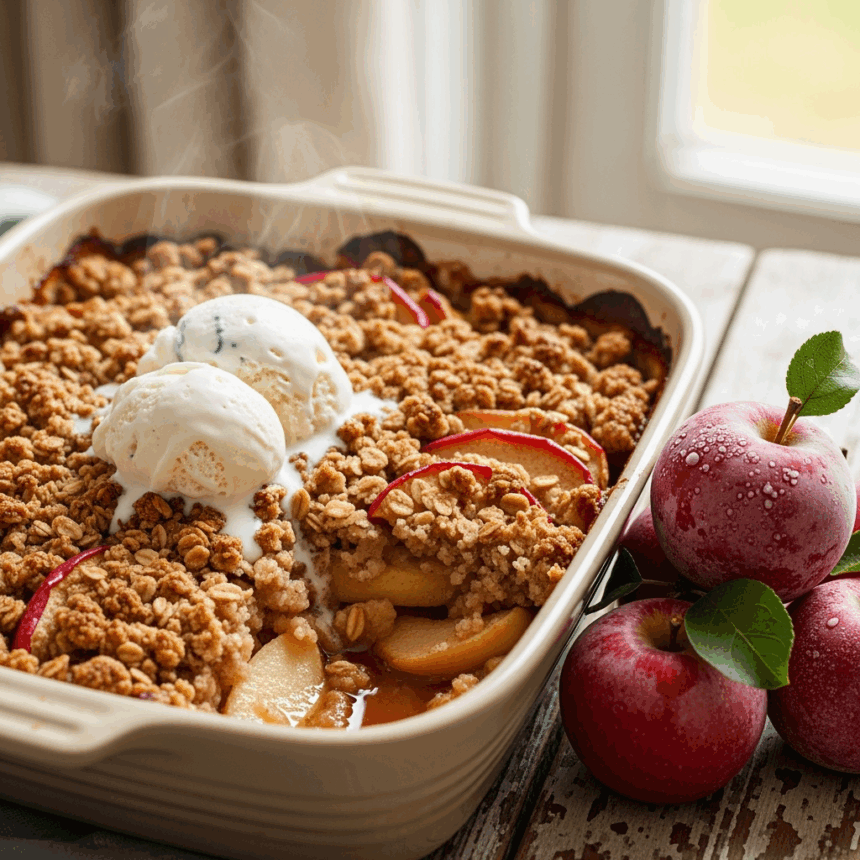
Yes. The answer is always yes. Add vanilla ice cream for dessert, or Greek yogurt for a “totally legitimate” breakfast. I won’t tell anyone.
Final Thoughts
There you have it—the lazy person’s guide to impressive apple crisp! No one needs to know you used frozen apples or that this took you basically no time to throw together. Take all the compliments, nod knowingly when people ask for your secret, and maybe mutter something about “family recipes” and “years of perfecting.”
The beauty of this dessert is that it’s practically impossible to mess up. Even if it doesn’t look Instagram-worthy, it’ll still taste amazing—especially with a scoop of vanilla ice cream melting on top. So go raid that freezer, rescue those forgotten apples, and transform them into the comfort food hero they were always destined to be!
