
Guess what’s about to happen in your kitchen? Magic. The kind that involves apples, cinnamon, and that irresistible crumbly topping that makes everyone think you’re some kind of culinary wizard. Truth is, this apple crisp recipe is basically foolproof—which is perfect for those of us who sometimes burn toast. The best part? It’s made in a 9×13 pan, so you’ll have plenty to share… or not. I don’t judge.
Why This Recipe is Awesome
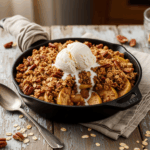
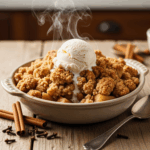
Let’s be real—this apple crisp is basically the sweatpants of desserts: comforting, reliable, and you don’t have to try too hard to make it work. It’s the dessert equivalent of “woke up like this” but actually impressive. The oat topping gets all golden and crispy while the apples underneath turn into this glorious, cinnamon-spiced situation that’ll make your kitchen smell better than any candle you’ve ever bought.
Plus, it’s a 9×13 recipe, which means it feeds a crowd or—more realistically—provides you with breakfast for several days. Because apple crisp absolutely counts as breakfast when there’s oats involved. That’s just science.
Ingredients You’ll Need
For the apple filling:
- 8-10 medium apples (Granny Smith or Honeycrisp work great, or whatever’s on sale, honestly)
- 3/4 cup granulated sugar (the white stuff)
- 2 tablespoons all-purpose flour (to thicken things up)
- 2 teaspoons cinnamon (more if you’re a cinnamon fiend like me)
- 1/4 teaspoon nutmeg (optional, but why wouldn’t you?)
- 2 tablespoons lemon juice (prevents browning and adds a little zing)
For the oat topping (the best part, let’s be honest):
- 2 cups old-fashioned oats (not the instant kind—they get weird)
- 1 1/2 cups all-purpose flour
- 1 cup brown sugar, packed (really get in there and pack it)
- 1/2 cup granulated sugar (because one type of sugar is never enough)
- 1 teaspoon cinnamon (again, feel free to go rogue here)
- 1/2 teaspoon salt (to make the sweet stuff pop)
- 1 cup (2 sticks) cold butter, cubed (the real deal, not that imposter margarine)
Step-by-Step Instructions
- Preheat your oven to 350°F (or 375°F if you’re impatient like me). Grab your 9×13 baking dish and give it a light spray with cooking oil. Nothing worse than having to chisel out dessert.
- Prep those apples. Peel, core, and slice them about 1/4 inch thick. If you have one of those fancy apple peeler-corer-slicer contraptions, now’s your moment to shine. If not, welcome to the arm workout portion of baking.
- Mix the filling. In a large bowl, toss your apple slices with sugar, flour, cinnamon, nutmeg, and lemon juice until they’re evenly coated. Dump this mixture into your prepared baking dish and spread it out evenly.
- Make the crumbly topping. In another bowl, combine the oats, flour, both sugars, cinnamon, and salt. Mix it up good. Then add the cold butter cubes and use a pastry cutter, two forks, or your fingers (get messy, live a little) to work the butter into the dry ingredients until you have pea-sized crumbles.
- Top those apples! Sprinkle the oat mixture evenly over the apples, covering them completely. Pat it down slightly but don’t compact it—we want that beautiful craggy texture.
- Bake until bubbly and golden. This takes about 45-50 minutes. You’ll know it’s done when the topping is golden brown and you can see the apple filling bubbling around the edges, basically begging to be eaten.
- Cool slightly before serving—about 15 minutes if you have self-control. Top with vanilla ice cream if you’re doing life right.
Common Mistakes to Avoid
Even though this recipe is harder to mess up than making a bowl of cereal, here are a few pitfalls to dodge:
- Skipping the lemon juice. Unless you enjoy the aesthetic of brown, oxidized apples, don’t skip this step.
- Using warm or melted butter for the topping. You’ll end up with a sad, flat layer instead of that crispy, crumbly goodness. Cold butter = texture magic.
- Slicing your apples too thick. Unless you enjoy the “still crunchy after an hour of baking” experience, keep those slices on the thinner side.
- Being stingy with the topping. This is not the time for restraint, people. If you find yourself with extra crumble, you’ve measured wrong. All of it goes on top. All. Of. It.
- Forgetting the ice cream. I mean, you can eat it without, but… why would you do that to yourself?
Alternatives & Substitutions
Life happens. Pantries aren’t always fully stocked. Here’s how to adapt:
- Apples: Any baking apple works. Granny Smith if you like it tart, Honeycrisp for sweetness, or mix and match for depth of flavor. In a pinch, pears work too (though that technically makes it a “pear crisp,” but whatever).
- Gluten-free? Swap the all-purpose flour for your favorite gluten-free blend and make sure your oats are certified GF.
- No brown sugar? Use all white sugar and add a tablespoon of molasses if you have it. Or just use all white sugar and accept that your topping will be slightly less complex in flavor (still delicious though).
- Vegan version: Substitute the butter with coconut oil or a plant-based butter. The texture will be slightly different, but TBH, it’s still gonna be great.
- Spice it up: Add cardamom, ginger, or allspice to the mix if you’re feeling fancy. Or a splash of vanilla extract. Go wild.
FAQ (Frequently Asked Questions)
Can I make this ahead of time?
Absolutely! Assemble it, cover with plastic wrap, and refrigerate for up to 24 hours before baking. You might need to add 5-10 minutes to the baking time if it’s coming straight from the fridge. Your future self will thank you.
Do I really need to peel the apples?
Technically no, but unless you enjoy random bits of papery apple skin in your dessert, I’d recommend it. Plus, it’s a great way to practice your knife skills… or lack thereof.
Can I freeze this?
You bet! Bake it, cool it completely, then wrap it tightly and freeze for up to 3 months. Thaw overnight in the fridge and reheat in a 350°F oven until warmed through. Future-you will be so impressed with past-you’s planning skills.
Why is my topping not crispy?
Did you pack it down too much? Did you use melted butter instead of cold? Are you baking in a rainforest? All potential causes. The topping should be loosely sprinkled, not compacted, and your oven needs to be properly preheated.
Can I reduce the sugar?
Sure, if you want to suck all the joy out of life. JK—you can reduce it by about 1/4 cup in both the filling and topping without major texture issues. More than that and you’re entering experimental territory. Godspeed.
Is this healthier than apple pie?
It has oats, so… yes? Let’s go with yes. Also, we’re not counting calories on dessert day. That’s just bad form.
Final Thoughts
Congratulations! You now possess the knowledge to create what might be the most universally beloved dessert in existence. This apple crisp is the kind of dessert that makes people think you’ve got your life together, even if your car is full of fast food wrappers and you can’t remember the last time you watered your plants.
The beauty of this 9×13 apple crisp is its versatility—serve it warm with ice cream for a decadent dessert, cold with coffee for breakfast (I won’t tell), or straight from the pan at midnight while standing in front of the open refrigerator (we’ve all been there).
Now go forth and bake! Your house is about to smell amazing, and you’re about to become everyone’s favorite person. Even if you’re just making it for yourself. Especially if you’re just making it for yourself.
