So, you’ve got those ridiculously ripe bananas staring at you from the counter, practically begging for a purpose beyond attracting fruit flies, right? And you’re craving something warm, sweet, and comforting, but also kinda want to chill on the couch with Netflix instead of doing a full baking marathon. My friend, you’ve come to the right place. We’re about to make banana bread so easy, it practically bakes itself. Well, almost.
Why This Recipe is Awesome
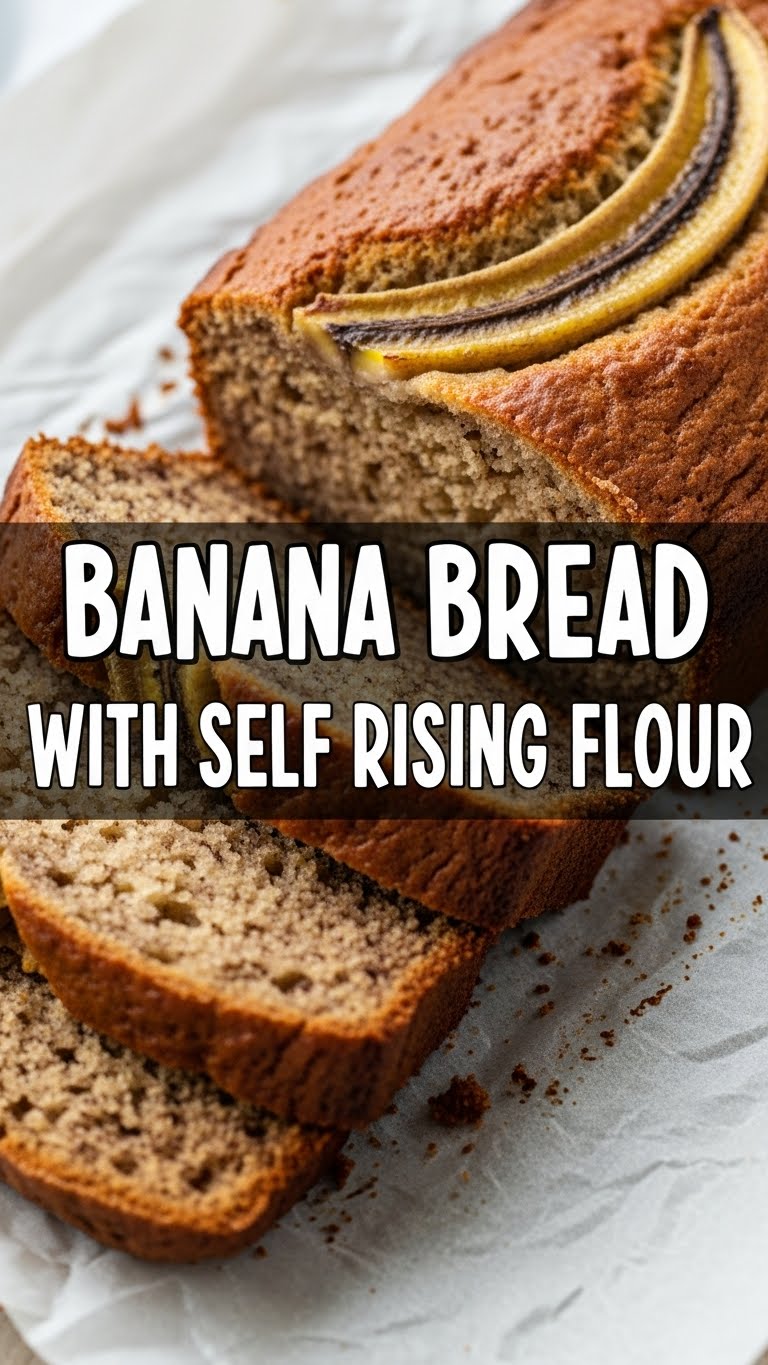
Okay, real talk. This isn’t just *any* banana bread. This is the **self-rising flour banana bread** recipe. What does that mean for your lazy-but-lovable self? It means you get to skip the whole ‘measure the baking soda, measure the baking powder, oh god did I put enough salt?’ dance. Self-rising flour has it all mixed in already. Less thinking, more eating. **It’s practically idiot-proof**, even I managed it on a Monday morning. Plus, it comes out moist, fluffy, and tastes like a warm hug. Who doesn’t need more of those?
Ingredients You’ll Need
Gather your troops! Don’t worry, it’s a small, mighty army.
- **Super Ripe Bananas (3-4 medium):** We’re talking brown spots, maybe even a few black patches. The uglier, the sweeter! Don’t you dare use yellow ones.
- **Self-Rising Flour (1 ½ cups):** The MVP of this whole operation. It’s got the leavening agent and salt already in there. *Mind blown*, right?
- **Granulated Sugar (½ cup):** Just enough sweetness without being cloying. If your bananas are practically syrup, you can even nudge this down a bit.
- **Unsalted Butter (½ cup or 1 stick), melted:** Because butter makes everything better. *Fact.*
- **Egg (1 large):** The binder, the unifier. Gives it structure and richness.
- **Vanilla Extract (1 teaspoon):** A little splash of magic. Don’t skip this, your taste buds will thank you.
- **Optional Add-ins (½ cup):** Chocolate chips, chopped walnuts, pecans, or whatever your heart desires.
Step-by-Step Instructions
Alright, apron on (or not, I won’t judge), let’s get baking!
- **Prep Your Oven & Pan:** First things first, **preheat your oven to 350°F (175°C)**. Then, grab a 9×5-inch loaf pan. Give it a good spray with non-stick cooking spray or grease it with butter and dust with flour. Trust me, you want this baby to slide out easily.
- **Mash Those Bananas:** In a medium bowl, peel your ripe bananas and mash them up with a fork. You want some lumps for texture, so don’t go full purée mode. Unless you like it that way, then you do you!
- **Wet Ingredients Unite:** To the mashed bananas, add the melted butter, sugar, egg, and vanilla extract. Stir everything together until it’s well combined and looks like a glorious, gooey mess.
- **Introduce the Flour:** Now, gently add the self-rising flour to your wet mixture. **Mix *just* until combined.** A few streaks of flour are totally fine. *Overmixing is the enemy of moist banana bread!*
- **Fold in the Goodies (Optional):** If you’re adding chocolate chips or nuts, now’s the time! Gently fold them into the batter.
- **Pour & Bake:** Pour your beautiful batter into the prepared loaf pan. Smooth out the top a little. Pop it into your preheated oven and bake for **50-60 minutes**.
- **Test for Doneness:** To check if it’s done, insert a toothpick into the center. If it comes out clean or with a few moist crumbs, you’re golden! If it’s still gooey, give it another 5-10 minutes.
- **Cool It Down:** Let the banana bread cool in the pan for about 10-15 minutes before transferring it to a wire rack to cool completely. Or, if you’re like me, slice into it while it’s still warm and slightly dangerous.
Common Mistakes to Avoid
Listen, we’ve all been there. Learn from my past kitchen mishaps!
- **Using Under-Ripe Bananas:** Seriously, don’t. They won’t give you the sweetness or moisture you crave. Brown is beautiful in this case.
- **Overmixing the Batter:** This is a biggie! Mixing too much develops the gluten, making your bread tough and dry. We want tender and moist, remember? **Mix *just* until combined.**
- **Forgetting to Grease the Pan:** Unless you enjoy chiseling your banana bread out of the pan in sad, crumbly pieces, grease it. Liberally.
- **Not Preheating the Oven:** Rookie mistake. A cold oven means uneven baking and a longer bake time. Patience, my friend, patience.
- **Cutting It Too Soon:** I know, I know, the smell is intoxicating. But giving it a few minutes to set up after baking makes for cleaner slices and prevents crumbling.
Alternatives & Substitutions
Feeling adventurous? Or just out of something? No stress.
- **No Self-Rising Flour?** Okay, this is the whole point of the recipe, but in a pinch, you *can* make your own! For every 1 cup of all-purpose flour, add 1 ½ teaspoons baking powder and ¼ teaspoon salt. So, for this recipe, you’d use 1 ½ cups all-purpose flour, 2 ¼ teaspoons baking powder, and ⅜ teaspoon salt. Boom!
- **Butter vs. Oil:** You can totally swap the melted butter for ½ cup of vegetable oil, canola oil, or even melted coconut oil. It’ll give it a slightly different texture, but still delicious.
- **Sweetener Swap:** Brown sugar instead of granulated sugar will add a deeper, molasses-y flavor. Go for it!
- **Add-ins Galore:** Get creative! Shredded coconut, a pinch of cinnamon or nutmeg, a tablespoon of cocoa powder for a chocolate banana bread twist. The world is your oyster… or, well, your banana bread.
FAQ (Frequently Asked Questions)
Alright, let’s tackle those burning questions before you even ask them.
- **Can I use frozen bananas?** Absolutely! Just thaw them first, and don’t drain the liquid—that’s extra flavor and moisture!
- **How do I store banana bread?** Keep it at room temperature in an airtight container for up to 3-4 days. For longer, wrap it tightly and freeze for up to 3 months. Slice it before freezing for easy grab-and-go portions!
- **My banana bread is dry, what happened?** Chances are, you overmixed the batter or overbaked it. Keep an eye on that toothpick test!
- **Why isn’t my banana bread rising properly?** If you used self-rising flour, it might be expired (yes, flour expires!). Or if you made your own, maybe the baking powder wasn’t fresh. Freshness matters!
- **Can I add more sugar?** You *can*, but bananas are already quite sweet. I wouldn’t go beyond ¾ cup unless you like it super sweet. Less is often more, IMO.
- **What if I only have two ripe bananas?** You can still make it! It might be a little less “banana-y” but still totally edible. Or, wait until you have three. Patience, young padawan.
Final Thoughts
Phew! You did it! See? Easy peasy, banana squeezy (I had to). Now you’ve got this glorious, fragrant loaf of homemade goodness sitting on your counter, ready to be devoured. Slice it up for breakfast, a snack, or just because it’s Tuesday and you deserve it. Go on, **pat yourself on the back**—you just whipped up something truly delicious with minimal fuss. Now go impress someone—or yourself—with your new culinary skills. You’ve earned it!

