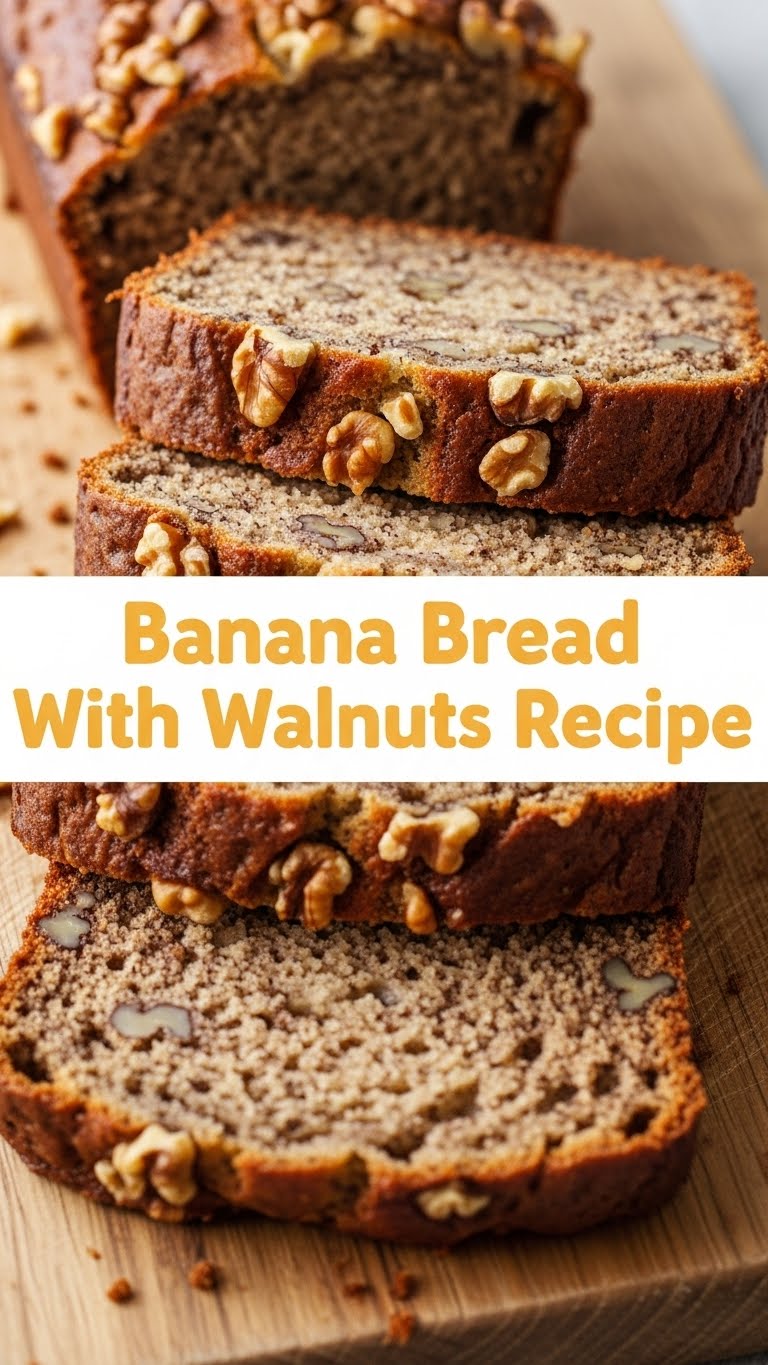
So, you’ve got those suspiciously brown bananas staring at you from the counter, practically begging for a delicious transformation, huh? And let’s be real, you want something *amazing* but also something that doesn’t require a culinary degree or a full day of slaving away. Good news, my friend! You’ve landed in the perfect spot. We’re about to make some seriously good banana bread with walnuts that’ll have your kitchen smelling like a warm hug and your tastebuds doing a happy dance. No fuss, just pure, carby joy.
Why This Recipe is Awesome
Because it’s not just banana bread; it’s a **comfort food superhero** in loaf form. Seriously, this isn’t one of those fussy recipes that makes you question your life choices. This is the “dump, mix, bake, and impress everyone” kind of deal. It’s practically idiot-proof, even for those of us who occasionally burn water (no judgment!). Plus, the walnuts add that *chef’s kiss* crunch and earthy flavor that elevates it from “good” to “I need another slice, immediately.” It’s also a fantastic way to use up those ripe bananas before they stage a full-blown rebellion on your fruit bowl. Win-win-win, if you ask me!
Ingredients You’ll Need
Alright, gather your troops! Most of these are probably already lurking in your pantry, ready for their moment in the spotlight.
- 3-4 Overripe Bananas: The browner, the better! We’re talking mottled, spotty, practically black. Don’t be scared, they’re just getting sweeter for you.
- 1/2 Cup Unsalted Butter: Melted and cooled. Because butter makes everything better, duh.
- 1 Large Egg: Room temp, if you’re feeling fancy, but straight from the fridge is usually fine too. It’s the binder of dreams.
- 1 Teaspoon Vanilla Extract: The secret weapon for making everything taste like a warm hug. Don’t skimp!
- 1 1/2 Cups All-Purpose Flour: The structural integrity of our delicious endeavor.
- 1 Teaspoon Baking Soda: Our lift-off agent! Makes it fluffy, not flat.
- 1/2 Teaspoon Salt: Balances all that sweet goodness. Don’t skip it!
- 1/2 Cup Granulated Sugar: Sweetness for the soul.
- 1/2 Cup Brown Sugar (packed): Adds that extra molasses-y depth and moisture. YUM.
- 1 Cup Chopped Walnuts: The star crunch. Feel free to give them a rough chop; perfection is overrated here.
Step-by-Step Instructions
- Preheat & Prep: First things first, get that oven fired up to 350°F (175°C). Then, grease a 9×5 inch loaf pan. A little butter or cooking spray works wonders. You don’t want your masterpiece getting stuck!
- Mash ‘Em Up: In a large bowl, mash those sad-looking bananas with a fork until they’re mostly smooth but still have a few small lumps. We’re not making baby food here; a little texture is good.
- Wet Ingredients Party: Pour the melted and cooled butter into the mashed bananas. Crack in your egg and add the vanilla extract. Give it a good stir until everything is nicely combined.
- Dry Ingredients Unite: In a separate, medium-sized bowl, whisk together the flour, baking soda, salt, granulated sugar, and brown sugar. Make sure there are no lumpy bits of brown sugar hiding!
- Combine Forces: Add the dry ingredients to the wet ingredients. Mix gently with a spatula or wooden spoon **just until combined**. A few streaks of flour are totally okay; **overmixing is the enemy of moist banana bread!**
- Walnut Wonderland: Gently fold in your chopped walnuts. They’re going to add that lovely crunch and nutty flavor we crave.
- Into the Pan: Pour the batter evenly into your prepared loaf pan. Give the pan a gentle tap or two on the counter to settle the batter and release any air bubbles.
- Bake It ‘Til Golden: Pop that pan into your preheated oven and bake for about 50-65 minutes. Every oven is a unique snowflake, so start checking around the 50-minute mark. You’ll know it’s done when a wooden skewer or toothpick inserted into the center comes out clean (or with just a few moist crumbs, but no wet batter).
- Cool Down, Buttercup: Once baked, let your banana bread cool in the pan for about 10-15 minutes. This helps it firm up. Then, carefully remove it from the pan and let it finish cooling completely on a wire rack. Or, if you’re like me, slice into it while it’s still warm and gooey. 😉
Common Mistakes to Avoid
Listen up, buttercup! Even the simplest recipes have their pitfalls. Don’t fall prey to these rookie blunders:
- Underripe Bananas: Using yellow bananas with green tips? What are you even doing? They won’t be sweet enough, and your bread will lack that signature banana-y goodness. **Embrace the brown!**
- Overmixing the Batter: I know, I know, it’s tempting to get every lump out. But seriously, **stop mixing as soon as the flour disappears.** Overmixing develops gluten, leading to tough, chewy bread instead of light, tender deliciousness.
- Not Preheating Your Oven: Thinking you can just shove it in and let the oven catch up? Nah, fam. A properly preheated oven ensures even baking from the start. Rookie mistake!
- Overbaking: Dry banana bread is a sad banana bread. Keep an eye on it. As soon as that toothpick comes out clean, take it out! A little underdone is usually better than overdone.
- Eating It All In One Sitting: Okay, maybe not a *mistake* for your tastebuds, but perhaps for your waistband. Pace yourself (or don’t, I’m not your mom).
Alternatives & Substitutions
Feeling adventurous? Or maybe you’re just out of something crucial. No stress, we can totally adapt!
- Nut Swap: Not a walnut fan? No problem! Pecans are a fantastic substitute. Or, if you’re feeling wild, try a mix of different nuts.
- Chocolate FTW: Add a cup of chocolate chips (milk, semi-sweet, dark—your choice!) along with or instead of the walnuts. Banana and chocolate are besties, trust me.
- Spice It Up: A pinch of cinnamon, nutmeg, or even a tiny bit of allspice can add another layer of warmth. Start with 1/2 teaspoon and adjust to your liking.
- Gluten-Free: For my GF pals, a 1:1 gluten-free all-purpose flour blend usually works wonderfully in this recipe. Just make sure it contains xanthan gum!
- Dairy-Free: Swap out the butter for an equal amount of melted coconut oil or a dairy-free butter substitute.
- Less Sugar: If your bananas are *super* ripe, you can probably reduce the sugar by 1/4 cup without much issue. Taste the batter (before adding egg if you’re worried about raw egg, but a tiny bit is generally fine!).
FAQ (Frequently Asked Questions)
- Can I use margarine instead of butter? Well, technically yes, but why hurt your soul like that? Butter just tastes better, IMO. But if that’s all you’ve got, go for it.
- How ripe do my bananas *really* need to be? The riper, the better! We’re talking brown spots galore, almost entirely black peel. If they’re still yellow, they’re not ready for their destiny. They provide sweetness and moisture.
- My banana bread came out dry. What went wrong? Oh no! Most likely culprit: overbaking. Keep a closer eye on it next time. Also, overmixing can lead to a tougher texture.
- Can I freeze banana bread? Absolutely! Let it cool completely, then wrap it tightly in plastic wrap and then foil. It’ll last for up to 3-4 months in the freezer. Just thaw it on the counter when you’re ready for a treat.
- What if I don’t have a loaf pan? You can use a muffin tin! Adjust baking time down to about 20-25 minutes, or until a toothpick comes out clean. Mini banana bread muffins are super cute.
- Why did my banana bread sink in the middle? Could be a few things: overmixing the batter (again!), too much leavening (baking soda), or opening the oven door too early causing a sudden temperature drop. Ensure your baking soda isn’t expired too!
- Can I add other fruits? Go for it! Berries or chopped apples can be delicious additions. Just be mindful that extra moisture might slightly increase baking time.
Final Thoughts
And there you have it, my friend! A ridiculously easy, unbelievably delicious, and totally satisfying banana bread with walnuts recipe. You’ve now mastered the art of transforming sad, spotty bananas into a golden loaf of pure happiness. Go ahead, bask in the glory! Share it with friends, hoard it all for yourself (no judgment here!), or just enjoy a warm slice with your favorite cuppa. You’ve earned those bragging rights. Now go impress someone—or yourself—with your new culinary skills. Happy baking!

