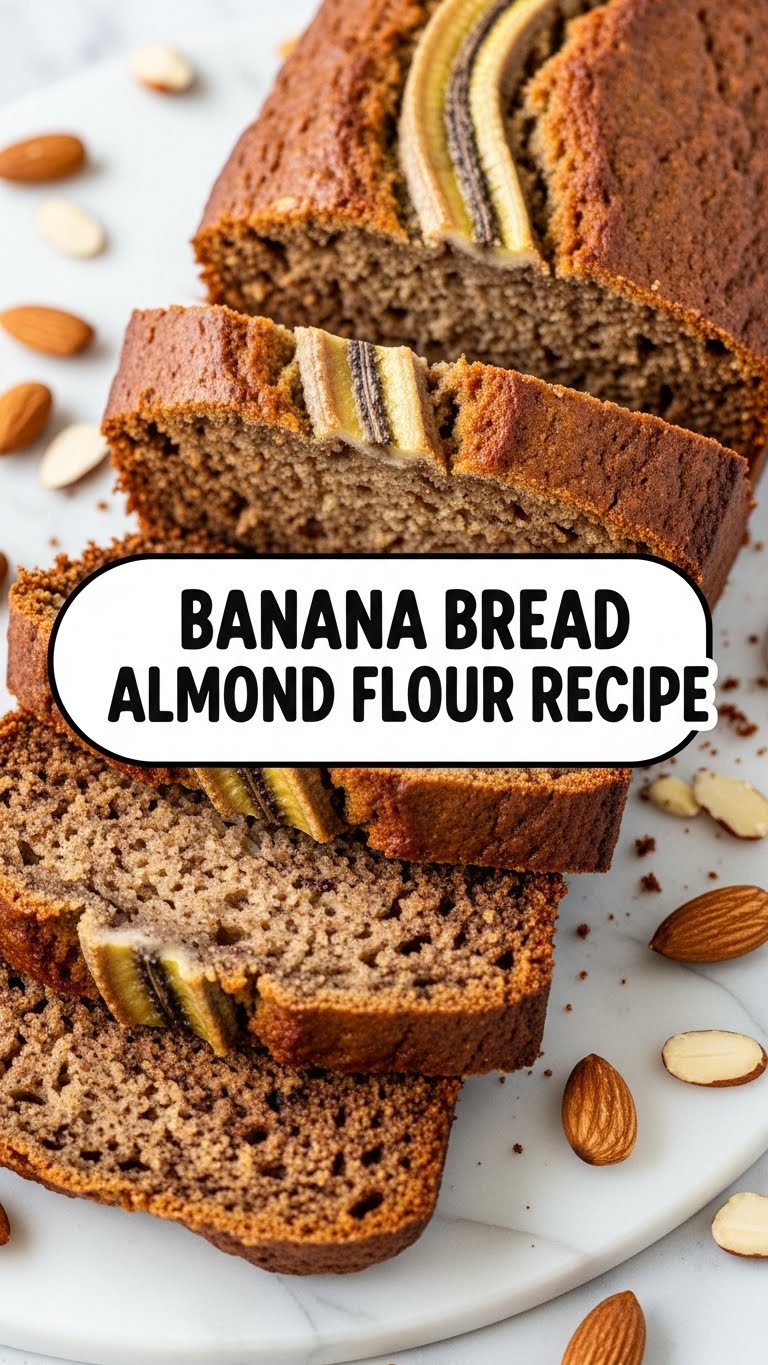
So you’re craving something warm, comforting, and just a *little* bit healthy (ish) but the thought of a complicated recipe makes your brain fuzz over? Yeah, me too. We’ve all been there, staring blankly at overripe bananas on the counter, thinking, “Banana bread time!” but then remembering that whole wheat flour thing and suddenly it feels like a chore. Well, my friend, put those worries aside, because today we’re making Banana Bread with Almond Flour – and it’s so ridiculously easy, you’ll wonder why you ever bothered with anything else. Get ready for some serious deliciousness without the drama!
Why This Recipe is Awesome
Let’s be real, most recipes promise the moon and deliver… well, a slightly deflated balloon. Not this one! This banana bread almond flour recipe is basically **idiot-proof**. Seriously, even I, someone who once mistook baking soda for salt (don’t ask), have managed to conquer this. It’s naturally gluten-friendly (hello, almond flour!), delightfully moist, and packed with that sweet banana goodness you crave. Plus, it comes together quicker than you can say “where did I put my measuring spoons?” (Don’t worry, we’ve all lost them.) It’s perfect for breakfast, a snack, or even a sneaky dessert. Your future self will thank you.
Ingredients You’ll Need
Gather your troops! Here’s what you’ll need to make this magic happen:
- 3 Ripe Bananas: The spottier, the better! Don’t even *think* about using yellow ones. These are your flavor powerhouses.
- 2 ½ cups Blanched Almond Flour: It’s the superstar of our show, giving us that lovely texture without the gluten fuss.
- 3 Large Eggs: Room temp if you can remember, but honestly, it’s not the end of the world if they’re not.
- ⅓ cup Melted Coconut Oil or Unsalted Butter: Either works! Choose your fighter for ultimate moistness.
- ½ cup Sweetener of Choice: Maple syrup, honey, or a granulated sugar alternative like erythritol if you’re watching carbs. Don’t go wild, the bananas add a lot of sweetness.
- 1 tsp Baking Soda: Our lift-off secret.
- ½ tsp Salt: Don’t skip this! It balances the sweetness like a pro.
- 1 tsp Vanilla Extract: Because everything’s better with vanilla.
- 1 tsp Cinnamon (Optional but highly recommended): Adds a warm hug to every slice.
- ½ cup Chocolate Chips or Chopped Nuts (Optional): For when you’re feeling extra fancy (or just want more chocolate, no judgment).
Step-by-Step Instructions
Alright, let’s get down to business! Follow these super simple steps:
- Preheat & Prep: First things first, preheat your oven to **350°F (175°C)**. Grease and lightly flour (with a bit more almond flour, of course!) a 9×5 inch loaf pan. You can also line it with parchment paper for easy removal. Future you will *really* thank past you for this.
- Mash ‘Em Up: In a large bowl, mash those gloriously ripe bananas until they’re mostly smooth with a few yummy chunks remaining. Don’t overthink it.
- Wet Ingredients Party: To the mashed bananas, add the eggs, melted coconut oil (or butter), sweetener, and vanilla extract. Whisk it all together until it’s just combined. We’re not aiming for perfection here, just happy co-mingling.
- Dry Ingredients Dance: In a separate medium bowl, whisk together the almond flour, baking soda, salt, and cinnamon (if using). Make sure there are no lumpy bits!
- Combine & Conquer: Pour the dry ingredients into the wet ingredients. Mix gently with a spatula until *just* combined. **Do not overmix!** A few streaks of flour are totally fine. If you’re adding chocolate chips or nuts, fold them in now.
- Into the Pan: Pour the batter into your prepared loaf pan and smooth the top. You can even sprinkle a few extra chocolate chips on top for maximum visual appeal (and chocolate dispersal).
- Bake It Up: Pop it into the preheated oven and bake for **45-55 minutes**. Start checking at 45 minutes. It’s done when a wooden skewer or toothpick inserted into the center comes out clean. If the top starts browning too quickly, you can loosely tent it with foil.
- Cool Down: Once baked, let it cool in the pan for about 10-15 minutes before carefully transferring it to a wire rack to cool completely. **Resist the urge to cut into it immediately!** It needs time to set. Trust me on this one.
Common Mistakes to Avoid
We’ve all made them, but let’s try not to repeat history, shall we?
- Under-ripe Bananas: Using yellow bananas is like trying to make coffee with decaf beans. It just won’t have that punch. **Go for the brown, spotty ones.** They’re sweeter and easier to mash.
- Overmixing: You’re not making cement, you’re making bread! Overmixing can lead to a dense, tough loaf. Mix until *just* combined.
- Not Preheating the Oven: Rookie mistake! Your oven needs to be at the correct temperature from the get-go for even baking and proper rising.
- Impatience: Cutting into the loaf while it’s still hot is tempting, but it will likely crumble and be difficult to slice. **Let it cool completely!** Your patience will be rewarded.
- Forgetting the Salt: It sounds counterintuitive in a sweet recipe, but salt is crucial for balancing flavors and making everything taste *more* banana-y and delicious. Don’t skip it!
Alternatives & Substitutions
Feeling creative? Here are some tweaks you can make:
- Sweeteners: Not a maple syrup fan? Use brown sugar, coconut sugar, or even stevia (adjusting to taste, obviously). Just be mindful of the liquid content if you swap out a wet sweetener for a dry one.
- Fats: If coconut oil or butter isn’t your jam, olive oil or avocado oil can also work! Just use something with a relatively neutral flavor.
- Add-ins: Go wild! Walnuts, pecans, chopped dates, dried cranberries, or even a swirl of nut butter. Anything goes, as long as it makes you happy. **Pro tip:** Toss your chocolate chips or nuts with a tiny bit of almond flour before adding them to the batter to prevent them from sinking to the bottom. You’re welcome!
- Spices: A pinch of nutmeg or a dash of allspice can really elevate the flavor profile. Get spicy!
FAQ (Frequently Asked Questions)
Got questions? I’ve got (casual) answers!
- “Can I use less sugar/sweetener?” Absolutely! The riper the bananas, the sweeter they are, so feel free to reduce the sweetener by a quarter or even a third if you like a less sweet bread. Taste your mashed banana mixture (before adding eggs, obviously!) if you’re unsure.
- “My banana bread is too dense, what went wrong?” Chances are you either overmixed the batter, used under-ripe bananas, or your baking soda isn’t fresh. **FYI, baking soda loses its oomph over time!** Test it by mixing a little with vinegar; if it fizzes, you’re good.
- “Can I freeze this banana bread?” Absolutely! Wrap individual slices or the whole loaf tightly in plastic wrap, then foil, and freeze for up to 3 months. Thaw on the counter or warm gently in the microwave or oven. It’s perfect for meal prep!
- “What kind of almond flour should I use?” Always use blanched almond flour for baking, not almond meal. Almond meal is coarser and still has the skins, which will give your bread a different (and often denser) texture.
- “Can I add protein powder to this?” You *can*, but be cautious. Protein powder can absorb a lot of liquid and make baked goods dry. If you want to try, start with a small amount (1-2 tablespoons) and be prepared to add a splash more milk or water to maintain consistency. **IMO, it’s best enjoyed as is!**
- “How long does it last?” On the counter, covered, for about 3-5 days. In the fridge, it’ll stretch a bit longer, maybe 5-7 days. But let’s be real, it probably won’t last that long! 😉
Final Thoughts
There you have it! A banana bread almond flour recipe that’s so easy, delicious, and forgiving, it might just become your new go-to. It’s perfect for those lazy Sunday mornings or when you just need a little sweet pick-me-up. So go on, embrace those spotty bananas, get baking, and then bask in the glory of your own culinary genius. Now go impress someone—or yourself—with your new skills. You’ve earned it! Enjoy!

