Ever had one of those days where you’re craving something warm, sweet, and cinnamon-y but the thought of peeling a mountain of apples makes you want to curl up in the fetal position? Been there! That’s exactly why this shortcut apple crisp recipe is about to become your new best friend. It’s got all the cozy vibes of grandma’s kitchen but with a fraction of the effort—because sometimes we deserve dessert without the drama.
Why This Recipe is Awesome
Look, I’m not saying this apple crisp will change your life, but it might just change your baking game forever. First off, it uses canned apple pie filling, which means zero peeling, zero coring, and zero of those weird brown apple oxidation stains on your cutting board. Second, it takes literally 10 minutes to throw together before it goes in the oven. Third, that oat topping gets so perfectly crispy-crunchy that you’ll be “taste-testing” it straight from the pan while it’s cooling. Don’t pretend you’re above that—we’ve all been there.
Ingredients You’ll Need
- 2 cans (21 oz each) of apple pie filling (because life’s too short to peel apples)
- 1 cup old-fashioned oats (not the instant kind—they’ll turn to mush)
- 1 cup all-purpose flour (the most forgiving flour in existence)
- 1 cup brown sugar, packed (don’t skimp—this isn’t the time for your health kick)
- 1 teaspoon cinnamon (or more if you’re a cinnamon fiend like me)
- ½ teaspoon nutmeg (optional, but highly recommended for that “what’s that amazing flavor?” effect)
- ¼ teaspoon salt (to make the sweet stuff taste sweeter—science!)
- ½ cup cold butter, cubed (cold is key, folks—don’t mess this up)
- Vanilla ice cream for serving (not technically in the recipe but let’s be real, it’s mandatory)
Step-by-Step Instructions
- Preheat your oven to 350°F (177°C). Yes, you actually need to preheat. No, your oven isn’t special and doesn’t heat up instantly.
- Grab a 9×13 baking dish and spray it with non-stick spray. Or butter it if you’re feeling fancy.
- Open those cans of apple pie filling and spread them evenly in the dish. If you want to get creative, sprinkle a little extra cinnamon on top of the filling. Live dangerously!
- In a medium bowl, combine the oats, flour, brown sugar, cinnamon, nutmeg, and salt. Mix it up real good.
- Add your cold butter cubes to the dry mixture. Now get your hands dirty! Use your fingers to work the butter into the mixture until it resembles coarse crumbs. Think pea-sized pieces, not sand. The colder your hands are, the better this works—run them under cold water first if you’re one of those people with perpetually warm hands.
- Sprinkle this magnificent crumbly topping all over your apple filling. Make it rain, people!
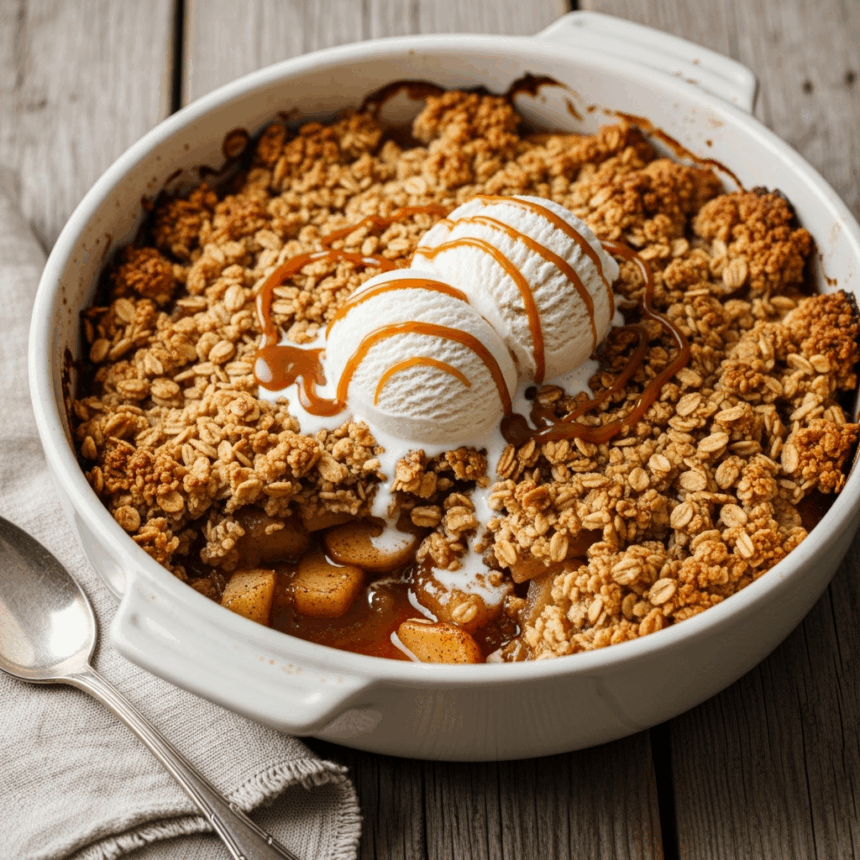
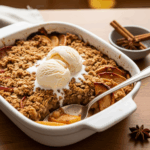
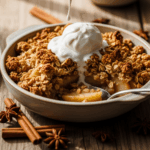
- Bake for 35-40 minutes until the top is golden brown and you can see the filling bubbling around the edges like delicious apple lava.
- Let it cool for at least 15 minutes before serving. I know waiting is torture, but molten apple filling burns are no joke.
- Scoop into bowls and top with vanilla ice cream that will melt into all the nooks and crannies of your crisp. Heaven!
Common Mistakes to Avoid
Let’s talk about how not to mess up this nearly foolproof recipe:
- Using warm butter in your topping. This isn’t a chocolate chip cookie recipe. Cold butter = crispy topping. Room temperature butter = sad, soggy topping.
- Skipping the preheating step. Your oven needs time to warm up, just like you need coffee before talking to people in the morning.
- Overworking the crumble mixture. You’re making crisp topping, not pie dough. Once it looks like crumbs, stop touching it!
- Diving in too soon after baking. I know it smells amazing, but that filling is basically culinary napalm when it first comes out of the oven.
- Not having ice cream on hand. This is just poor planning and you know it.
Alternatives & Substitutions
Need to switch things up? I gotchu:
- Use peach pie filling instead of apple. Equally delicious, equally lazy.
- Gluten-free? Swap the all-purpose flour for almond flour or your favorite gluten-free blend.
- No brown sugar? White sugar works, but add a tablespoon of molasses if you have it. Otherwise, just accept that your crisp will be slightly less caramel-y (still good though).
- Add a handful of chopped nuts to the topping. Walnuts, pecans, or almonds all bring a nice crunch factor.
- Feeling fancy? Add a splash of bourbon to your apple filling. I won’t tell anyone.
- IMO, a handful of dried cranberries mixed into the apple filling takes this to a whole new level of awesome.
FAQ (Frequently Asked Questions)
Can I make this ahead of time?
Absolutely! Assemble it, cover with plastic wrap, and refrigerate for up to 24 hours before baking. Just add about 5-10 minutes to the baking time if you’re cooking it cold.
How do I store leftovers? As if there will be any…
Cover with foil or transfer to an airtight container and refrigerate for up to 3 days. Reheat in the microwave for that just-baked vibe, or eat it cold from the fridge at midnight like a normal person.
Can I freeze this?
You sure can! Freeze the whole unbaked crisp for up to 3 months. Thaw overnight in the fridge before baking, or bake from frozen, adding about 15-20 extra minutes to the cooking time.
Can I reduce the sugar to make it healthier?
Look, you’re already using canned pie filling which isn’t exactly a health food. But yes, you could reduce the brown sugar to 3/4 cup without causing a dessert disaster.
Can I use quick oats instead of old-fashioned?
Technically yes, but your topping won’t have the same hearty texture. It’s kind of like substituting a handwritten letter with a text message—it gets the job done, but something special is lost.
Why is my topping not crispy?
Did you use melted butter instead of cold? Did you process the mixture until it was paste-like instead of crumbly? These are the usual suspects. Also, patience—it actually gets crispier as it cools a bit.
Final Thoughts
There you have it—apple crisp that tastes like you slaved over it all day but actually required less effort than ordering takeout. The beauty of this recipe is that it’s simple enough for baking novices but tasty enough to impress your mother-in-law (and we all know how hard that is). Whether you’re making this for a cozy night in or bringing dessert to a dinner party, this apple crisp has your back. Now go forth and bake! Your future self—hovering over the pan with a spoon—will thank you.
