So you’ve got those sad, spotty bananas sitting on your counter, practically begging for purpose, and a jar of sourdough discard giving you the side-eye? Welcome to the club! You’re clearly a person of refined tastes who also appreciates not wasting good… *stuff*. Let’s turn that potential food waste into pure, unadulterated comfort.
Why This Recipe is Awesome
This recipe isn’t just “good,” it’s a *life upgrade*. Seriously. It’s so forgiving, you could probably bake it blindfolded after a few sips of wine (not that I recommend that, *ahem*). The sourdough discard adds this incredible tang and moisture without making it taste like, well, sourdough. It just elevates the whole banana bread experience, making it less “meh” and more “OMG, I made this?!” Plus, it’s a brilliant way to use up that discard without feeling guilty. Zero waste, maximum deliciousness. You’re practically a culinary superhero.
Ingredients You’ll Need
Alright, gather your troops! Most of this stuff is probably already lurking in your pantry, no fancy trips to the artisanal-unicorn-dust store required.
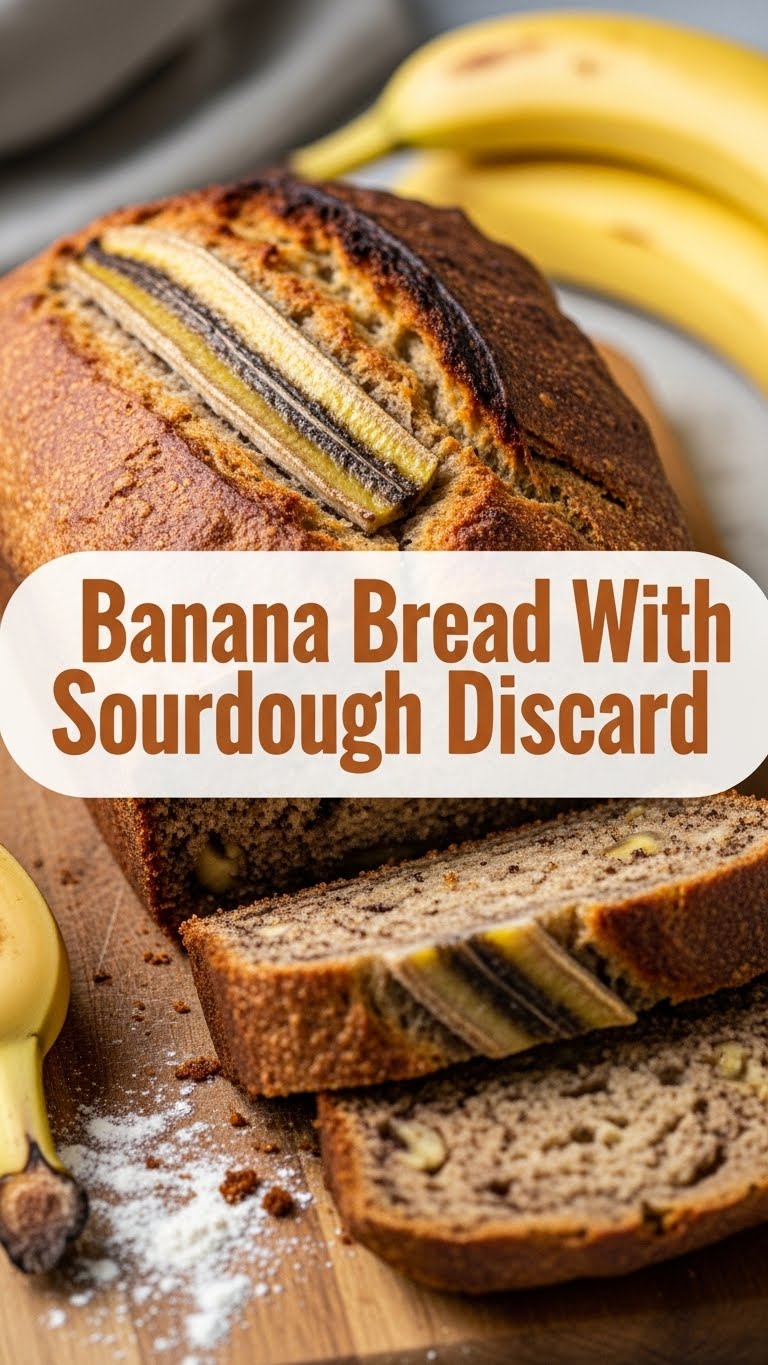
- The Bananas: 3-4 ripe ones. We’re talking brown, spotty, practically black. The sadder they look, the sweeter your bread will be. Don’t you dare touch a yellow one for this!
- Sourdough Discard: 1 cup. Straight from the fridge, cold or room temp, it really doesn’t care. Just make sure it’s unfed.
- All-Purpose Flour: 1 ½ cups. The good old reliable.
- Granulated Sugar: ½ cup (or up to ¾ cup if your sweet tooth is extra demanding). It’s bread, not a diet, right?
- Brown Sugar: ¼ cup, packed. Adds that molasses-y depth that just screams comfort.
- Eggs: 2 large. Room temp if you’re feeling fancy, but straight from the fridge works too. We’re not scientists here.
- Unsalted Butter: ½ cup (1 stick), melted and cooled a bit. Because butter makes everything better, period.
- Baking Soda: 1 teaspoon. Our little leavening friend.
- Salt: ½ teaspoon. Balances out all that sweetness. Don’t skip it!
- Vanilla Extract: 1 teaspoon. A hug in a bottle.
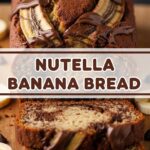
- Optional Fun Stuff: ½ cup chocolate chips, chopped walnuts, pecans, or a sprinkle of cinnamon. Go wild, it’s your party!
Step-by-Step Instructions
Ready? Set? Bake! This is going to be easier than convincing your kids to eat ice cream.
- Prep Time! Preheat your oven to 350°F (175°C). Grab a 9×5-inch loaf pan and either grease it or line it with parchment paper, leaving a little overhang on the sides. Trust me, the overhang makes extraction a breeze.
- Mash Those Bananas: In a large bowl, mash your super-ripe bananas with a fork until they’re chunky, not puréed. A few lumps are totally fine; they add character!
- Wet Ingredients Unite: Add the sourdough discard, melted butter, eggs, granulated sugar, brown sugar, and vanilla extract to the mashed bananas. Whisk it all together until just combined. Don’t overmix, or your bread will get tough – nobody wants tough bread.
- Dry Ingredients Dance: In a separate medium bowl, whisk together the flour, baking soda, and salt. Make sure there are no clumps of baking soda lurking around.
- Combine Gently: Pour the dry ingredients into the wet ingredients. Mix with a spatula or wooden spoon *just until no dry streaks remain*. This is key: Do NOT overmix! If you’re adding any optional goodies like chocolate chips or nuts, fold them in now.
- Pan It Up: Scrape the batter into your prepared loaf pan. Smooth the top with your spatula.
- Bake It Baby! Pop it into your preheated oven and bake for 55-70 minutes. The exact time depends on your oven and the moisture in your bananas.
- Check for Doneness: You’ll know it’s ready when a toothpick inserted into the center comes out clean or with just a few moist crumbs attached. If the top starts browning too quickly, you can loosely tent it with foil.
- Cool Down: Let your beautiful banana bread cool in the pan for about 10-15 minutes before carefully lifting it out onto a wire rack to cool completely. Or, if you’re like me, slice into it while it’s still warm and gooey. Warm banana bread is superior, IMO.
Common Mistakes to Avoid
We’ve all been there, staring at a culinary disaster thinking, “What went wrong?!” Learn from my (and others’) mistakes!
- Using Under-Ripe Bananas: This is perhaps the biggest sin. Green or yellow bananas lack the sweetness and moisture needed for truly epic banana bread. Wait for those spots!
- Overmixing the Batter: I can’t stress this enough! Overmixing develops gluten, which leads to a dense, rubbery loaf instead of a tender, moist one. Mix *just* until combined.
- Not Preheating Your Oven: Rookie mistake! A properly preheated oven ensures even baking and the correct rise. Don’t rush it.
- Impatience: Pulling it out too early! It might look done on the outside, but the center could still be gooey (and not in a good way). Always do the toothpick test.
- Forgetting the Salt: It seems counterintuitive in a sweet bread, but salt is crucial for balancing flavors and making the sweetness pop. Don’t skip it!
Alternatives & Substitutions
Feeling adventurous or just missing an ingredient? No stress!
- Flour Power: You can totally swap out some of the all-purpose flour for whole wheat flour if you’re feeling a bit healthier (maybe up to half). Just know the texture might be slightly denser.
- Sweetener Swaps: Instead of granulated sugar, you could use coconut sugar for a slightly different flavor profile. Maple syrup or honey could work too, but you might need to adjust the wet ingredients slightly to account for the extra liquid. Stick to the sugar for simplicity, though!
- Fat Facts: Ran out of butter? Vegetable oil or melted coconut oil can be used instead. They’ll give you a slightly different crumb, but still delicious.
- Spice It Up: A pinch of nutmeg, cardamom, or even a dash of pumpkin pie spice blend can add another layer of flavor. Cinnamon is always a winner!
- Add-ins Galore: Chocolate chips and nuts are just the beginning! Shredded coconut, dried cranberries, chopped dates, or even a spoonful of peanut butter swirled in can take this bread to new heights.
FAQ (Frequently Asked Questions)
Let’s tackle those burning questions, shall we?
- “Can I use fed sourdough starter instead of discard?” Technically, yes, but the texture and rise might be a bit different, and the tang will be more pronounced. This recipe specifically shines with unfed discard for its unique flavor contribution without overpowering the banana. Stick to discard for the best results here!
- “My bananas aren’t super ripe. Can I still use them?” You *can*, but your bread won’t be as sweet or moist. If you’re desperate, you can ripen them quickly by baking them on a baking sheet at 300°F (150°C) for 15-30 minutes until soft and dark. It’s a cheat, but it works!
- “How do I store this deliciousness?” Once completely cooled (if you can wait that long), wrap it tightly in plastic wrap or store it in an airtight container at room temperature for up to 3 days. For longer storage, slice it, wrap individual slices, and freeze for up to 3 months. Just thaw and enjoy!
- “Can I make this into muffins?” Absolutely! Divide the batter into a greased muffin tin (makes about 12-16 muffins) and bake for 20-25 minutes. Keep an eye on them, though, as muffin ovens can vary!
- “Is it really that much better with sourdough discard?” Oh, my friend, yes! The discard adds a subtle tang, incredible moisture, and a depth of flavor you just don’t get with regular banana bread. It’s like banana bread went to finishing school. Trust me on this one.
- “What if I don’t have brown sugar?” You can use all granulated sugar, but you’ll miss out on that lovely molasses note. You can also make your own brown sugar by mixing 1 cup granulated sugar with 1 tablespoon molasses. Problem solved!
Final Thoughts
Alright, you’ve done it! You’ve navigated the tricky waters of sourdough discard and emerged victorious with a loaf of banana bread that will make your taste buds sing. Whether you share it (highly recommended, builds good karma) or hoard it all to yourself (no judgment here, we’ve all done it), know that you’ve transformed some humble ingredients into something truly special. Now go impress someone—or yourself—with your new culinary skills. You’ve earned it! Seriously, go make another one. You know you want to.

