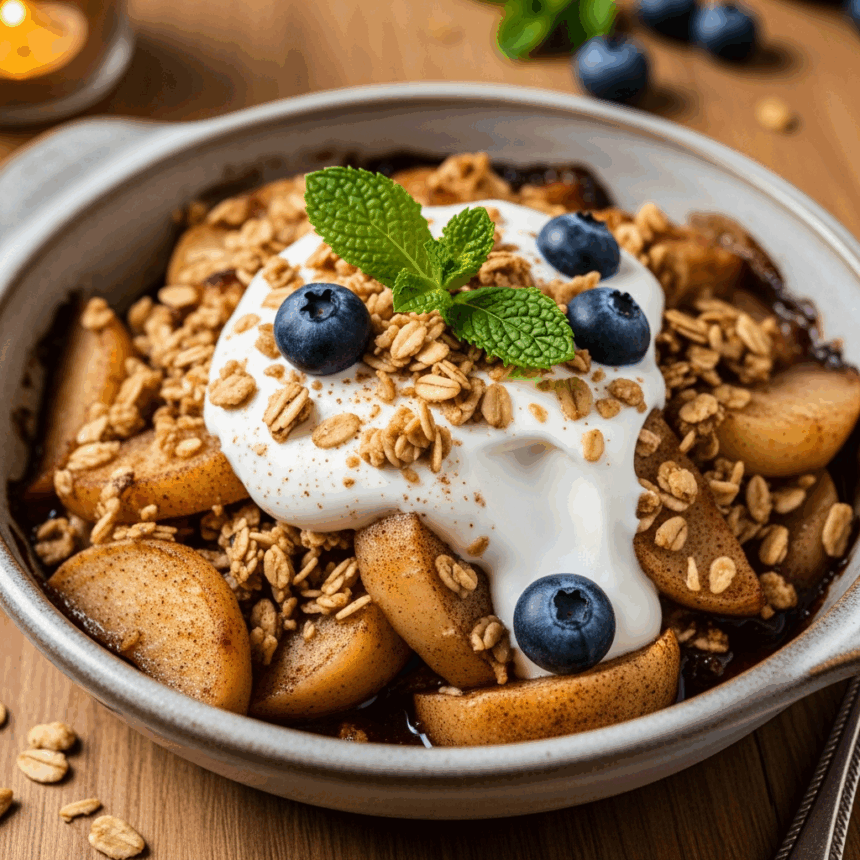
Listen, we need to talk about apple crisp. Not the bland, soggy mess your aunt brings to Thanksgiving, but the kind that makes you close your eyes and mumble “oh my god” with your mouth full. And this one? It’s topped with tangy yogurt instead of ice cream because we’re basically health gurus now. (Kidding—it just tastes amazing and gives you permission to eat dessert for breakfast.)
Why This Recipe is Awesome
First off, this isn’t just another apple crisp recipe I found on page 37 of some dusty cookbook. This beauty hits the perfect sweet-tart balance while the yogurt topping brings a creamy tang that ice cream could never. Plus, it’s ridiculously simple—we’re talking “I’ve had three glasses of wine and can still pull this off” level of easy.
The cinnamon-oat topping gets all crispy and caramelized while the apples underneath turn soft but not mushy (because mushy apples are just sad applesauce pretending to be dessert). The secret is using firm apples and not overdoing it with the sugar. Trust me on this one.
Ingredients You’ll Need
For the apple filling:
- 6 medium-sized apples (Honeycrisp, Granny Smith, or Braeburn work great—basically anything that won’t turn to mush)
- 2 tablespoons lemon juice (bottled is fine, no need to get fancy)
- ½ cup granulated sugar (or less if you’re one of those “I don’t like things too sweet” people)
- 2 tablespoons all-purpose flour (to thicken things up so it’s not swimming in apple juice)
- 1 teaspoon cinnamon (the good stuff, not the one that’s been in your cabinet since 2018)
- ¼ teaspoon nutmeg (optional, but why wouldn’t you?)
For the crisp topping:
- 1 cup old-fashioned oats (not the instant stuff—we have standards)
- ¾ cup all-purpose flour
- ½ cup brown sugar, packed (emphasis on PACKED—don’t be shy)
- ½ teaspoon cinnamon
- ¼ teaspoon salt (to make the sweet stuff taste sweeter—science!)
- ½ cup cold butter, cubed (yes, real butter—this isn’t the time for your diet margarine)
For the yogurt topping:
- 2 cups Greek yogurt (the thick kind, not the runny stuff)
- 3 tablespoons honey (or maple syrup if you’re feeling Canadian)
- ½ teaspoon vanilla extract (the real deal, not that imitation nonsense)
- Zest of one lemon (optional, but adds that “what’s that amazing flavor?” quality)
Step-by-Step Instructions
- Preheat your oven to 350°F (175°C). Do this first because we both know you’ll forget otherwise.
- Prep your apples. Peel, core, and slice them into roughly ¼-inch pieces. Think “chunky but not going to break your teeth” size. Toss them in a bowl with the lemon juice to prevent that unappetizing brown look.
- Make the apple filling. Add sugar, flour, cinnamon, and nutmeg to your apples and toss until they’re well-coated. Dump this mixture into a 9×13 baking dish. Spread it evenly—we’re not savages.
- Create the crumbly topping. In a separate bowl, mix the oats, flour, brown sugar, cinnamon, and salt. Add the cold butter cubes and use your fingers to squish it all together. Keep going until it looks like chunky, buttery sand. This is your arm workout for the day.
- Assemble the crisp. Sprinkle (more like dump) your crumb mixture evenly over the apples. Pat it down slightly, but don’t compact it—we want some nooks and crannies for crispy goodness.
- Bake until golden and bubbly. About 40-45 minutes, or until the topping is golden brown and you can see the apple filling bubbling around the edges like delicious lava.
- While it bakes, make your yogurt topping. Mix the Greek yogurt, honey, vanilla, and lemon zest in a bowl. Stick it in the fridge until serving time.
- Let it rest! I know you want to dive in immediately, but give it 15 minutes to cool slightly. This prevents both roof-of-mouth burns and runny filling.
- Serve warm with a generous dollop of your yogurt topping. Watch as it melts slightly into the warm crisp and try not to weep with joy.
Common Mistakes to Avoid
Let’s talk about ways people mess this up, so you don’t join their sad ranks:
- Using the wrong apples. Red Delicious? More like Red Suspicious. They’ll turn to mush faster than your motivation on a Monday morning.
- Skipping the lemon juice. Unless you enjoy the aesthetics of brown food, use the dang lemon juice.
- Over-mixing the topping. If you work the butter too much, you’ll get a solid sheet of oat cookie instead of a crumbly topping. We want crisp, not oat roof.
- Using warm butter. Cold butter = flaky, crumbly topping. Warm butter = sad, flat topping. Science doesn’t lie.
- Not letting it cool. Patience is a virtue that rewards you with intact taste buds and prettier servings.
Alternatives & Substitutions
Need to switch things up? I gotchu:
- Make it gluten-free: Swap the all-purpose flour for almond flour or a gluten-free blend. Just be aware the topping might be a bit less crispy—that’s the trade-off.
- Reduce the sugar: You can cut the sugar by up to half if you’re using sweeter apples or trying to be “healthy” (while still eating dessert, which I respect).
- Vegan version: Use coconut oil instead of butter and coconut yogurt for the topping. It’ll have a slight tropical vibe, but who’s complaining?
- Fruit variations: Add berries, pears, or peaches to the apple mix. Live your best fruit life.
- Spice it up: Add cardamom, ginger, or allspice to the filling if you’re feeling fancy or want to impress someone who watches too much Food Network.
FAQ (Frequently Asked Questions)
Can I make this ahead of time?
You absolutely can! Assemble the whole thing, cover it with foil, and refrigerate for up to 24 hours before baking. Just add about 5-10 minutes to the baking time since you’re starting cold. The yogurt topping can be made 2 days ahead—just give it a stir before serving.
Will this crisp still be good without the yogurt topping?
I mean, are fries still good without ketchup? Yes, but why deprive yourself? That said, it’s still delicious with ice cream, whipped cream, or even—gasp—plain.
My topping got too brown before the apples were done. What gives?
Your oven might run hot (it happens to the best of us). Next time, cover the crisp loosely with foil after about 25 minutes to prevent over-browning while the apples finish cooking.
How do I store leftovers? As if there will be any…
Cover and refrigerate for up to 5 days. The topping will soften a bit, but it’s still amazing. Store the yogurt topping separately. Pro tip: Cold apple crisp makes an excellent breakfast. I won’t tell if you don’t.
Can I freeze this masterpiece?
You can freeze the unbaked crisp for up to 3 months. Thaw overnight in the fridge before baking. Don’t freeze the yogurt topping—make that fresh. Nobody wants weird, separated yogurt.
I only have quick oats. Am I doomed?
Not doomed, just slightly compromised. Quick oats will give you a less defined texture, but if you’re in a pinch, they’ll work. Your crisp will be more like a… gentle crumble. Still tasty though!
Final Thoughts
Look at you, about to make a dessert that’s impressive enough for company but easy enough for a Tuesday night when you’re just craving something sweet. This apple crisp with yogurt topping sits perfectly in that magical space between “I’m adulting with a homemade dessert” and “I’m not spending three hours in the kitchen.”
The yogurt topping is the real game-changer here—it makes this dessert feel lighter and brighter while still delivering that comforting hug-in-a-bowl feeling that apple crisp is famous for. Plus, it’s a great excuse to eat this for breakfast. Because, you know… yogurt = breakfast food. That’s just math.
Now go forth and bake! Your house is about to smell amazing, and people are going to think you’re way more talented in the kitchen than you might actually be. And isn’t that what cooking is all about?
