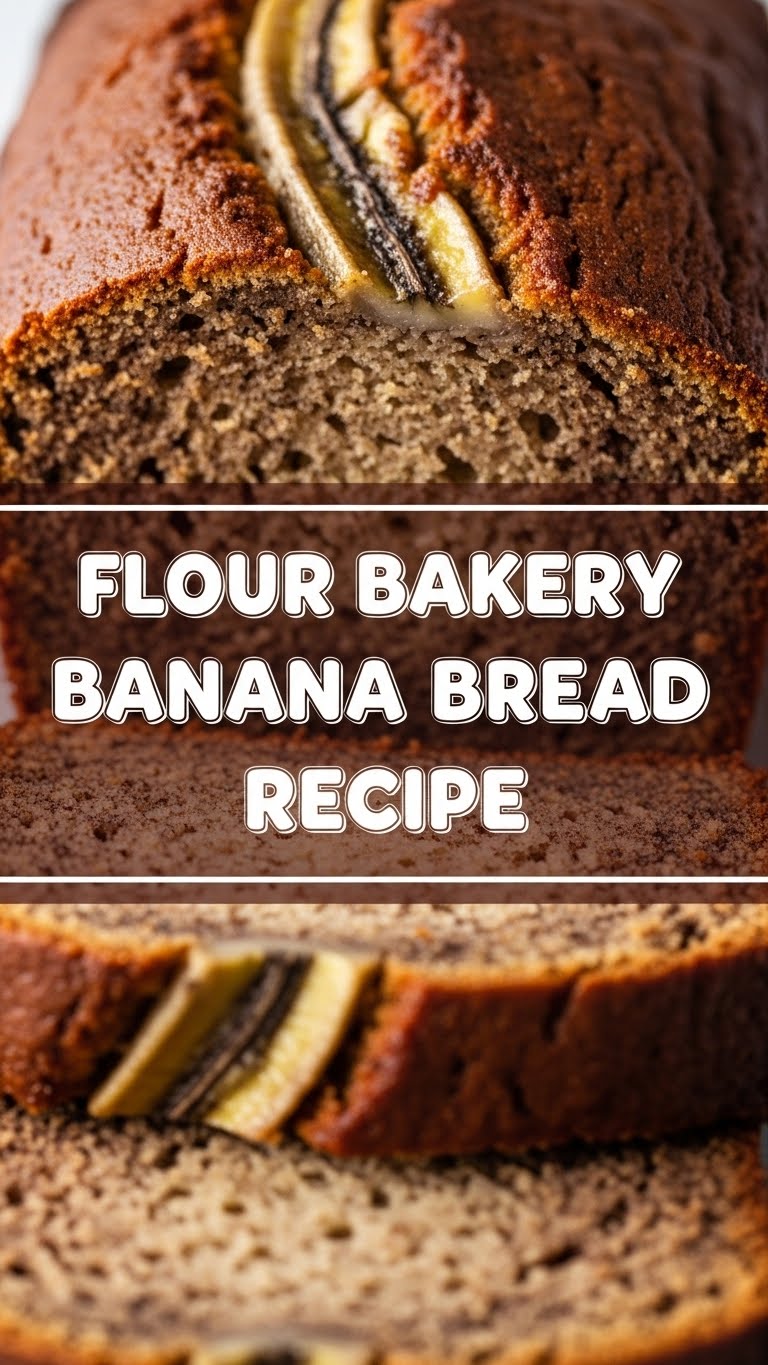
So, you’ve got those ridiculously overripe bananas staring at you from the counter, practically begging for a glow-up, right? And your stomach is rumbling for something sweet, comforting, and utterly delicious, but also, like, *effortless*? My friend, you’ve come to the right place. We’re diving headfirst into the legendary Flour Bakery Banana Bread – the kind of recipe that makes you look like a baking genius without actually needing a culinary degree. Forget complicated techniques; we’re here for maximum flavor, minimum fuss. Let’s get sticky and make some magic!
Why This Recipe is Awesome
Okay, let’s be real. There are a million banana bread recipes out there. But this one? This one’s the MVP. It’s got a cult following for a reason. First off, it’s **insanely moist**. We’re talking ‘melt-in-your-mouth, don’t even need a drink to wash it down’ moist. Secondly, it’s pretty much **idiot-proof**. Seriously, even I, a serial burner of toast, have managed to pull this off without setting off the smoke alarm. The flavor is out of this world – a perfect balance of sweet banana, rich butter, and a hint of tang. Plus, your house will smell like a warm, cozy hug for hours. Trust me, it’s basically free aromatherapy. You’re welcome.
Ingredients You’ll Need
Gather ’round, fellow culinary adventurers! Here’s your loot list. Don’t worry, nothing too exotic here. Your local grocery store (or even your forgotten pantry shelf) probably has most of this:
- Very Ripe Bananas: About 3 medium-sized ones. And when I say ‘very ripe,’ I mean spotty, almost black, looking-like-they-belong-in-the-bin ripe. These are the unsung heroes of moisture and flavor. Don’t skimp on the ripeness!
- All-Purpose Flour: 1 ½ cups. The basic stuff, no fancy alchemy needed.
- Granulated Sugar: ¾ cup. For that perfect sweetness.
- Brown Sugar (packed): ¼ cup. This adds a lovely depth and caramel-y note. Don’t skip it!
- Unsalted Butter (softened): ½ cup (that’s one stick). Because everything’s better with butter, duh. Make sure it’s properly softened, not melted or straight from the fridge.
- Large Egg: 1. Our binding agent for delicious dreams.
- Sour Cream (or Greek yogurt): ¼ cup. This is our secret weapon for *next-level* moistness. Shhh, don’t tell anyone.
- Baking Soda: 1 teaspoon. The magic leavener that makes it all fluffy.
- Salt: ½ teaspoon. Just a pinch to balance all that sweetness.
- Vanilla Extract: 1 teaspoon. For that “je ne sais quoi” fancy bakery flavor.
- Optional (but highly recommended): ½ cup chopped walnuts or chocolate chips. Because why not live a little?
Step-by-Step Instructions
Alright, apron on (or not, we’re informal here), music up! Let’s get baking!
- Get Prepped: First things first, preheat your oven to 350°F (175°C). Then, lightly grease and flour a 9×5-inch loaf pan. If you have parchment paper, line it with a sling so you can lift the bread out easily later. Trust me, it’s a game-changer.
- Mash ‘Em Up: In a medium bowl, mash your super ripe bananas with a fork. You want it mostly smooth, but a few small lumps are totally fine and add character. Set aside.
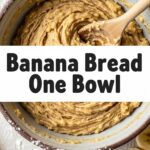
- Cream the Good Stuff: In a large bowl, using an electric mixer (or a strong arm and a whisk, you superhero!), beat together the softened butter, granulated sugar, and brown sugar until light and fluffy. This usually takes about 2-3 minutes. Scrape down the sides of the bowl as needed.
- Eggs and Vanilla Join the Party: Beat in the egg until well combined, then stir in the vanilla extract. It should look creamy and dreamy.
- Add the Tang: Now, mix in that sour cream (or Greek yogurt). Don’t be shy; this is where the magic really starts to happen for moisture.
- Dry Ingredients Unite: In a separate small bowl, whisk together the flour, baking soda, and salt. Make sure it’s all nicely combined.
- Combine Wet and Dry: Add the dry ingredients to the wet ingredients in three additions, mixing on low speed (or by hand) just until *barely* combined after each addition. **Do not overmix!** Overmixing is the enemy of tender banana bread. A few streaks of flour are okay.
- Fold in Bananas (and Friends): Gently fold in your mashed bananas until just incorporated. If you’re using walnuts or chocolate chips, now’s the time to fold those in too!
- Bake It Up: Pour the batter into your prepared loaf pan and spread it evenly. Bake for 55-65 minutes, or until a wooden skewer or toothpick inserted into the center comes out clean. If the top starts to brown too quickly, you can loosely tent it with foil.
- Cool Down: Let the banana bread cool in the pan for about 10-15 minutes before carefully removing it and placing it on a wire rack to cool completely. Patience is a virtue here, my friend.
Common Mistakes to Avoid
Listen, we’ve all been there. Here’s how not to mess up your masterpiece:
- Not Preheating the Oven: Rookie mistake! Your oven needs to be at the correct temperature from the get-go for proper leavening. Think of it as giving your bread a warm welcome.
- Using Underripe Bananas: If your bananas are still green or even mostly yellow, put them back on the counter and wait. They won’t provide the sweetness or moisture needed. The darker and spottier, the better!
- Overmixing the Batter: I can’t stress this enough: **do not overmix!** Overmixing develops the gluten too much, leading to tough, chewy banana bread. We want tender and moist, not an arm workout.
- Opening the Oven Door Too Much: Resist the urge to peek every five minutes! Each time you open the door, the oven temperature drops, which can affect the bread’s rise and texture. Let it do its thing until close to the end of baking time.
- Not Greasing Your Pan Properly: Nothing is sadder than a perfectly baked loaf stuck to the bottom of the pan. Grease and flour (or use parchment!) like your delicious dessert depends on it. Because it does.
Alternatives & Substitutions
Feeling a little rebellious, or just missing an ingredient? No stress, I got you:
- Sour Cream Swap: No sour cream? No problem! **Plain Greek yogurt** (full-fat is best, IMO) works like a charm. It gives a similar tang and moisture.
- Add-ins Galore: This recipe is super adaptable for add-ins. Chocolate chips (milk, dark, white – go wild!), chopped walnuts, pecans, or even a sprinkle of cinnamon or nutmeg for extra warmth. Just don’t add *too* much, or it might alter the batter consistency.
- Dairy-Free? You can definitely try plant-based butter (like Earth Balance sticks) and a thick plant-based yogurt (like plain almond or soy yogurt). The texture might be slightly different, but still delicious!
- Mini Loaves or Muffins: This recipe converts beautifully! For muffins, bake at 375°F (190°C) for 20-25 minutes. For mini loaves, bake at 350°F (175°C) for about 30-40 minutes. Just keep an eye on them!
FAQ (Frequently Asked Questions)
Got questions? I’ve got casual, slightly sarcastic answers:
- Can I use margarine instead of butter? Well, technically yes, but why hurt your soul like that? Butter truly makes a difference in flavor and texture. Stick with the good stuff if you can.
- How ripe should the bananas actually be? Think ‘ready for the compost pile’ ripe. Lots of black spots, soft to the touch. The sugars are more developed, and the flavor is more intense. Your future self will thank you.
- Can I freeze banana bread? Absolutely! Once completely cooled, wrap it tightly in plastic wrap, then again in foil. It freezes beautifully for up to 3 months. Just thaw at room temperature.
- My banana bread is dry, what did I do wrong? Likely culprit: overbaking or overmixing. Remember, **gentle is key** with the batter, and watch that oven time like a hawk! A toothpick coming out with moist crumbs is ideal, not completely dry.
- What if I don’t have baking soda, can I use baking powder? Not really, no. They react differently. Baking soda needs an acid (like the sour cream and bananas) to activate, while baking powder is double-acting. Stick to baking soda for this one!
- Can I reduce the sugar? You can slightly, but the sugar contributes to moisture and browning, not just sweetness. If you cut too much, you might end up with a denser, drier loaf. Proceed with caution!
Final Thoughts
And there you have it! Your very own, incredibly delicious, Flour Bakery-style Banana Bread. Whether you’re making it for a lazy Sunday morning, a thoughtful gift, or just because you had too many sad-looking bananas (relatable, honestly), this recipe is a winner. Now go impress someone—or yourself—with your new culinary skills. You’ve earned it! Grab a slice, maybe a cup of coffee, and revel in your baking glory. You’re a star!
