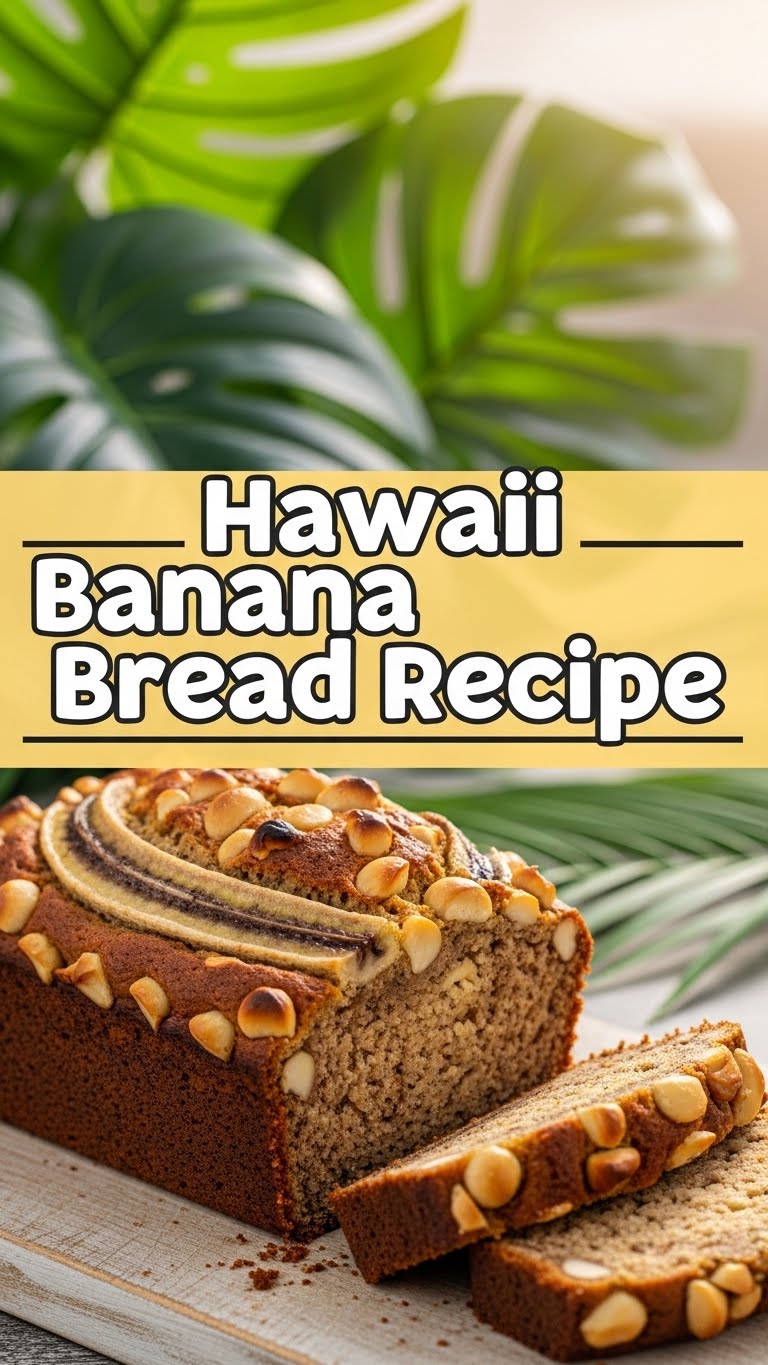
So, you’re craving something tasty but too lazy to spend forever in the kitchen, huh? Same, friend, same. Sometimes, you just need a hug in food form, and let’s be real, a quick trip to Hawaii isn’t always in the budget. But a little taste of the islands? Totally doable. Get ready to whip up some legendary Hawaiian Banana Bread that’s so good, you might just hear distant ukeleles playing.
Why This Recipe is Awesome
Listen, I get it. The world is full of banana bread recipes. But this one? This one is special. It’s not just “banana bread”; it’s Hawaiian Banana Bread. We’re talking tropical vibes, the kind that makes you want to put on a lei and pretend you’re on a beach. Plus, it’s pretty much **idiot-proof**. Seriously, if I can make it without setting off the smoke alarm (which is a common Tuesday occurrence for me), you can too. It’s moist, it’s flavorful, and it uses up those sad, spotty bananas you keep forgetting about in your fruit bowl. Win-win-win, if you ask me!
Ingredients You’ll Need
Gather your troops, folks! Here’s what you need for this little slice of paradise:
- 3-4 Ripe Bananas: And by ripe, I mean almost-black, looks-like-it’s-seen-some-things bananas. The browner, the sweeter, trust me.
- 1/2 cup Unsalted Butter: Softened, because butter just wants to be loved.
- 3/4 cup Granulated Sugar: Because life is sweet, and so should your bread be.
- 1 Large Egg: Room temperature, if you’re feeling fancy (it mixes better, FYI).
- 1 teaspoon Vanilla Extract: The secret whisper of deliciousness.
- 1 1/2 cups All-Purpose Flour: The good ol’ reliable base.
- 1 teaspoon Baking Soda: Our trusty lift-off agent.
- 1/2 teaspoon Salt: Balances everything out like a culinary tightrope walker.
- 1/2 cup Chopped Macadamia Nuts (Optional, but highly recommended): Hello, Hawaii! These add that perfect crunch and island flair.
- 1/2 cup Shredded Coconut (Optional, for extra vacation vibes): Unsweetened or sweetened, your call.
Step-by-Step Instructions
- Get Your Oven Ready: Preheat your oven to 350°F (175°C). Seriously, do it now. And grease a 9×5-inch loaf pan. Don’t skip this, unless you want your bread to permanently live in the pan.
- Mash Those Bananas: In a medium bowl, mash your ripe bananas with a fork until they’re mostly smooth but still have a few small lumps. We like character, right? Set ’em aside.
- Cream It Up: In a separate large bowl, cream together the softened butter and granulated sugar until it’s light and fluffy. This usually takes about 2-3 minutes with an electric mixer, or a good arm workout if you’re doing it by hand.
- Add Wet Goodness: Beat in the egg and vanilla extract into the butter-sugar mixture until just combined. Don’t go crazy; we’re not making a soufflé here.
- Combine Dry Power: In another bowl, whisk together the flour, baking soda, and salt. Make sure it’s all mixed nicely so you don’t get a surprise pocket of baking soda in your bread (blech).
- Marry Them Together: Gradually add the dry ingredients to the wet ingredients, mixing until just combined. **Do not overmix!** A few lumps are totally fine. We want tender bread, not a rubbery brick.
- Fold in the Fun: Gently fold in your mashed bananas, and if you’re using them, the macadamia nuts and shredded coconut. These are the party animals of the batter!
- Pour and Bake: Pour the batter into your prepared loaf pan and smooth out the top. Pop it into the preheated oven and bake for 50-65 minutes. It’s done when a toothpick inserted into the center comes out clean or with a few moist crumbs.
- Cool Down: Let the bread cool in the pan for about 10 minutes before transferring it to a wire rack to cool completely. Patience, young grasshopper! It’s worth it.
Common Mistakes to Avoid
Nobody’s perfect, but we can avoid some classic banana bread blunders:
- Under-Ripe Bananas: Using yellow bananas is a rookie mistake. They won’t give you the deep banana flavor or the moisture you crave. Wait for those brown spots, IMO.
- Overmixing the Batter: This is a biggie! Overmixing develops the gluten too much, leading to tough, dense bread. Mix until just combined, then stop! Seriously, put the spoon down.
- Not Greasing the Pan Properly: You’ll end up with half your delicious bread stuck to the bottom. A little butter or non-stick spray goes a long way.
- Opening the Oven Door Too Soon: Curiosity killed the banana bread! Resist the urge to peek before at least 45 minutes have passed, or your bread might sink.
Alternatives & Substitutions
Feeling a little rebellious? Here are some ways to switch things up:
- Nut Swap: No macadamia nuts? No problem! Walnuts or pecans are fantastic alternatives and bring their own cozy vibe.
- Chocolate Lover’s Delight: Ditch some or all of the nuts and add a generous half-cup of chocolate chips. Because, well, chocolate.
- Dairy-Free Option: You can swap the butter for an equal amount of melted coconut oil or a neutral-flavored vegetable oil.
- Spice it Up: A pinch of cinnamon or nutmeg (about 1/2 teaspoon) can add another layer of warmth if you’re feeling extra spicy.
FAQ (Frequently Asked Questions)
- “Can I use less ripe bananas?” Well, you *can*, but why would you want to? The flavor won’t be as intense, and the bread won’t be as sweet or moist. Patience is a virtue, especially with bananas.
- “My bread came out too dense. What happened?” Ah, the classic overmixing blunder! Next time, mix until just combined, even if there are a few streaks of flour.
- “How long does this tropical masterpiece last?” If you manage not to eat it all in one sitting, it’ll stay fresh at room temperature for 2-3 days, or in the fridge for up to a week. Best kept tightly wrapped!
- “Can I freeze Hawaiian Banana Bread?” Absolutely! Wrap it tightly in plastic wrap, then aluminum foil, and it’ll be happy in the freezer for up to 3 months. Thaw at room temp when a craving strikes.
- “What if I don’t have macadamia nuts or coconut?” No sweat! It’ll still be fantastic banana bread. Consider adding a few more chocolate chips, or just enjoy it plain. It’s still a winner.
- “Is it healthy?” Let’s not ask questions that could ruin the magic, okay? It’s delicious. That’s all you need to know.
Final Thoughts
So there you have it, your very own ticket to a mini-vacation, right from your kitchen! This Hawaiian Banana Bread isn’t just a recipe; it’s an experience. It’s the kind of treat that makes your house smell like a warm hug and brings a smile to everyone’s face. Now go impress someone—or yourself—with your new culinary skills. You’ve earned it!

