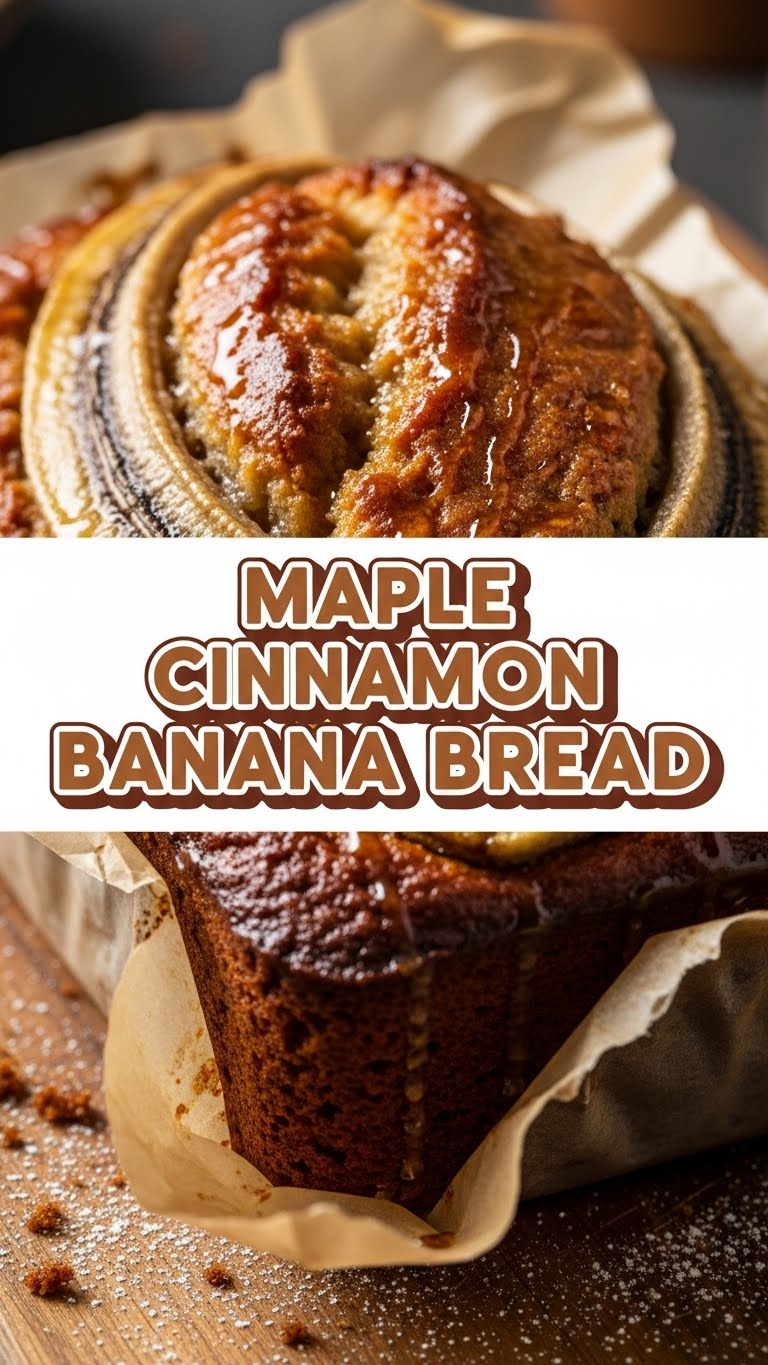
Okay, so your bananas are looking a little… sad. Like they’ve seen better days, maybe even contemplated their life choices. And you’re craving something warm, comforting, and absolutely packed with flavor, but you’re also not trying to get a second job as a pastry chef, right? Good. Because we’re about to turn those mournful mushy fruits into the most ridiculously delicious Maple Cinnamon Banana Bread you’ve ever had. And guess what? It’s so easy, your cat could probably supervise. (FYI, don’t let your cat supervise. They’re notoriously bad at oven temperatures.)
Why This Recipe is Awesome
Seriously, this isn’t just *another* banana bread recipe. This is **THE** banana bread recipe you’ll actually make more than once. Why? First, it’s virtually idiot-proof. If I can nail it after a long week, you totally can too. Second, it smells like a hug from a lumberjack who just spilled maple syrup on a cinnamon stick – basically, autumnal heaven. Third, those sad, overripe bananas? They become stars! No food waste guilt, just pure, unadulterated baked goodness. Plus, it makes your whole house smell amazing, instantly elevating your “just rolled out of bed” vibe to “culinary genius.”
Ingredients You’ll Need
Gather your baking squad!
- 2-3 very ripe bananas: The browner, the better. We’re talking practically black. Don’t be shy; embrace the mush!
- 1/2 cup (113g) unsalted butter: Softened. If it’s rock-hard, microwave it for about 10 seconds, but don’t melt it completely, unless you’re into that chaotic baking life.
- 1/2 cup (100g) granulated sugar: Sweetness!
- 1/4 cup (50g) packed light brown sugar: For that extra moistness and molasses-y goodness.
- 1 large egg: Room temperature if you’re feeling fancy, but straight from the fridge works too. Don’t overthink it.
- 1/4 cup pure maple syrup: The real deal, folks. None of that “pancake syrup” impostor stuff. This is where the magic happens!
- 1 teaspoon vanilla extract: A flavor MVP. Don’t skip it!
- 1 1/2 cups (180g) all-purpose flour: The backbone of our bread.
- 1 teaspoon baking soda: For lift. We don’t want a pancake bread, do we?
- 1/2 teaspoon ground cinnamon: Our other star player!
- 1/4 teaspoon salt: Balances everything out. Trust me on this.
Step-by-Step Instructions
Let’s get baking, friend!
- Preheat Your Oven & Prep Your Pan: First things first, get that oven going to 350°F (175°C). While it’s heating, grab a 9×5 inch loaf pan. Grease it up and flour it, or line it with parchment paper leaving an overhang. This makes removal super easy!
- Mash Those Bananas: In a medium bowl, mash your ripe bananas with a fork until they’re mostly smooth but still have a few small lumps. We’re not making baby food here. Set them aside.
- Cream the Butter & Sugars: In a larger bowl, beat the softened butter with the granulated and brown sugars until it’s light and fluffy. Use an electric mixer if you have one, or get a good arm workout with a whisk.
- Add Wet Ingredients: Beat in the egg, then stir in the maple syrup and vanilla extract until well combined. Don’t be alarmed if it looks a little curdled; it’ll all come together.
- Combine Dry Ingredients: In a separate bowl, whisk together the flour, baking soda, cinnamon, and salt. Give it a good whisk to distribute everything evenly.
- Mix Wet & Dry (Carefully!): Gradually add the dry ingredients to the wet ingredients, mixing until *just* combined. **Do not overmix!** Overmixing develops gluten and can make your bread tough. Lumps of flour are okay!
- Fold in Bananas: Gently fold in the mashed bananas. Again, mix until just combined.
- Pour & Bake: Pour the batter into your prepared loaf pan and spread it evenly. Bake for 50-65 minutes, or until a wooden skewer inserted into the center comes out clean. If the top starts to brown too quickly, you can loosely tent it with aluminum foil.
- Cool Down: Let the bread cool in the pan for about 10-15 minutes before carefully transferring it to a wire rack to cool completely. Or, if you’re impatient (like me), slice off a warm piece. Just be warned, it’s harder to cut when hot!
Common Mistakes to Avoid
Don’t be *that* person. Learn from my (and others’) mistakes!
- Underripe Bananas: Using yellow bananas with green tips? Rookie mistake. They won’t give you the deep banana flavor or the moisture you need. Wait until they’re spotted or mostly black.
- Overmixing the Batter: I cannot stress this enough. Once you add the flour, mix until *just* combined. A few lumps are totally fine. Overmixing leads to tough, chewy bread instead of tender deliciousness.
- Opening the Oven Door Too Early: Curiosity killed the cat and deflated many a banana bread. Resist the urge! Let it bake undisturbed for at least 40-45 minutes before you even think about peeking.
- Not Greasing Your Pan Properly: This is a pain when your beautiful bread sticks to the bottom. **Grease and flour generously**, or use parchment paper. Your future self will thank you.
Alternatives & Substitutions
Feeling adventurous or just missing an ingredient? No stress!
- Dairy-Free: Swap butter for a plant-based butter alternative (like Earth Balance) or coconut oil.
- Gluten-Free: Use a 1:1 gluten-free baking flour blend. I’ve had good luck with these, but texture might vary slightly.
- Spice it Up: Add a pinch of nutmeg or allspice for extra warmth. A dash of ginger could also be fun!
- Add-Ins: Feeling fancy? Fold in **1/2 cup of chocolate chips** (dark, milk, or white!), chopped walnuts, or pecans with the bananas. Totally optional, totally delicious. My personal fave? Dark chocolate chips. Because, chocolate.
- No Maple Syrup? While the maple syrup is kinda the star here, you could sub in an equal amount of honey or even an extra tablespoon of brown sugar if you’re in a pinch. But seriously, go get some maple syrup!
FAQ (Frequently Asked Questions)
Got questions? I’ve got answers (mostly humorous ones).
- Can I use frozen bananas? Absolutely! Just thaw them completely and drain any excess liquid before mashing. They tend to be extra watery when thawed, which is why draining is important.
- My banana bread is raw in the middle! What gives? Ah, the classic raw-center conundrum. Your oven might be running cool, or you pulled it out too soon. Next time, give it an extra 5-10 minutes, or tent it with foil if the top is browning too much. **Always check with a skewer!**
- Can I make muffins instead? Heck yeah! Pour the batter into a greased muffin tin. Bake for about 20-25 minutes, or until a toothpick comes out clean. Adjust baking time accordingly.
- How do I store leftover banana bread? If there even *is* leftover banana bread (lol). Store it at room temperature, tightly wrapped in plastic wrap or in an airtight container, for up to 3-4 days. It also freezes beautifully for up to 3 months! Just wrap slices individually.
- What if I don’t have ripe bananas? Can I speed up the ripening? Okay, you’re in a hurry. You *can* bake unripe bananas on a baking sheet at 300°F (150°C) for 15-30 minutes until their skins turn black. Let them cool, then proceed. It’s not *quite* as good as naturally ripe, but it works in a pinch!
- Is this breakfast or dessert? Friend, it’s both. It’s brunch. It’s a midnight snack. It’s whenever you want a slice of pure joy. Don’t let anyone tell you otherwise.
Final Thoughts
Phew! You made it. You’re officially armed with the knowledge (and hopefully the motivation) to bake the most epic Maple Cinnamon Banana Bread known to humankind. It’s cozy, it’s comforting, and it’s basically a hug in loaf form. So go forth, bake glorious bread, and enjoy every single crumb. Now go impress someone—or yourself—with your new culinary skills. You’ve earned it! Maybe even make two loaves, because one never lasts long enough. Trust me on that one.
