So you’re craving something tasty but too lazy to spend forever in the kitchen, huh? Same. What if I told you there’s a magical healthy banana bread recipe that uses oat flour, tastes like a hug, and practically bakes itself? You’d probably call me a liar, but hear me out!
Why This Recipe is Awesome
Okay, so maybe it doesn’t *literally* bake itself, but it’s pretty darn close. This isn’t just any banana bread, my friend. This is the “I want something delicious but also don’t want to feel guilty for eating half the loaf” kind of banana bread. Here’s why you’re about to fall in love:
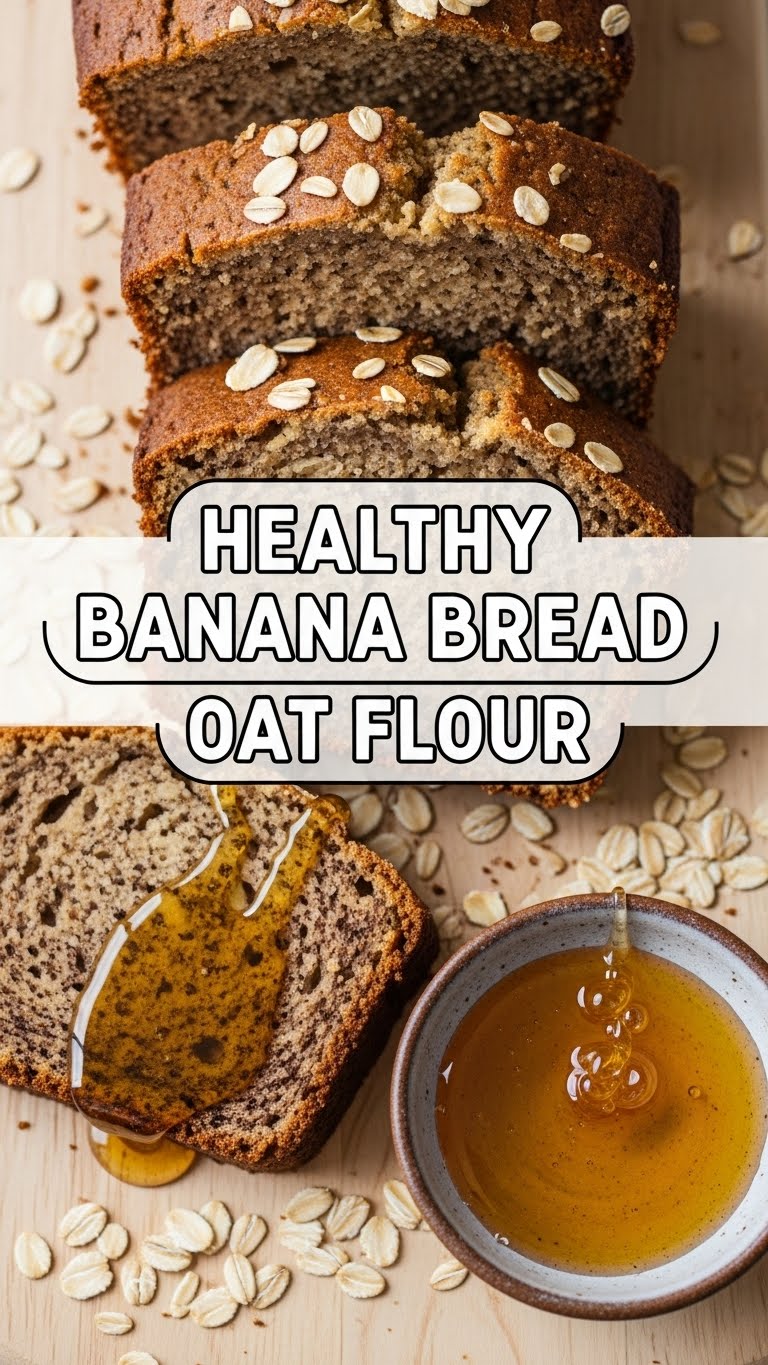
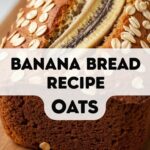
- It’s **healthy-ish**: We’re talking oat flour (whole grains, baby!), natural sweeteners, and those gorgeous, spotty bananas doing all the heavy lifting.
- It’s **idiot-proof**: Seriously, if I can make this without a culinary disaster, you absolutely can too.
- **Minimal clean-up**: If you’re smart about it, you’ll only dirty a couple of bowls. Win!
- Your house will smell like a warm, cozy bakery. And who doesn’t want that?
- It’s the perfect excuse to use up those bananas that have been silently judging you from the fruit bowl.
Ingredients You’ll Need
Gather ’round, my fellow lazy gourmets! Here’s what you’ll need to make this magic happen. Don’t worry, nothing too fancy (unless you count vanilla extract as fancy, which, fair).
- **Ripe Bananas:** 3-4 medium, practically black and squishy. The uglier, the sweeter and better for baking!
- **Oat Flour:** 1 ½ cups. FYI, you can literally just blend rolled oats until they’re a fine powder. Mind. Blown.
- **Eggs:** 2 large. Room temperature if you’re feeling fancy, but straight from the fridge works too. We’re not picky.
- **Maple Syrup or Honey:** ½ cup. Natural sweetness FTW!
- **Melted Coconut Oil or Butter:** ¼ cup. Or even a light olive oil if that’s what’s lurking in your pantry.
- **Vanilla Extract:** 1 teaspoon. Non-negotiable, unless you’re a fan of bland bread (and who is?).
- **Baking Soda:** 1 teaspoon. Our magical leavening agent for that perfect rise.
- **Salt:** A pinch. Just to balance out all that lovely sweetness.
- **Cinnamon (optional):** ½ teaspoon. Adds a warm, cozy hug to your bread.
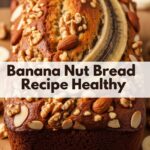
- **Chocolate Chips or Walnuts (optional):** A handful, because you deserve a little extra joy.
Step-by-Step Instructions
Alright, let’s get down to business. These steps are so easy, you could probably do them in your sleep (but please don’t, hot ovens and sleep don’t mix).
- **Preheat & Prep:** First things first, get that oven nice and toasty to **350°F (175°C)**. Then, grab a loaf pan (a standard 9×5 inch is perfect), grease it up, and lightly flour it. Or, if you’re smart, line it with parchment paper for an easy lift-out.
- **Mash ‘Em Up:** In a large mixing bowl, take those gloriously ripe bananas and mash them into oblivion with a fork. Lumpy is fine; we’re going for rustic chic here.
- **Wet Ingredients Party:** To the mashed bananas, add your eggs, maple syrup (or honey), melted coconut oil (or butter), and vanilla extract. Whisk everything together until it’s all combined and looking like a happy, gloopy family.
- **Dry Ingredients Dance:** In a separate, smaller bowl (or just dump it straight into the wet ingredients if you’re a rebel, I won’t tell), combine the oat flour, baking soda, salt, and cinnamon (if using). Give it a quick whisk to evenly distribute everything.
- **Combine Forces (Gently!):** Now, gently fold the dry ingredients into the wet ingredients. **Do not overmix!** Mix just until no dry streaks remain. A few lumps are totally okay; overmixing leads to tough bread, and nobody wants that. If you’re adding chocolate chips or walnuts, fold them in now.
- **Into the Pan:** Pour your magnificent batter into the prepared loaf pan. Give the pan a gentle tap or two on the counter to settle the batter and release any rogue air bubbles.
- **Bake It, Baby:** Pop that beautiful loaf into your preheated oven. Bake for **45-55 minutes**. You’ll know it’s done when a toothpick inserted into the center comes out clean or with just a few moist crumbs attached.
- **Cool Down:** Let your banana bread chill in the pan for about 10-15 minutes before carefully transferring it to a wire rack to cool completely. This is the hardest part, IMO – the waiting!
Common Mistakes to Avoid
We’ve all been there, staring at a baking disaster wishing we could turn back time. Learn from my (many) mistakes, and avoid these common pitfalls:
- **Using under-ripe bananas:** This is like showing up to a party with no snacks. Under-ripe bananas won’t mash well, and your bread will lack that deep, natural sweetness. Don’t do it!
- **Overmixing the batter:** I cannot stress this enough! Too much mixing develops gluten, leading to a dense, chewy, rubbery loaf. We want tender, moist, melt-in-your-mouth goodness.
- **Not greasing your pan properly:** Rookie mistake! Your bread will cling for dear life, and you’ll end up with sad, broken chunks instead of a glorious loaf. **Parchment paper is your best friend.**
- **Impatience:** Peeking into the oven every five minutes lets out heat and can mess with the baking process, potentially causing your bread to sink. Trust the oven, trust the timer!
Alternatives & Substitutions
Feeling adventurous or just missing an ingredient? No stress, this recipe is pretty forgiving. Here are some simple swaps:
- **Oat Flour:** As mentioned, if you don’t have oat flour, just blend rolled oats until they’re powdery. If you absolutely can’t, a 1:1 gluten-free flour blend or even whole wheat flour can work, but the texture might be slightly different.
- **Sweetener:** Agave nectar, brown sugar, or even a sugar-free alternative can work instead of maple syrup or honey. Just remember to adjust to your desired sweetness level.
- **Fat:** Unsweetened applesauce can replace half the oil for an even lighter version. It might make the bread a tad denser, but it still tastes great!
- **Mix-ins:** Get creative! Blueberries, chopped pecans, shredded coconut, or a swirl of peanut butter can all make fantastic additions.
FAQ (Frequently Asked Questions)
- **My bananas aren’t super ripe, help!** Don’t panic! You can bake them unpeeled at 300°F (150°C) for 15-20 minutes until the skins are shiny black. Or, accept a slightly less sweet bread and maybe add a touch more sweetener. Your call.
- **Can I make this gluten-free?** Oat flour is naturally gluten-free! Just be sure to check your package label for a “certified gluten-free” seal if you have celiac disease or severe sensitivities, as oats can sometimes be cross-contaminated during processing.
- **How do I store this masterpiece?** Keep it in an airtight container at room temperature for 2-3 days, or in the fridge for up to a week. It also freezes beautifully for up to 3 months—just slice it first for easy grab-and-go portions!
- **Can I make muffins instead of a loaf?** Absolutely! Divide the batter into a greased or lined muffin tin. They’ll bake faster, usually around 20-25 minutes. Keep an eye on them!
- **Is this *really* healthy?** “Healthy” is a spectrum, right? This banana bread uses whole grains and less refined sugar than many traditional recipes, making it a healthier option for sure. It’s a treat, not a kale smoothie, so enjoy it in moderation!
Final Thoughts
There you have it, friend! A healthy banana bread recipe that’s ridiculously easy, satisfying, and proof that you *can* have your cake (or bread) and eat it too, without a side of guilt. You just whipped up something amazing, probably without breaking a sweat. Now go impress someone—or yourself—with your new culinary skills. You’ve earned it!
Maybe make an extra loaf, because sharing is caring… or for second breakfasts. No judgment here.
