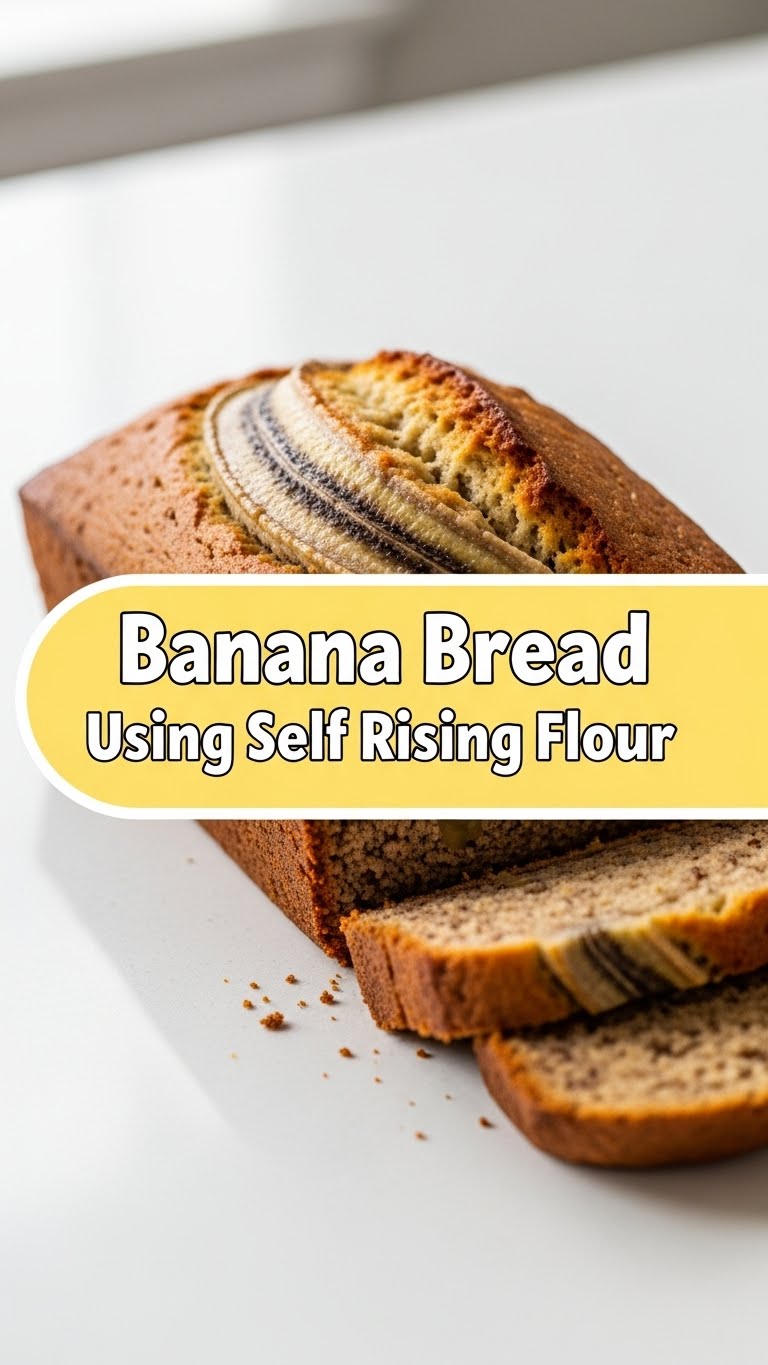
So you’re craving something tasty but too lazy to spend forever in the kitchen, huh? Same. And honestly, who needs a complex recipe when you’ve got a couple of suspiciously spotty bananas staring back at you from the fruit bowl, practically begging for a glow-up? Today, we’re making the easiest, most gloriously moist banana bread with self-rising flour. Because adulting is hard enough without having to measure baking soda AND baking powder. Am I right?
Why This Recipe is Awesome
Okay, first things first: This isn’t just any banana bread. This is the “I woke up like this, still fabulous” of banana breads. Why?
- It’s practically magic: Self-rising flour does half the work for you. No need to play chemist with leavening agents. Phew.
- Seriously fast: From “Hmm, I want banana bread” to “OMG, I’m eating banana bread” is a surprisingly short journey.
- Foolproof (even for me!): If you can mash a banana and stir, you can make this. Seriously, it’s idiot-proof. I even surprised myself.
- Uses up those neglected bananas: Finally, a noble purpose for those brown beauties. No more guilt!
Ingredients You’ll Need
Gather your troops, folks! Here’s what you’ll need for this delicious adventure:
- 3 very ripe bananas (the spottier, the better! We’re talking almost black, practically begging for mercy. Don’t be shy.)
- 1 ½ cups self-rising flour (The star of our show! No measuring baking powder/soda, thank goodness.)
- ½ cup (1 stick) unsalted butter, melted (Or slightly softened if you’re feeling fancy. Adds that luscious richness.)
- ¾ cup granulated sugar (Sweetness without being cloying. Feel free to adjust based on your banana’s ripeness.)
- 1 large egg (The binder, the glue, the unsung hero of baked goods.)
- 1 teaspoon vanilla extract (A splash of warmth and deliciousness. Don’t skip it!)
- Pinch of salt (Just to balance out the sweetness, like a culinary referee.)
- Optional add-ins: A handful of chocolate chips, walnuts, or pecans if you’re feeling extra. Go wild!
Step-by-Step Instructions
- Preheat your oven and prep your pan: Set your oven to 350°F (175°C). Grab a 9×5 inch loaf pan, give it a good grease, and maybe a dusting of flour. Don’t skip the greasing unless you like your bread permanently stuck.
- Mash those sad-looking bananas: In a medium bowl, get to mashing! A fork works wonders here. You want it mostly smooth, but a few lumps are totally fine for texture. Embrace the imperfection!
- Cream the butter and sugar: In a separate, larger bowl, whisk together the melted butter and sugar until they’re nicely combined and look slightly fluffy. This step is where the magic really starts to happen.
- Add the egg and vanilla: Crack in that egg and pour in the vanilla extract. Whisk ’em until everything is beautifully incorporated. It should look smooth and inviting.
- Combine the wet and dry (almost): Stir your mashed bananas into the butter-sugar-egg mixture. Now it’s looking like a proper banana bread base!
- Gently fold in the flour: Add the self-rising flour to the wet ingredients. Mix just until combined. A few streaks of flour are okay; overmixing is the enemy of tender banana bread! If you’re adding chocolate chips or nuts, now’s the time.
- Pour and bake: Scrape that glorious batter into your prepared loaf pan. Pop it into the preheated oven and bake for 50-60 minutes. Start checking around 50 minutes. A skewer or toothpick inserted into the center should come out clean.
- Cool down (if you can wait): Let the bread cool in the pan for about 10-15 minutes before carefully transferring it to a wire rack to cool completely. Or, you know, slice into it while it’s still warm and gooey. No judgment here!
Common Mistakes to Avoid
We’ve all been there, trust me. Learn from my past banana bread mishaps!
- Not using ripe enough bananas: This is like trying to make lemonade with sour grapes. The sweeter the banana, the better the flavor and moisture. Seriously, don’t rush the ripening process.
- Overmixing the batter: Remember what I said about streaks of flour? Overmixing develops the gluten too much, leading to a tough, dense bread instead of a light, fluffy one. Mix like you’re gently waking a sleeping baby.
- Forgetting to preheat the oven: Rookie mistake! Your oven needs to be at the correct temperature from the start for even baking and a good rise. Patience, young padawan.
- Cutting into it too soon: I know, the smell is intoxicating. But giving it a few minutes to cool in the pan and then on a rack helps it set and prevents it from crumbling when sliced. Try to resist the urge! (I rarely succeed, but I try.)
Alternatives & Substitutions
Life happens, and sometimes you don’t have exactly what the recipe calls for. No stress!
- Flour power: Only got all-purpose flour? No worries! For every 1 cup of all-purpose flour, add 1 ½ teaspoons baking powder and ¼ teaspoon salt. Adjust accordingly for 1 ½ cups.
- Butter swap: Coconut oil or a neutral-flavored vegetable oil can work in a pinch for the melted butter. The texture will be slightly different, but still delicious. Just… don’t use margarine unless you absolutely have to. Your taste buds deserve better, IMO.
- Sugar rush: Brown sugar can replace granulated sugar for a deeper, more caramel-y flavor. Maple syrup or honey could also work, but you might need to adjust other liquid components slightly.
- Vegan vibes: For a dairy-free version, use plant-based butter and a ‘flax egg’ (1 tbsp ground flaxseed + 3 tbsp water, let sit for 5 min) instead of a regular egg. It works surprisingly well!
FAQ (Frequently Asked Questions)
- My bananas aren’t ripe, HELP! Pop them on a baking sheet in a 300°F (150°C) oven for 15-30 minutes until their skins are shiny black. Let them cool, then mash. Crisis averted!
- Can I add chocolate chips? Um, is the sky blue? Absolutely! Fold in about ½ to 1 cup with the flour. Walnuts, pecans, or even a swirl of cinnamon sugar work beautifully too. Get creative!
- How long does it last? Stored tightly wrapped at room temperature, it’s usually good for 3-4 days. In the fridge, maybe a week. But let’s be real, it rarely lasts that long, does it?
- Can I freeze banana bread? Heck yes! Wrap individual slices or the whole loaf tightly in plastic wrap, then foil. It’ll keep for up to 3 months. Perfect for a future ‘I need carbs now’ emergency.
- Why is my banana bread dry? Probably overmixed the batter, used too much flour, or baked it too long. Remember: gentle mixing and don’t overbake! A slight underbake is better than an overbake.
- What’s the best way to eat it? Warm, with a smear of butter, a dollop of cream cheese, or just plain. There’s no wrong answer here, folks.
Final Thoughts
And there you have it, folks! Your new go-to, stress-free banana bread recipe. You’ve just transformed a few sad-looking bananas into a masterpiece. Go ahead, bask in the glory, inhale that amazing smell, and then maybe share a slice (or five) with someone you like. Or don’t! You earned this. Now go impress someone—or yourself—with your new culinary skills. You’ve earned it!
