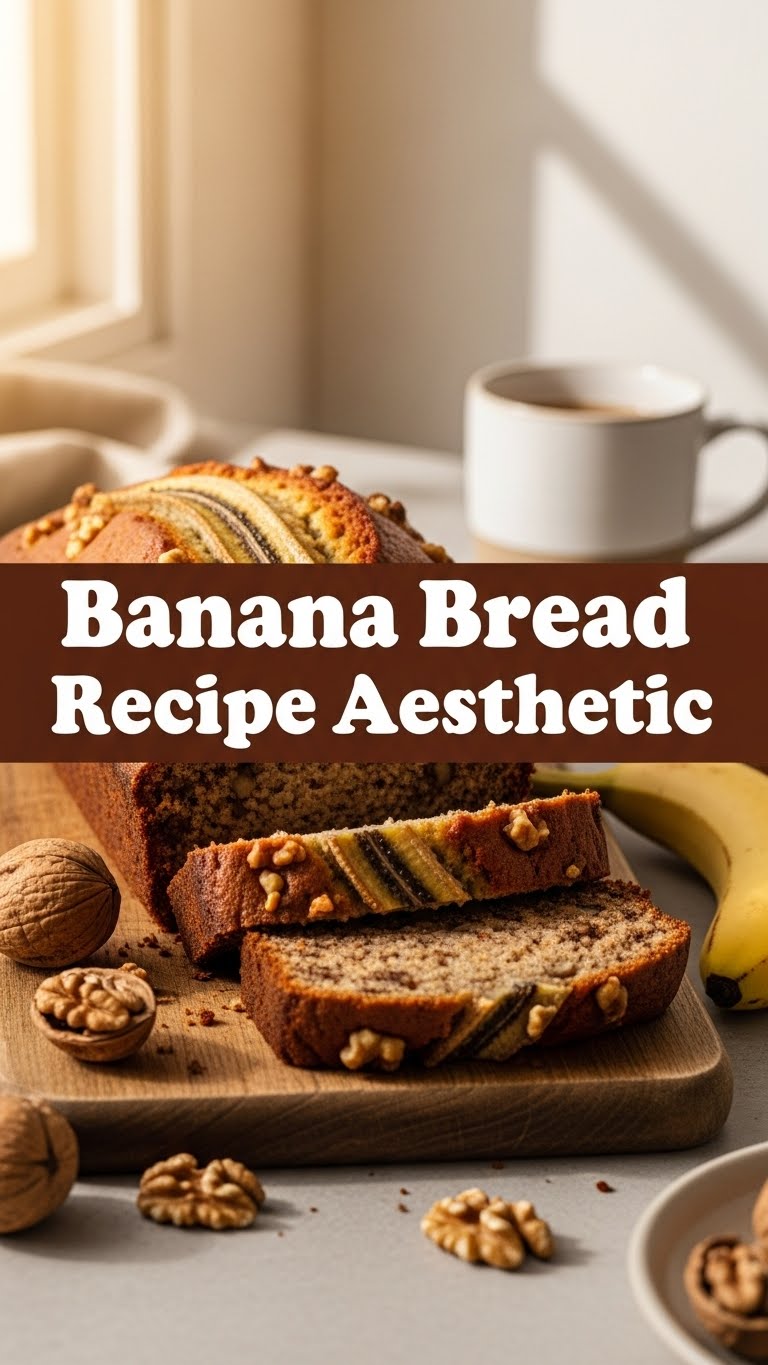
So you’re craving something tasty but too lazy to spend forever in the kitchen, huh? Same. And let’s be real, those ‘overripe’ bananas on your counter are practically begging for a glow-up. Enter: The Ultimate Banana Bread. Not just any banana bread, darling, we’re going for *aesthetic*. We’re talking photo-ready, comfort-food-meets-art vibes here. Ready to make your kitchen smell like a dream without breaking a sweat?
Why This Recipe is Awesome
Okay, let’s be blunt: this isn’t just a recipe; it’s an experience. Forget complicated techniques or obscure ingredients. This banana bread is so simple, it practically bakes itself. Here’s why you’re about to fall in love:
- It’s **idiot-proof**. Seriously, even I didn’t mess it up, and my kitchen adventures often end with the smoke alarm.
- It turns those sad, brown bananas into a glorious masterpiece. You’re basically a superhero, saving fruit from the compost bin.
- Your house will smell like a five-star bakery. People might actually believe you’re a professional chef.
- It’s the perfect excuse for a cozy afternoon with a cup of coffee and a good book. Pure bliss, no filter needed (though, obviously, snap a pic for the ‘gram!).
- The texture is just *chef’s kiss* – moist, tender, and just sweet enough.
Ingredients You’ll Need
Gather your troops! No fancy-pants equipment needed, just the usual suspects. And remember, quality (and ripeness!) matters, my friend.
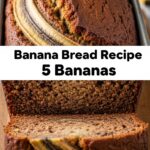
- 3-4 Ripe Bananas: The browner, the better. We’re talking practically black, okay? If they’re not spotty and mushy, put them back on the counter and wait. Seriously.
- 1 ½ cups All-Purpose Flour: Basic stuff. Nothing fancy unless you’re feeling extra.
- ¾ cup Granulated Sugar: Or brown sugar for a deeper, caramel-y vibe. Your call.
- 1 Large Egg: Just one, for binding all that deliciousness together.
- ½ cup (1 stick) Unsalted Butter: Melted, then cooled slightly. Don’t even think about cold butter, you rebel.
- 1 teaspoon Baking Soda: For that perfect lift. Nobody wants flat bread.
- ½ teaspoon Salt: Balances the sweetness. It’s a flavor enhancer, not just for pretzels.
- 1 teaspoon Vanilla Extract: The secret MVP for that warm, cozy flavor. Don’t skimp.
- Optional Add-ins: ½ cup chocolate chips (duh), chopped walnuts or pecans, a sprinkle of cinnamon. Go wild!
Step-by-Step Instructions
Alright, let’s get down to business. Follow these simple steps, and you’ll be a banana bread guru in no time. No stress, just deliciousness.
- Preheat & Prep: Get that oven ready, darling. Set it to 350°F (175°C). Grab a standard loaf pan (9×5 inches usually works) and give it a good grease. You can use butter, cooking spray, or even parchment paper. Nobody wants their masterpiece stuck to the pan, right?
- Mash ’em Up: In a large mixing bowl, go to town on those ripe bananas. Use a fork, a potato masher, or even your clean hands (if you’re feeling primal). Don’t worry about a few lumps; they add character!
- Wet Ingredients Unite: To your mashed bananas, add the melted butter, sugar, egg, and vanilla extract. Stir it all together with a spoon or spatula until it’s just combined. We’re not making meringue here, so no need for vigorous whipping.
- Dry Ingredients Party: In a separate, medium-sized bowl, whisk together the flour, baking soda, and salt. Make sure it’s all mixed evenly so you don’t get pockets of just baking soda in your bread (blech).
- Combine with Care: Now for the magic! Gently fold the dry ingredients into the wet ingredients. **Do NOT overmix!** I repeat, do not overmix. Stir *just* until the flour streaks disappear. A few lumps of flour are totally fine; overmixing is the express train to tough, chewy bread. And no one wants that.
- Add Your Flair: If you’re using chocolate chips, nuts, or cinnamon, fold them in now. Give it a gentle stir to distribute them evenly.
- Bake Time Bliss: Pour the batter into your prepared loaf pan. Pop it into the preheated oven and let it bake for about 50-65 minutes.
- The Toothpick Test: How do you know it’s done? Stick a toothpick or a thin knife into the center of the loaf. If it comes out clean (or with just moist crumbs, not wet batter), you’re golden! If it’s still gooey, give it another 5-10 minutes. If the top is getting too brown, you can loosely tent it with aluminum foil.
- Cool Down, Buttercup: Let your glorious banana bread cool in the pan for 10-15 minutes. This helps it set. Then, carefully transfer it to a wire rack to cool completely. I know, I know, it’s tempting to dive right in, but patience is a virtue here.
Common Mistakes to Avoid
Even the pros make mistakes, but you don’t have to! Here are a few rookie errors to sidestep on your journey to banana bread greatness:
- Using underripe bananas: This is probably the biggest faux pas. Yellow bananas just won’t cut it. They lack the sweetness and intense banana flavor we’re going for. Wait for those glorious brown spots, or even black!
- Overmixing the batter: As mentioned, this is the enemy of tender bread. Stir just until combined. Lumps are your friends.
- Not greasing your pan: Thinking you don’t need to preheat the oven—rookie mistake. Thinking you don’t need to grease the pan—even bigger mistake. Learn from my past struggles.
- Opening the oven door constantly: Resist the urge! Every time you open that door, the oven loses heat, which can mess with your bread’s rise and baking time. Sneak a peek through the glass.
- Cutting it too soon: Your bread needs time to set as it cools. Slice it too early, and it might crumble or be too gooey in the middle.
Alternatives & Substitutions
Feeling creative? This recipe is super flexible! Here are some ideas to make it uniquely yours:
- Sugar Swap: Swap the granulated sugar for brown sugar for a deeper, molasses-like flavor. You could also reduce the sugar slightly if your bananas are super sweet, or use maple syrup/honey (though you might need to adjust other liquid ratios slightly).
- Dairy-Free Delight: Use coconut oil (melted) or any neutral-flavored oil (like vegetable or canola) instead of butter.
- Flour Power: Want to add some whole grains? Substitute up to half of the all-purpose flour with whole wheat flour. Just be aware it might result in a slightly denser texture. Gluten-free flour blends can also work, but **IMO**, results can vary, so proceed with caution.
- Mix-in Mania: Beyond chocolate chips and nuts, try dried cranberries, shredded coconut, a swirl of Nutella, or even some zest from an orange or lemon for a bright kick.
- Spiced Up: A pinch of cinnamon, nutmeg, or allspice can really elevate the flavor profile.
FAQ (Frequently Asked Questions)
Got questions? I’ve got answers. No judgment here, only banana bread love!
- “My bananas aren’t brown enough!?” Oh, the agony! **FYI**, you can speed up the ripening process. Place them on a baking sheet and bake them in their skins at 300°F (150°C) for 15-30 minutes, until they’re shiny and black. Let them cool, then proceed!
- “Can I use a stand mixer?” For the wet ingredients, absolutely! But when you add the dry ingredients, switch to a spatula and fold by hand. Remember: **no overmixing!**
- “How do I know if it’s cooked through without a toothpick?” You can gently press the top of the loaf. If it springs back, it’s likely done. If your top is browning too fast, tent it loosely with aluminum foil.
- “Can I make muffins instead of a loaf?” You totally can! Fill muffin tins about two-thirds full. Bake them at 375°F (190°C) for about 20-25 minutes, or until a toothpick comes out clean.
- “How long does banana bread last?” Wrapped tightly at room temperature, it’s usually good for 3-4 days. In the fridge, up to a week. It also freezes beautifully for up to 3 months! Just wrap it well in plastic wrap and then foil.
- “Can I use margarine instead of butter?” Well, technically yes, but why hurt your soul like that? Butter just tastes better, let’s be honest.
- “What’s the best way to store it?” Once completely cool, wrap it tightly in plastic wrap, then store in an airtight container or a Ziploc bag. This keeps it moist and fresh!
Final Thoughts
There you have it! Your ticket to a kitchen that smells divine and a plate that looks like it came straight out of a lifestyle magazine. You’ve created something beautiful, delicious, and totally Instagram-worthy. Go forth and conquer, you magnificent baker, you! Seriously, share a pic. Tag me. I want to see your aesthetic masterpiece. Now go impress someone—or yourself—with your new culinary skills. You’ve earned it!
