So you’re craving something tasty, comforting, and banana-y, but the thought of pulling out a dozen ingredients and making a monumental mess sends shivers down your spine, huh? Same, friend, same. You’re in luck because today we’re tackling the legendary, the almost unbelievable, 3-Ingredient Banana Bread. Yes, you read that right. Three. As in, less than your age, probably. Get ready to bake like a boss without breaking a sweat (or the bank).
Why This Recipe is Awesome
Let me count the ways! First off, it’s ridiculously easy. We’re talking “I woke up like this and still managed to bake bread” easy. It’s practically idiot-proof, and trust me, if *I* can make it without a single culinary catastrophe, you absolutely can too. Secondly, it tastes like a warm hug from a tropical vacation. Seriously, it’s moist, sweet, and oh-so-banana-y. Third, the cleanup? Minimal. Like, *super* minimal. We’re talking one bowl, one pan, and done. Fourth, bragging rights! Imagine telling your friends you whipped up banana bread with just three things. They’ll think you’re a wizard. You basically are.
Ingredients You’ll Need
Alright, drumroll please! Here are the superstars of this low-effort, high-reward show:
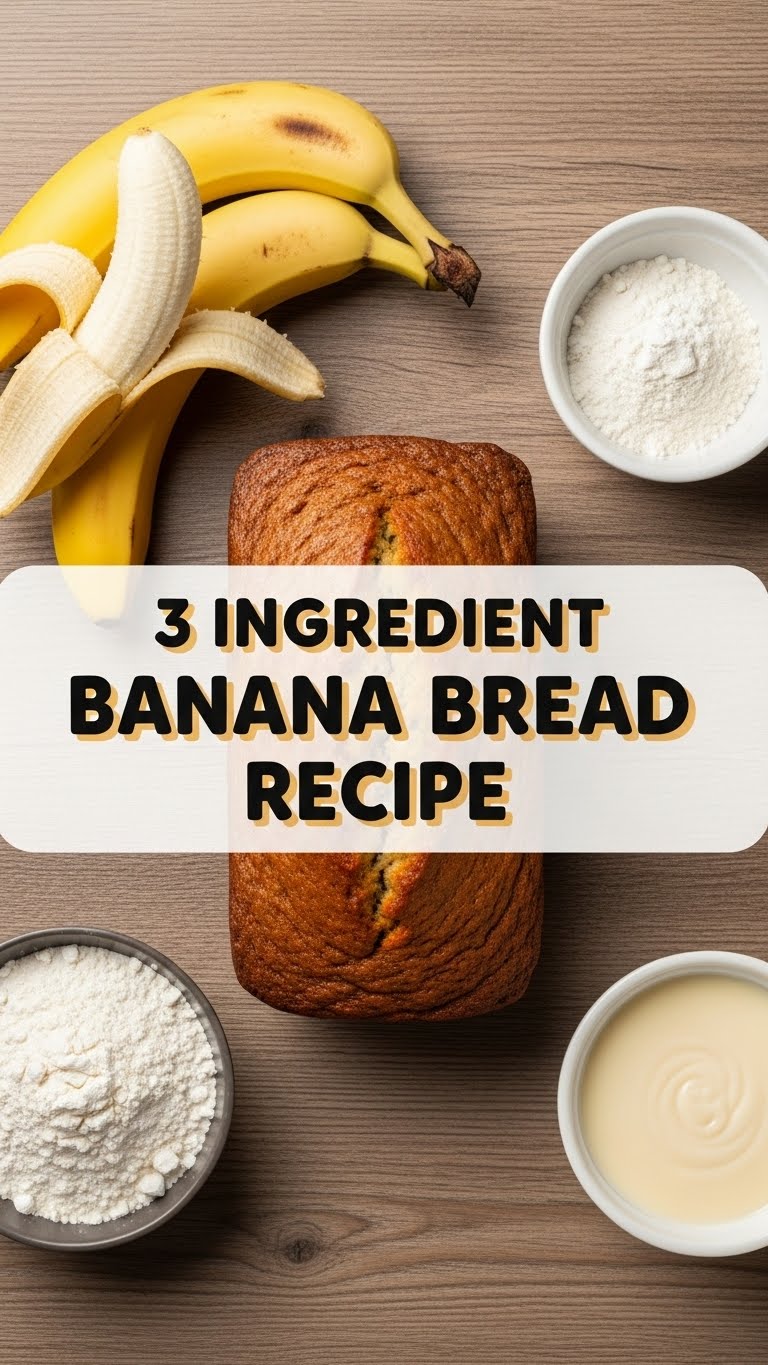
- 3 Ripe Bananas: And by “ripe,” I mean *overripe*. Like, brown spots everywhere, practically-mush-on-the-counter ripe. These are the ones begging for a delicious afterlife, and they provide all the natural sweetness and moisture we need. Don’t you dare use those pretty yellow ones!
- 1 ½ cups Self-Rising Flour: This is our magic dust. It already has leavening agents (baking powder and salt) mixed in, which means you don’t need to add a single extra pinch. Convenience at its finest, folks.
- ½ cup Sweetened Condensed Milk: The sticky, sweet, glorious glue that binds it all together and adds an extra layer of decadence. This is our primary sweetener and binder. No plain milk allowed – we need the sweet stuff!
Step-by-Step Instructions
Ready? Let’s get this bread in the oven faster than you can say “bananarama!”
- Preheat & Prep: Preheat your oven to 350°F (175°C). Lightly grease and flour a standard loaf pan (about 9×5 inches). You can also line it with parchment paper for easy removal.
- Mash ‘Em Up: In a medium-sized bowl, use a fork or a potato masher to absolutely obliterate your ripe bananas. We’re going for a chunky-smooth consistency here – a few lumps are totally fine and add character.
- Stir in the Sweet Stuff: Pour the sweetened condensed milk into the mashed bananas. Stir it well until everything is combined and looks like a glorious, sticky, sweet banana goo.
- Add the Flour: Gently fold in the self-rising flour. Do not overmix! Mix just until there are no dry streaks of flour left. Overmixing will give you tough bread, and nobody wants tough bread.
- Pour & Bake: Pour the batter into your prepared loaf pan. Pop it into the preheated oven and bake for 45-60 minutes.
- Test & Cool: You’ll know it’s done when a toothpick inserted into the center comes out clean or with a few moist crumbs. If the top starts browning too quickly, you can loosely tent it with foil. Let it cool in the pan for about 10-15 minutes before carefully transferring it to a wire rack to cool completely. (Or, if you’re like me, slice into it while it’s still warm – life’s too short, right?)
Common Mistakes to Avoid
Even though this recipe is practically fail-proof, here are a few rookie errors to sidestep:
- Using Under-Ripe Bananas: Thinking you can get away with slightly yellow bananas? Nope! You’ll miss out on natural sweetness and that incredible moisture. Brown is beautiful for banana bread.
- Overmixing the Batter: Remember when I said “gently fold”? I meant it. If you beat the flour into submission, your bread will be dense and chewy, not light and fluffy.
- Impatience is a Virtue (Sometimes): Pulling the bread out of the oven too early will give you a sad, gooey center. Let that toothpick test be your guide. Also, cutting it immediately after baking can make it fall apart – give it those 10-15 minutes to set.
- Forgetting to Grease the Pan: Unless you love scraping stuck banana bread out of a pan, don’t skip this step. Trust me, it’s not fun.
Alternatives & Substitutions
Want to get a little wild? Here are some tweaks once you’ve mastered the basic three-ingredient magic:
- Flour Power: No self-rising flour? No problem! For every cup of all-purpose flour, add 1 ½ teaspoons of baking powder and ¼ teaspoon of salt. So for this recipe, you’d use 1 ½ cups all-purpose flour, 2 ¼ teaspoons baking powder, and slightly less than ½ teaspoon salt.
- Sweetener Swap (if you must): While sweetened condensed milk is key here, if you’re experimenting beyond the 3-ingredient rule, you *could* try other liquid sweeteners like maple syrup or honey, but you’ll need to adjust the flour slightly to maintain the right consistency, and it won’t be as rich. For the pure 3-ingredient recipe, stick to condensed milk.
- Mix-Ins Mania: Once you’re feeling confident, totally go for it! Add ½ cup of chocolate chips (dark, milk, white – your call!), chopped nuts (walnuts or pecans are classic!), or even a sprinkle of cinnamon to the batter before baking. These aren’t part of the 3-ingredient count, but they definitely take it up a notch.
FAQ (Frequently Asked Questions)
- “Can I use regular flour instead of self-rising?” Well, technically yes, but then it’s not *just* three ingredients, is it? See my “Flour Power” alternative above for how to make your own self-rising flour!
- “My bananas aren’t super ripe. What do I do?” Okay, first, shame on you for not planning ahead! Kidding! You can bake them in their peels on a baking sheet at 300°F (150°C) for 15-20 minutes until they’re black and soft. Let them cool, then proceed.
- “Can I add chocolate chips or nuts?” Umm, absolutely! Once you’ve mastered the basic recipe, go wild. Just fold them in before pouring the batter into the pan. FYI, they add deliciousness, but also an extra ingredient to your “3-ingredient” claim. 😉
- “How long does this banana bread last?” If you manage not to devour it all in one sitting, it’ll last covered at room temperature for 2-3 days, or up to a week in the fridge. IMO, it tastes best on day one or two.
- “Can I freeze it?” You betcha! Once completely cooled, wrap the loaf (or individual slices) tightly in plastic wrap, then foil. It’ll keep for up to 3 months in the freezer. Thaw at room temp or gently warm in the microwave.
- “Why is my banana bread dry?” You likely overmixed the batter, or possibly overbaked it. Remember, gentle mixing and checking for doneness are key!
- “Do I need a stand mixer for this?” Nope! A fork, a bowl, and some elbow grease are all you need. Keep it simple, friend!
Final Thoughts
So there you have it, your new secret weapon for when the craving hits, the pantry is bare, and your motivation is… questionable. This 3-ingredient banana bread isn’t just a recipe; it’s a lifestyle choice. It’s permission to be lazy and still eat like royalty. Now go impress someone – or yourself – with your new culinary skills. You’ve earned it!


