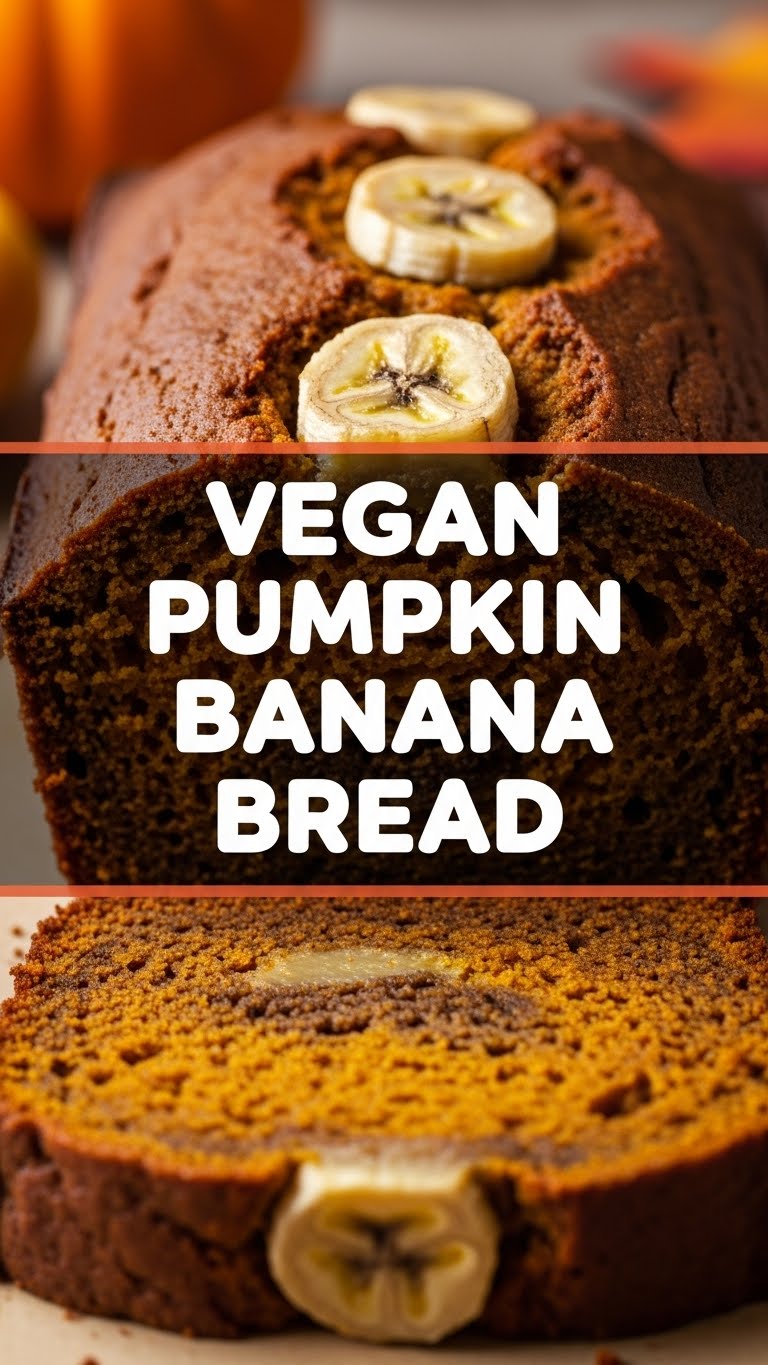
So you’re craving something warm, spicy, and utterly delicious but also maybe, just maybe, trying to keep things on the slightly healthier, plant-based side? And let’s be real, you’re not trying to spend your entire afternoon slaving away in the kitchen, are you? Same, friend, same. Welcome to your new obsession: Vegan Pumpkin Banana Bread. It’s like autumn and the tropics had a delicious, low-maintenance baby.
Why This Recipe is Awesome
Okay, let’s break it down. Why is *this* particular bread the culinary hero you didn’t know you needed? First off, it’s **vegan**, so all your plant-based pals (or just your adventurous self) can partake. No eggs, no dairy, just pure plant goodness. Second, it’s a brilliant way to use up those sad, spotty bananas silently judging you from the fruit bowl. Finally, it combines the comforting vibes of pumpkin spice with the inherent moistness of banana bread. It’s basically a hug in loaf form. Plus, it’s pretty darn **idiot-proof**. I even managed it, and my track record for baking anything more complex than toast is… well, let’s just say it’s improving.
Ingredients You’ll Need
Gather ’round, pantry explorers! Here’s your shopping list for ultimate deliciousness:
- 1 ½ cups All-Purpose Flour: The backbone of our bread, our trusty carb-y companion.
- ¾ cup Granulated Sugar: Or organic cane sugar, if you’re feeling fancy. Just enough sweetness, no sugar rush to outer space.
- 1 tsp Baking Soda: Our trusty leavening agent. It makes things fluffy.
- ½ tsp Baking Powder: Double the trouble, double the rise!
- 1 tsp Ground Cinnamon: Because what even *is* pumpkin anything without cinnamon?
- ½ tsp Ground Nutmeg: Adds that cozy, warm depth.
- ¼ tsp Ground Cloves: Just a pinch for that extra spicy kick.
- ¼ tsp Ground Ginger: The subtle zing that ties it all together.
- ½ tsp Salt: Don’t skip it! It balances all those sweet and spicy notes.
- 1 cup Mashed Ripe Bananas: About 2-3 extra-spotty bananas. The riper, the sweeter, the better!
- ½ cup Pumpkin Puree: NOT pumpkin pie filling. We want the pure, unadulterated orange goodness. Check the label!
- ½ cup Plant Milk: Almond, soy, oat – whatever non-dairy buddy you have chilling in your fridge.
- ⅓ cup Neutral Oil: Canola, vegetable, or melted coconut oil (cooled!) work great.
- 1 tsp Vanilla Extract: Because everything’s better with a splash of vanilla, IMO.
- Optional Mix-ins (¼-½ cup): Chocolate chips (duh!), chopped walnuts, pecans, or even a mix of dried cranberries for extra flair.
Step-by-Step Instructions
Ready? Set? Bake! This is so easy, you’ll wonder why you ever bought store-bought.
- Preheat & Prep: First things first, get your oven ready. Preheat it to 350°F (175°C). Then, grease and flour a standard 9×5 inch loaf pan. Or line it with parchment paper for easy removal. You’ll thank me later.
- Whisk the Dry Stuff: In a large mixing bowl, combine your flour, sugar, baking soda, baking powder, cinnamon, nutmeg, cloves, ginger, and salt. Give it a good whisk until everything is nicely incorporated. No hidden clumps, please!
- Mash & Mix the Wet Stuff: In a separate medium bowl, mash those ripe bananas until they’re mostly smooth (a few lumps are totally fine, adds character!). Add the pumpkin puree, plant milk, oil, and vanilla extract. Whisk it all together until it’s well combined.
- Combine & Conquer: Pour the wet ingredients into the dry ingredients. Use a spatula or wooden spoon to gently mix until **just combined**. A few streaks of flour are okay; we’re aiming for *just* mixed, not overmixed. If you’re adding mix-ins, fold them in now.
- Into the Pan: Scrape the batter into your prepared loaf pan. Give the pan a gentle tap or two on the counter to settle the batter and release any air bubbles.
- Bake It Up: Pop that pan into your preheated oven and bake for **50-65 minutes**. Every oven is different, so start checking around 50 minutes. You’ll know it’s done when a toothpick inserted into the center comes out clean or with just a few moist crumbs.
- Cool Down: Once baked, let the bread cool in the pan for about 10-15 minutes. This helps it firm up. Then, carefully transfer it to a wire rack to cool completely. Patience is a virtue, especially when it comes to warm bread.
Common Mistakes to Avoid
Listen up, buttercup! Even easy recipes have their pitfalls. Don’t be “that person.”
- Overmixing the Batter: This is a cardinal sin of bread baking. Mixing too much develops the gluten, making your bread tough and chewy instead of tender. Mix until *just* combined, seriously.
- Using Under-Ripe Bananas: Green-ish bananas just won’t cut it. You need those super ripe, spotty, almost black bananas. They’re sweeter and easier to mash, giving your bread that irresistible banana flavor and moist texture.
- Skipping the Preheat: Thinking you don’t need to preheat the oven? Rookie mistake! A properly preheated oven ensures even baking and a good rise.
- Confusing Puree with Pie Filling: Seriously, double-check that can! Pumpkin pie filling has added sugars and spices, which will mess with the balance of this recipe. You want 100% pure pumpkin puree.
- Cutting it While Hot: I know, the smell is intoxicating. But cutting warm bread often leads to a gummy texture and crumbly slices. Let it cool, for goodness sake!
Alternatives & Substitutions
Feeling creative? Or maybe you’re just out of one thing? No stress, we got options!
- Flour Power: You can swap out up to half of the all-purpose flour for whole wheat flour for a slightly nuttier, denser loaf. For a **gluten-free** version, use a good quality 1:1 gluten-free baking blend that contains xanthan gum.
- Sweetener Swaps: Not a fan of granulated sugar? You can use maple syrup or agave nectar (use ¾ cup and slightly reduce the plant milk by 2-3 tablespoons). Brown sugar also adds a lovely caramel note!
- Oil-Free Option: For a lower-fat loaf, you can often substitute the oil with an equal amount of unsweetened applesauce. The texture might be a touch denser, but still delicious!
- Spice it Up (or Down): Don’t have all the individual spices? No problem! Use 2 teaspoons of a good quality pumpkin pie spice mix instead.
- Mix-in Mania: Beyond chocolate chips and nuts, try shredded coconut, dried cranberries, or even a swirl of nut butter through the batter before baking for extra richness.
FAQ (Frequently Asked Questions)
Got questions? I’ve got answers (mostly humorous ones).
- How ripe do the bananas *really* need to be? Like, seriously ripe. Think more brown spots than yellow. They should be soft to the touch and mash easily. If they’re still firm and yellowish, save them for smoothies.
- Can I make this gluten-free? Yep! As mentioned, use a 1:1 gluten-free baking flour blend. Just make sure it has xanthan gum in it, or add ¼ teaspoon yourself.
- How long does this glorious bread last? Tightly wrapped at room temperature, it’ll last 3-4 days. In the fridge, it’s good for up to a week. If it makes it that long, that is!
- Can I freeze it? Absolutely! Once completely cooled, wrap the loaf tightly in plastic wrap, then foil. It’ll keep in the freezer for up to 3 months. Thaw it on the counter overnight when the craving strikes.
- What if I don’t have all those individual spices? Relax! A good 2 teaspoons of pre-mixed pumpkin pie spice will do the trick just fine. You might miss a subtle nuance, but it’ll still taste amazing.
- Can I make muffins instead of a loaf? You bet! Pour the batter into a greased or lined muffin tin. Bake for about 20-25 minutes, or until a toothpick comes out clean. Perfect for grab-and-go treats!
- Is this *actually* healthy? Well, it’s vegan, uses whole fruits, and you know what’s in it. It’s certainly a more wholesome treat than many store-bought options. But it’s still bread, so enjoy it in moderation. Or don’t. I’m not your mom.
Final Thoughts
So there you have it, folks! Your new go-to recipe for when you want something comforting, delicious, and not a total pain to make. This Vegan Pumpkin Banana Bread is seriously next-level good, and you’ll be patting yourself on the back with every bite. Now go forth, bake this beauty, and impress someone—or yourself—with your new culinary skills. You’ve earned it!
