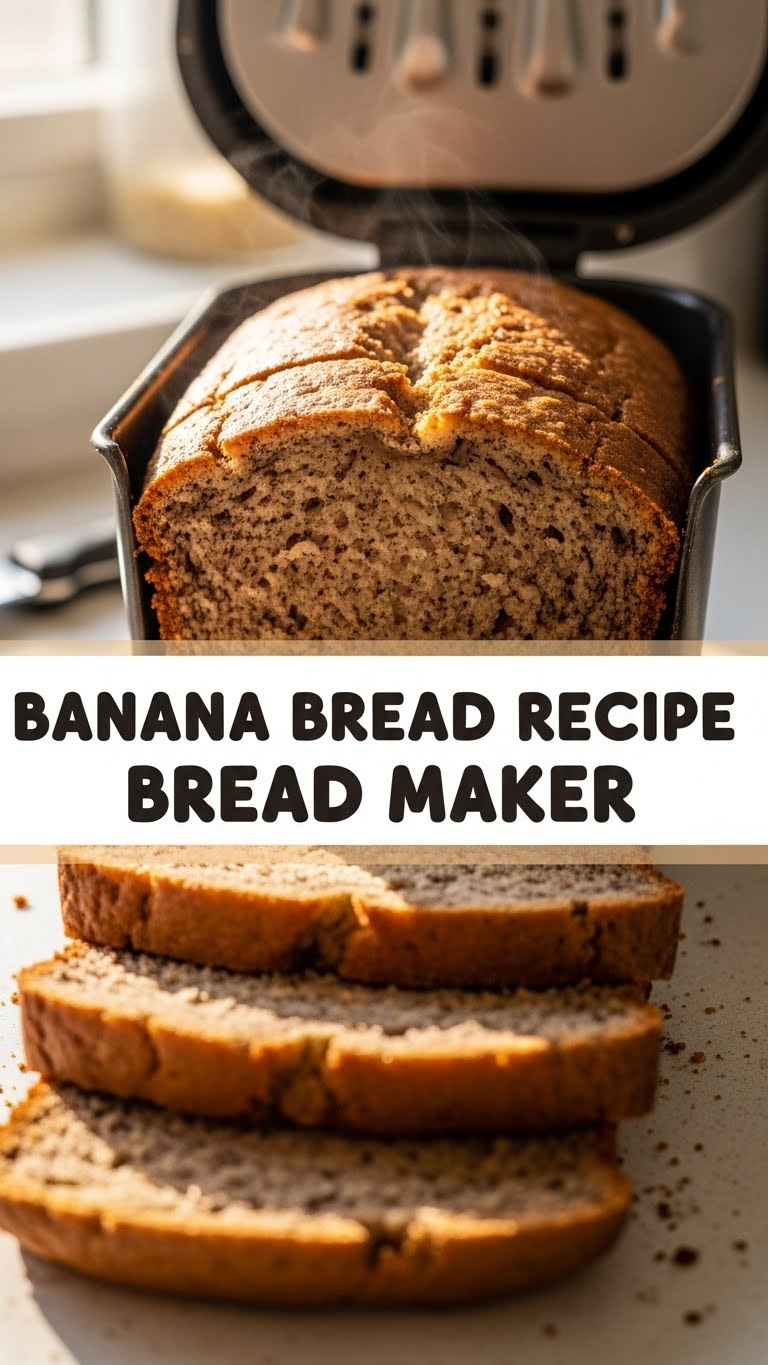
So you’re staring at those spotty bananas on your counter, feeling guilty, and dreaming of something warm, sweet, and zero-effort? My friend, you’ve come to the right place. Because today, we’re making actual magic with a bread maker, turning those sad bananas into the ultimate comfort food: banana bread. And yes, it’s so easy, your cat could probably do it (if they had opposable thumbs, which, thankfully, they don’t).
Why This Recipe is Awesome
Okay, let’s be real. Who has time to mess around with multiple bowls, flour explosions, and oven-watching anxiety? Not me, and probably not you either! This bread maker banana bread recipe is your new best friend. Seriously, it’s basically a ‘dump, press, and forget’ situation. You throw everything in, press a button, and voilà – a perfect, moist, fragrant loaf appears like a delicious miracle. No kneading, no rising worries, no baking sheet drama. It’s so foolproof, even I, the queen of kitchen chaos, didn’t mess it up. Plus, your house will smell like a bakery, and who doesn’t want that?
Ingredients You’ll Need
Alright, gather your troops! These are the heroes of our no-fuss banana bread adventure:
- Overripe Bananas (3-4 medium, very spotty): The spottier, the better! We’re talking brown, mushy, practically begging to be bread-ified. Green bananas? Nope. Don’t even think about it.
- All-Purpose Flour (1 ¾ cups): Your basic, run-of-the-mill flour. Nothing fancy needed here.
- Granulated Sugar (¾ cup): Sweetness is key, my friend. Don’t skimp unless you’re into savory banana bread (which… no).
- Egg (1 large): A binder. And, you know, because it’s bread.
- Unsalted Butter (½ cup, melted): Melted is crucial. Like, microwave for 30 seconds crucial. Don’t use cold butter!
- Milk (¼ cup): Just a splash to keep things moist and happy. Any kind works, but whole milk is my go-to.
- Baking Soda (1 teaspoon): Our leavening agent. Helps it puff up beautifully.
- Salt (½ teaspoon): Enhances all those lovely flavors. Don’t skip it, it truly makes a difference.
- Vanilla Extract (1 teaspoon): For that “oomph” of deliciousness.
- Optional Mix-ins (½ cup): Chocolate chips (duh!), chopped walnuts, pecans, or even a sprinkle of cinnamon. Go wild!
Step-by-Step Instructions
Deep breaths, people. This is easier than tying your shoes (unless you wear slip-ons, then it’s just as easy!).
- Prep Your Bananas: Peel those spotty beauties and mash them up in a bowl. You want them chunky-ish, not purée-smooth. Nobody likes a soupy banana bread.
- Wet Ingredients First: Pour your melted butter into your bread maker pan. Add the mashed bananas, egg, milk, and vanilla extract.
- Dry Ingredients Next: Carefully layer the flour over the wet ingredients. On top of the flour, add the sugar, baking soda, and salt. Try to keep them separate from the wet stuff for now; it helps with mixing.
- Insert Pan & Select Cycle: Pop the bread maker pan back into its home. Close the lid. Now, here’s the magic part: select the “Quick Bread” or “Cake” cycle on your bread maker. This is super important because these cycles don’t have a long rise time, which we don’t need for banana bread.
- Press Start & Chill: Hit the start button! Some bread makers will beep to tell you when it’s time to add mix-ins (like those glorious chocolate chips). If yours does, add them in then. If not, just throw them in with the dry ingredients.
- The Waiting Game: Now, go read a book, watch some Netflix, or stare blankly at a wall. Your bread maker is doing all the heavy lifting.
- Cool Down: Once the cycle finishes, immediately remove the pan from the bread maker. Let it cool in the pan for about 10-15 minutes. This prevents it from collapsing and helps it set.
- Enjoy!: Carefully invert the pan onto a wire rack to cool completely. Or, if you’re like me, cut a slice while it’s still warm and burn your tongue. Totally worth it.
Common Mistakes to Avoid
Listen, we’ve all been there. Learn from my past banana bread blunders, so you don’t have to!
- Using Not-Ripe-Enough Bananas: This is the cardinal sin of banana bread. Seriously, if your bananas aren’t brown and squishy, save them for another day. You’ll end up with bland, disappointing bread.
- Opening the Lid Too Often: Resist the urge! Every time you peek, you let out heat, which can mess with the baking process. Trust the machine, it knows what it’s doing.
- Not Cooling in the Pan: Pulling it out too soon is like pulling a cake out of the oven too early – it’ll collapse and get dense. Give it those crucial 10-15 minutes.
- Using the Wrong Cycle: If you use a “Basic” or “White Bread” cycle, your banana bread will likely be over-mixed, dense, and potentially weirdly risen. Quick Bread or Cake is your jam!
Alternatives & Substitutions
Feeling adventurous? Or just realized you’re missing an ingredient? No stress, we got options!
- Butter Swap: Out of butter? You can use vegetable oil or melted coconut oil instead, cup for cup. The flavor will be slightly different, but still delish.
- Sweetener Switch-Up: Instead of granulated sugar, try brown sugar for a deeper, more caramel-y flavor. Maple syrup or honey could work too, but you might need to slightly reduce the milk.
- Flour Power: While AP flour is king here, you can totally do a 50/50 mix with whole wheat flour for a healthier twist. Don’t go 100% whole wheat unless you want a brick, though.
- Spice it Up: A dash of cinnamon (½ tsp) or nutmeg (¼ tsp) can add a lovely warmth. Cardamom is also surprisingly good!
- Mix-in Madness: Besides the classics, try dried cranberries, shredded coconut, or a swirl of peanut butter (add during the mix-in beep). The possibilities are endless, my friend!
FAQ (Frequently Asked Questions)
Okay, spill the beans! Got questions? I probably have snarky answers.
- My bread maker only has a “Sweet Bread” setting, not “Quick Bread” or “Cake.” What do I do?
Fear not, intrepid baker! “Sweet Bread” is usually perfectly fine. It’s designed for breads with sugar, and often has a shorter/different rise/bake cycle than basic white bread. Just use that one!
- Can I use frozen bananas?
Absolutely! Just make sure to thaw them completely and drain any excess liquid before mashing. Otherwise, your bread will be too watery. Nobody wants soggy bottom bread.
- How do I store banana bread?
Once it’s completely cooled (the hardest part, I know!), wrap it tightly in plastic wrap or foil, or store it in an airtight container at room temperature for up to 3-4 days. For longer, freeze slices for up to a month – they thaw beautifully!
- My bread maker has a delay start function. Can I use it for this recipe?
Hmm, I wouldn’t recommend it for banana bread. Because it uses baking soda (not yeast), the leavening action starts immediately when the wet and dry ingredients mix. Letting it sit too long could result in a denser loaf. Best to make it fresh! FYI, this applies to most quick breads.
- Why is my banana bread dense/gummy?
Couple of culprits here: possibly over-mixing (though less likely in a bread maker if you use the right cycle), too much liquid (e.g., watery bananas), or not enough leavening (old baking soda, perhaps?). Double-check your measurements, especially the bananas and any extra liquids.
- Can I add nuts to the banana bread?
Heck yes! Add about ½ cup of chopped walnuts or pecans when your bread maker beeps for mix-ins, or just toss them in with the dry ingredients. They add a fantastic crunch and nutty flavor! AKA, totally go for it.
Final Thoughts
And there you have it, folks! Your passport to banana bread bliss, courtesy of your trusty bread maker. No fuss, no muss, just pure, unadulterated, baked-to-perfection deliciousness. Now go impress someone – or yourself, which is arguably more important – with your new culinary superpowers. You’ve earned those bragging rights (and that delicious slice!). Happy baking, my friend!

