
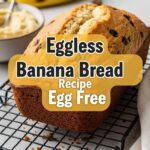
So you’re craving something warm, gooey, and absolutely delicious but scrolling through recipes feels like homework and, honestly, you’re fresh out of butter? Been there, done that, bought the oversized stretchy pants. Trust me, we all have those days when the fridge is looking a bit sparse, but your sweet tooth is screaming for attention. Good news, my friend! We’re about to make some magic happen with a recipe that’s so simple, so utterly delightful, you’ll wonder why you ever bothered with butter in the first place. Get ready for **Chocolate Chip Banana Bread No Butter**!
Why This Recipe is Awesome
Okay, let’s be real. This isn’t just *another* banana bread recipe. This is THE banana bread recipe for when you want maximum deliciousness with minimum fuss. First off, it’s **no butter**, which means less fat (yay!) and no waiting for butter to soften (double yay!). Ripe bananas do all the heavy lifting for moisture and flavor. Seriously, if you can mash a banana, you can make this. It’s practically idiot-proof. Even I didn’t mess it up, and that’s saying something considering my track record with anything more complex than toast.
Plus, it smells incredible while baking, turning your kitchen into a cozy, irresistible haven. You’ll impress everyone, or just yourself, which, let’s be honest, is usually the more important audience anyway. It’s perfect for breakfast, a snack, or midnight cravings when you’re pretending to be asleep but secretly plotting your raid on the pantry.
Ingredients You’ll Need
Gather ’round, fellow non-butter enthusiasts! Here’s what you’ll need to whip up this glorious loaf. Don’t worry, it’s nothing too exotic.
- **3 ripe bananas:** The riper, the better. We’re talking brown spots, practically black – these are your flavor bombs and moisture champions. Don’t you dare use perfectly yellow ones!
- **1 large egg:** Just one little guy to bind it all together. No overthinking here.
- **1/3 cup vegetable oil (or any neutral oil):** This is our butter substitute, bringing all the tenderness without the dairy.
- **1/2 cup granulated sugar:** For that sweet, sweet goodness. Adjust if your bananas are super sweet (or if you just like less sugar, you rebel).
- **1 teaspoon vanilla extract:** Because everything tastes better with vanilla. It’s just a fact.
- **1 1/2 cups all-purpose flour:** The backbone of our bread.
- **1 teaspoon baking soda:** Our magic leavening agent. Don’t skip it, or you’ll have a sad, flat loaf.
- **1/2 teaspoon salt:** Balances everything out and makes the flavors pop. It’s a secret weapon.
- **1 cup chocolate chips:** The star of the show! Milk, semi-sweet, dark… your choice, your adventure.
Step-by-Step Instructions
Alright, apron on (or not, whatever), let’s get baking! This is super straightforward.
- **Preheat Power-Up:** First things first, get your oven to **350°F (175°C)**. While it’s heating up, grab a 9×5 inch loaf pan, give it a quick spray with non-stick spray, or line it with parchment paper. Trust me, future you will thank present you when the loaf slides right out.
- **Banana Bash:** In a medium bowl, mash those ripe bananas with a fork until they’re mostly smooth but still have a few small lumps. We’re not making baby food here, just breaking them down a bit.
- **Wet Mix Wonders:** Add the egg, oil, sugar, and vanilla extract to your mashed bananas. Stir it all together until just combined. Don’t overmix! We want a tender loaf, not a tough one.
- **Dry Mix Magic:** In a separate, larger bowl, whisk together the flour, baking soda, and salt. Make sure there are no lumps of baking soda hiding, as that would be a nasty surprise later.
- **Combine & Conquer:** Pour the wet ingredients into the dry ingredients. Stir gently with a spoon or spatula until *just* combined. Again, **do not overmix!** A few streaks of flour are totally fine.
- **Chocolate Chip Drop-In:** Fold in your glorious chocolate chips. Be gentle, we’re not trying to crush them.
- **Pan It Up:** Pour your beautiful batter into the prepared loaf pan. Spread it out evenly.
- **Bake Off!:** Pop that pan into your preheated oven. Bake for **50-60 minutes**. You’ll know it’s ready when a toothpick inserted into the center comes out clean or with just a few moist crumbs attached.
- **Cool Down:** Once it’s baked to golden perfection, take it out of the oven. Let it cool in the pan for about 10-15 minutes before carefully transferring it to a wire rack to cool completely. Or, you know, just slice into it while it’s still warm and gooey. I won’t tell.
Common Mistakes to Avoid
Look, we all make mistakes. It’s part of the human condition, especially when deliciousness is involved. But with these tips, you can dodge the common pitfalls!
- **Underripe Bananas:** Using yellow, firm bananas. Rookie mistake! You need those brown, mushy ones for maximum flavor and moisture. Otherwise, your bread will be dry and sad.
- **Overmixing the Batter:** This is a biggie. Mixing too much develops the gluten in the flour, leading to a tough, dense bread instead of a soft, tender one. Mix until *just* combined. I mean it!
- **Forgetting to Preheat the Oven:** You wouldn’t jump into a cold pool, would you? Your bread doesn’t want to jump into a cold oven either. Preheating ensures even baking and proper rising.
- **Not Cooling Properly:** Slicing into a hot loaf can make it crumble or seem gooey in a bad way. Let it cool for at least 15 minutes in the pan, then on a rack. Patience, grasshopper!
Alternatives & Substitutions
Feeling adventurous? Or maybe you’re missing an ingredient? No stress, here are some easy swaps:
- **Flour Power:** Don’t have all-purpose? You can often substitute with a 1:1 gluten-free flour blend. Whole wheat flour also works for a nuttier, denser loaf, but IMO, all-purpose is best here for texture.
- **Sugar Swaps:** Brown sugar can replace granulated for a deeper, more molasses-like flavor. Coconut sugar works too, but might alter the sweetness slightly.
- **Oil Options:** Canola oil, sunflower oil, or even a light olive oil (if you don’t mind a faint olive flavor) work perfectly well instead of vegetable oil.
- **Chocolate Chip Alternatives:** Not a chocolate fan (gasp!)? Swap them for walnuts, pecans, or a mix of dried fruits like cranberries or raisins. Or, **FYI**, just leave them out for a classic banana bread!
- **Spice it Up:** A teaspoon of cinnamon or a pinch of nutmeg can add an extra layer of warmth and coziness to your loaf.
FAQ (Frequently Asked Questions)
Got questions? I’ve got (casual) answers!
- **Can I make this into muffins?** Absolutely! Just grease a muffin tin and fill cups about two-thirds full. Bake for about 20-25 minutes at the same temperature. Who doesn’t love a good banana bread muffin?
- **How do I store leftover banana bread?** Keep it in an airtight container at room temperature for up to 3-4 days. If it lasts that long, you’re doing better than me!
- **Can I freeze banana bread?** You bet! Wrap the cooled loaf (or slices) tightly in plastic wrap, then foil. It’ll last in the freezer for up to 3 months. Thaw at room temperature when you’re ready for a treat.
- **My bananas aren’t ripe enough, what do I do?** Bake them! Seriously. Place unpeeled bananas on a baking sheet and bake at 300°F (150°C) for 15-30 minutes until the peels are black and shiny. Let them cool, then peel and mash. Magic!
- **Is this recipe healthy since it has no butter?** Well, it’s *healthier* in terms of fat, but it’s still banana bread, packed with sugar and chocolate chips. It’s all about balance, right? Treat yourself!
- **Can I add other fruits like berries?** You can, but keep it to about half a cup so it doesn’t make the batter too wet. Just fold them in gently with the chocolate chips.
Final Thoughts
And there you have it, folks! Your new go-to recipe for when you need a warm, comforting hug in bread form. This Chocolate Chip Banana Bread No Butter is proof that you don’t need fancy ingredients or complicated steps to create something truly delicious. It’s easy, it’s forgiving, and it’s ridiculously tasty. Now go impress someone—or yourself—with your new culinary skills. You’ve earned it! Seriously, go forth and bake some joy. And maybe make an extra loaf, because trust me, one won’t be enough.
