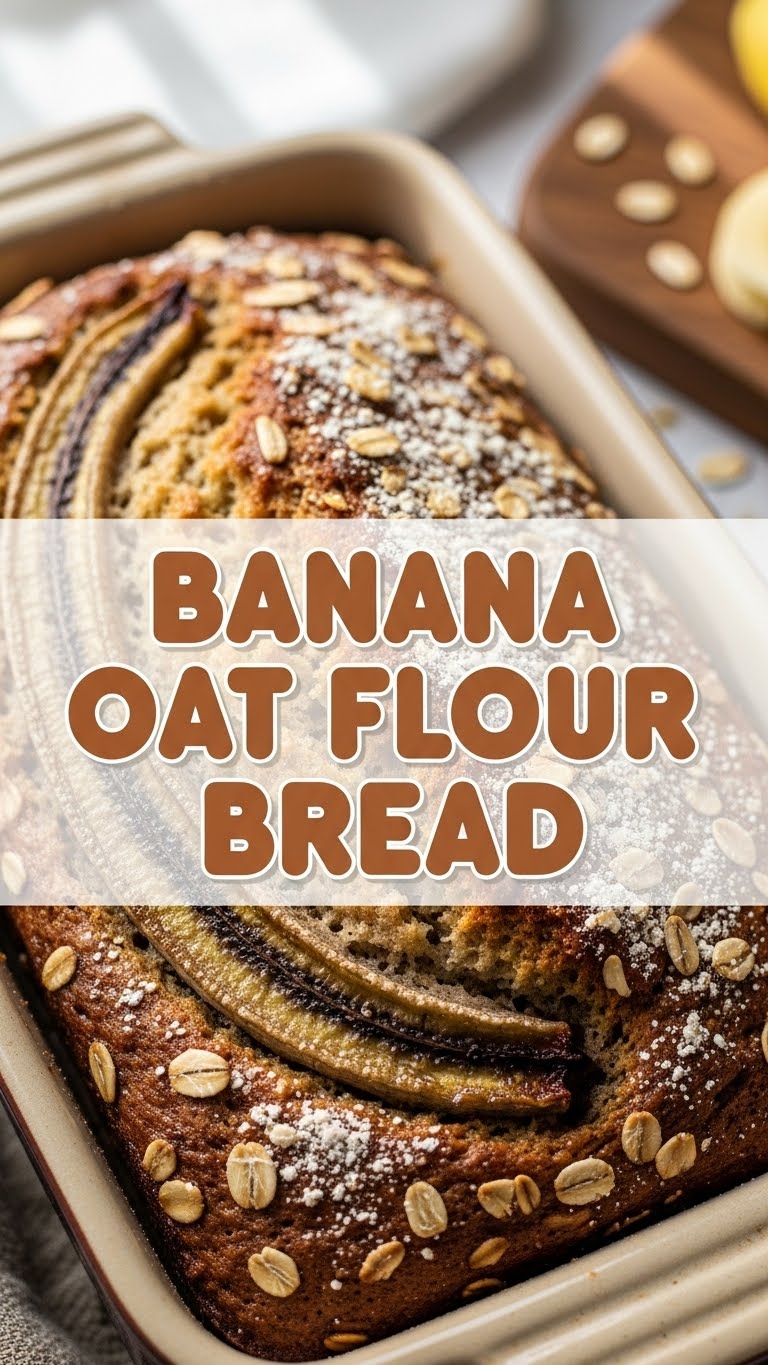
So, your bananas on the counter are looking a little… spotted? A little *too* ripe for a smoothie but not quite ready for the compost bin? And you’re craving something warm, comforting, and maybe just a *smidge* healthier than your average dessert? You, my friend, are in the right place. Because today, we’re making Banana Oat Flour Bread, and it’s basically a hug in loaf form.
Why This Recipe is Awesome
Let’s be real, life’s too short for complicated recipes that require a chemistry degree. This banana oat flour bread? It’s so ridiculously easy, you’ll wonder if you missed a step. It’s essentially “dump, stir, bake, eat” – my kind of cooking, honestly. Plus, using oat flour gives it this lovely, subtle nutty flavor and a texture that’s both tender and satisfying. It’s also kinda-sorta-definitely-healthier than traditional banana bread, meaning you can have a second slice without the immediate guilt trip. **It’s practically idiot-proof**, even on a Monday morning before coffee.
Ingredients You’ll Need
Gather your troops! Here’s what you’ll need to make this magic happen:
- 2-3 super ripe bananas: We’re talking brown, spotty, practically black. These are your flavor powerhouses. Don’t even *think* about using yellow ones; they’re just not ready for the big leagues yet.
- 1/2 cup melted butter: Unsalted, please. Or salted if you’re feeling rebellious and like a little savory kick. Margarine? We’ll talk about that in the FAQ, but just trust me on the butter for now.
- 1/2 cup brown sugar: For that cozy, caramel-y sweetness. If you’re feeling less sweet, you can cut it down a bit.
- 1 large egg: Room temperature if you’re fancy, straight from the fridge if you’re like me and forget until the last minute.
- 1 teaspoon vanilla extract: Don’t skimp on this. It’s the silent hero.
- 1 1/2 cups oat flour: This is key! You can buy it, or make your own by blending rolled oats in a food processor until fine. Easy peasy.
- 1 teaspoon baking soda: Our lift-off agent!
- 1/2 teaspoon salt: Enhances all those lovely flavors. Don’t skip it!
- Optional add-ins: 1/2 cup chocolate chips, chopped walnuts, pecans, or whatever your heart desires.
Step-by-Step Instructions
Ready to get your bake on? Let’s do this!
- First things first, preheat your oven to 350°F (175°C). Then, lightly grease and flour a standard loaf pan (around 9×5 inches). Nobody wants a stuck loaf, right?
- In a medium bowl, mash those gloriously ripe bananas with a fork until they’re mostly smooth with a few small lumps. We like texture!
- Now, add the melted butter, brown sugar, egg, and vanilla extract to the mashed bananas. Whisk ’em all together until they’re well combined and look like a delicious, gloopy mess.
- In a separate, larger bowl, whisk together the oat flour, baking soda, and salt. Make sure there are no lumpy bits of baking soda chilling out.
- Pour the wet ingredients into the dry ingredients. Stir gently with a spoon or spatula until *just* combined. Do not overmix! A few streaks of flour are totally fine. If you’re adding chocolate chips or nuts, fold them in now.
- Scrape the batter into your prepared loaf pan, smoothing the top a little.
- Bake for 50-60 minutes, or until a wooden skewer or toothpick inserted into the center comes out clean (or with just a few moist crumbs).
- Let the bread cool in the pan for about 10 minutes before carefully turning it out onto a wire rack to cool completely. Or, if you’re like me, cut a slice while it’s still warm and gooey. YOLO, right?
Common Mistakes to Avoid
Even the easiest recipes have their pitfalls. Don’t be “that person.”
- Using under-ripe bananas: Seriously, this is the cardinal sin. Green bananas make for bland, dry bread. Embrace the brown spots!
- Overmixing the batter: This is a big no-no for tender bread. Overmixing develops gluten, which is great for chewy bread, but not so much for a fluffy, moist loaf. Mix until *just* combined, then stop!
- Not preheating your oven: It might seem trivial, but a properly preheated oven ensures even baking from the get-go. Otherwise, you’ll end up with dense, sad bread. **Rookie mistake!**
- Cutting it too soon: I know the struggle is real, but give it at least 10 minutes in the pan before attempting to release it. Otherwise, it might crumble on you.
Alternatives & Substitutions
Feeling adventurous? Or just missing an ingredient? No stress, we got options!
- Sweeteners: Instead of brown sugar, you could use granulated sugar, coconut sugar, or even maple syrup (reduce other liquids slightly if using syrup). Just adjust to your preferred sweetness level.
- Fat: Coconut oil or a neutral-flavored oil (like vegetable or canola) can replace the butter, though I *personally* think butter gives the best flavor. But hey, you do you!
- Add-ins: Get wild! Cinnamon swirl, shredded coconut, dried cranberries, a sprinkle of sea salt on top before baking… the world is your oyster.
- Gluten-Free: Good news! Oat flour is naturally gluten-free, but if you have a severe allergy, **make sure your oat flour is certified gluten-free** to avoid cross-contamination.
FAQ (Frequently Asked Questions)
Got questions? I probably have snarky answers.
- Can I use regular all-purpose flour instead of oat flour? You totally *can*, but it won’t be the same bread. Oat flour gives it a unique texture and flavor. If you do switch, the liquid ratio might need slight adjusting.
- My bananas aren’t ripe enough, help! Okay, deep breaths. You can speed up ripening by baking them *with the peel on* at 300°F (150°C) for 15-20 minutes until they’re black. Let them cool, then proceed. You’re welcome.
- How do I store this deliciousness? At room temperature, wrapped tightly or in an airtight container, it’ll last 3-4 days. In the fridge, up to a week. For longer storage, slice and freeze for up to 3 months. Just thaw and enjoy!
- Can I make this into muffins? Absolutely! Divide the batter into a greased muffin tin and bake for 20-25 minutes, or until a toothpick comes out clean. Smaller portions, less commitment. Genius, right?
- Is this *actually* healthy? Well, it has bananas and oats, so it’s got some fiber and good stuff. But it also has sugar and butter. It’s “healthier-ish” than a frosted donut, IMO. Everything in moderation, my friend!
Final Thoughts
And there you have it! Your very own, incredibly delicious, easy-peasy Banana Oat Flour Bread. Go ahead, pat yourself on the back – you just turned some sad, spotty bananas into a culinary masterpiece. Slice it, smear some butter on it (because why not?), or just eat it plain. You deserve this. Now go impress someone—or yourself—with your new culinary skills. You’ve earned it!

