
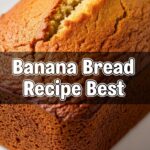
So, you’re staring at those spotty, almost-too-ripe bananas on your counter, contemplating their fate? Don’t you dare toss ’em! We’re about to transform those neglected fruit soldiers into something utterly glorious, incredibly easy, and best of all, dairy-free. Get ready for some serious muffin magic, because these are about to become your new kitchen obsession. You’re welcome.
Why This Recipe is Awesome
Let’s be real, who needs complicated when you can have delicious? This recipe is the ultimate low-effort, high-reward situation. It’s so forgiving, honestly, **even if you occasionally burn toast**, you’ll nail these. They’re super moist (yeah, I said it), packed with banana goodness, and the fact that they’re dairy-free means more happy tummies for everyone. Plus, they make your kitchen smell like a warm hug, which is basically aromatherapy, right? You’ll look like a baking pro without breaking a sweat. Win-win-win.
Ingredients You’ll Need
Gather your troops! Here’s what you’ll need to make these little pockets of joy:
- **Very Ripe Bananas (3 medium, or about 1.5 cups mashed):** We’re talking brown spots, maybe a little black. The uglier, the sweeter! These are the stars, don’t skimp.
- **All-Purpose Flour (1.5 cups):** The regular stuff. No need for fancy flours unless you’re feeling extra.
- **Granulated Sugar (1/2 cup):** Sweetens things up. Adjust to your banana sweetness level.
- **Baking Soda (1 teaspoon):** Our little lift-off agent.
- **Salt (1/2 teaspoon):** Brings out all those delicious flavors. Don’t skip it!
- **Cinnamon (1/2 teaspoon):** Optional, but adds a lovely warmth. Highly recommended, IMO.
- **Dairy-Free Milk (1/4 cup):** Almond, oat, soy, whatever your heart desires.
- **Neutral Oil (1/4 cup):** Vegetable, canola, or melted coconut oil work great. This keeps them moist without any dairy.
- **Vanilla Extract (1 teaspoon):** Because everything is better with vanilla.
Step-by-Step Instructions
- **Preheat Power-Up:** First things first, get your oven to **375°F (190°C)**. Line a 12-cup muffin tin with paper liners or grease it like you mean it. Nobody wants stuck muffins!
- **Banana Mash Party:** In a medium bowl, mash those gloriously ripe bananas with a fork until they’re mostly smooth with a few small lumps. Texture is good!
- **Wet Ingredients Whirlwind:** Add the dairy-free milk, oil, and vanilla extract to your mashed bananas. Stir ’em all up until they’re well combined. This is your “wet” bowl.
- **Dry Mix Magic:** In a separate, larger bowl, whisk together the flour, sugar, baking soda, salt, and cinnamon (if using). Make sure there are no lumpy bits. This is your “dry” bowl.
- **Combine & Conquer:** Pour the wet ingredients into the dry ingredients. Stir gently with a spoon or spatula **just until combined**. A few lumps of flour are totally fine. **Do not overmix!** Overmixing is the enemy of fluffy muffins.
- **Fill ‘Em Up:** Divide the batter evenly among the 12 muffin cups. Fill each one about two-thirds full.
- **Bake Away!** Pop your muffin tin into the preheated oven. Bake for **18-22 minutes**, or until a toothpick inserted into the center of a muffin comes out clean.
- **Cool Down:** Let your muffins cool in the tin for a few minutes before transferring them to a wire rack to cool completely. (Or, you know, eat one while it’s still warm because you earned it.)
Common Mistakes to Avoid
- **Overmixing the Batter:** Seriously, this is the number one muffin killer. You want a light touch. Overmixing develops the gluten too much, leading to tough, chewy muffins instead of light, fluffy ones. Resist the urge to make it perfectly smooth!
- **Not Using Ripe Bananas:** Under-ripe bananas just won’t give you that natural sweetness and moist texture. Embrace the brown!
- **Forgetting to Preheat the Oven:** Rookie mistake! Your muffins won’t rise properly if the oven isn’t at temperature from the start.
- **Filling Muffin Tins Too Full:** Overfilling means muffins that overflow and stick together. Stick to about two-thirds full, and they’ll get a nice dome.
Alternatives & Substitutions
Feeling adventurous? Here are some fun tweaks:
- **Add-ins Galore:** Throw in a handful of dairy-free chocolate chips (because, duh), chopped walnuts or pecans for crunch, or even a sprinkle of shredded coconut. Just fold them in gently at step 5.
- **Flour Power:** Want to go whole grain? You can swap up to half of the all-purpose flour for whole wheat flour, but they might be a little denser. For gluten-free, use your favorite 1:1 gluten-free baking blend.
- **Spice it Up:** A pinch of nutmeg or a dash of allspice can really elevate the flavor profile if you’re feeling spicy.
- **Sweetness Level:** If your bananas are super sweet, you can reduce the sugar slightly. Conversely, if you like things on the sweeter side, add another tablespoon or two. Your kitchen, your rules!
FAQ (Frequently Asked Questions)
- **My bananas aren’t ripe enough! What do I do?** Patience, young grasshopper! If you’re in a pinch, you can bake them on a baking sheet at 300°F (150°C) for 15-30 minutes until their skins are black. Let them cool, then mash. Boom!
- **Can I make these into a loaf?** Absolutely! Pour the batter into a greased 9×5 inch loaf pan. You’ll need to increase the baking time to about 50-60 minutes, or until a toothpick comes out clean.
- **Are these freezer-friendly?** Heck yes! Once completely cooled, store them in an airtight container or freezer bag for up to 3 months. Just thaw at room temperature or zap ’em in the microwave for a quick treat.
- **What if I don’t have dairy-free milk?** You can actually use water in a pinch, though the muffins might be slightly less rich. Dairy-free plain yogurt could also work for a tangier twist.
- **Can I reduce the sugar?** Yes, especially if your bananas are super ripe. You could try reducing it to 1/4 cup, but the texture might change a tiny bit. They’ll still be tasty, though!
Final Thoughts
See? That wasn’t scary at all! You just made a batch of ridiculously delicious, dairy-free banana bread muffins. Go on, grab one (or two, I’m not judging). You’ve earned this moment of pure, unadulterated baked-good bliss. Now go impress someone—or yourself—with your new culinary skills. You’re practically a pastry chef, **FYI**!

