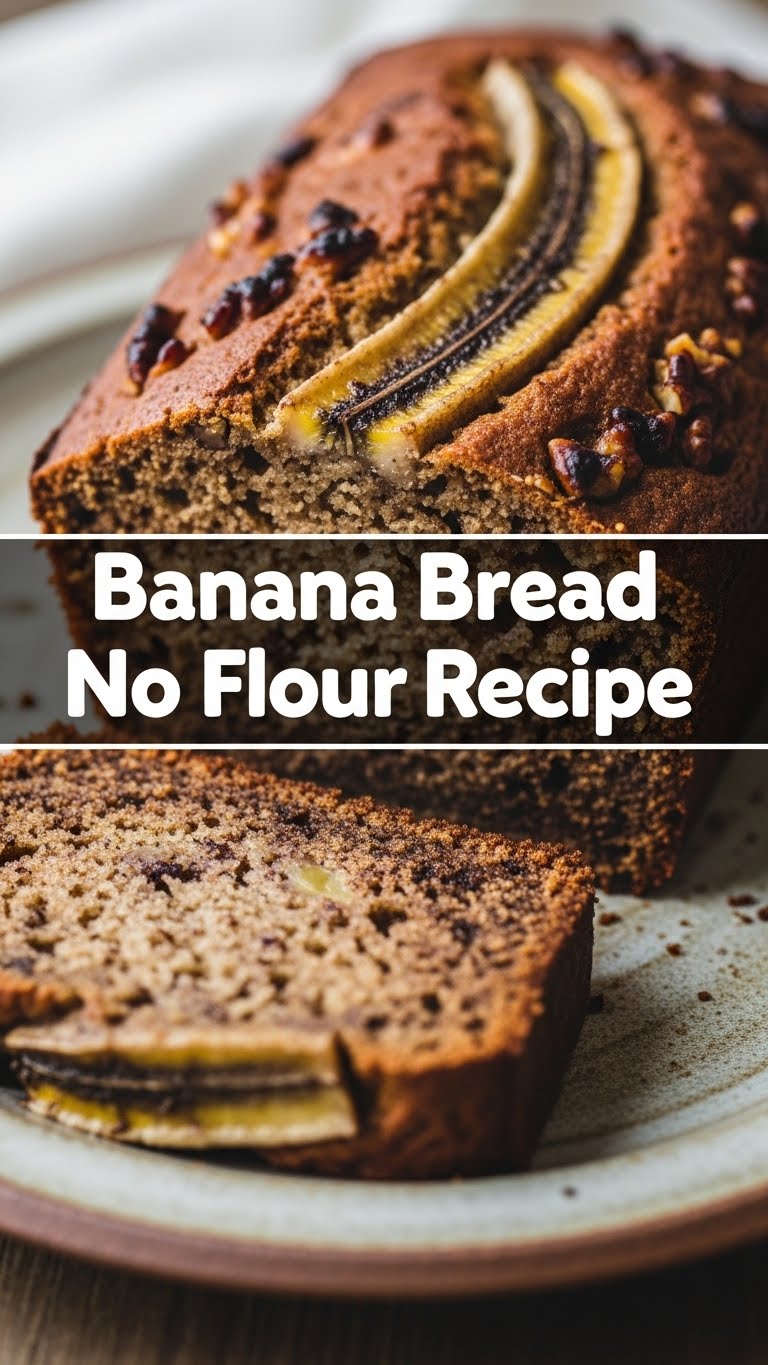
So, you’ve got those sad, spotty bananas glaring at you from the counter, practically begging for a glow-up? And you’re thinking, “Flour? Nah, too much effort, and honestly, who needs the extra carbs when we can just, you know, not?” My friend, you’ve come to the right place. We’re about to make some banana bread magic without the white stuff. Get ready to impress yourself!
Why This Recipe is Awesome
Listen up, because this isn’t just *any* banana bread recipe. This is the “OMG, I can’t believe there’s no flour in this!” kind of recipe. Why is it awesome? Let me count the ways:
- It’s naturally **gluten-free** without even trying. Score!
- Super moist, thanks to our banana heroes and a secret ingredient (shhh, it’s nut butter).
- Whips up faster than you can say “preheat the oven.” Seriously, minimal fuss.
- Practically **one-bowl wonder** territory. Fewer dishes? Yes, please!
- It’s so straightforward, even *I* didn’t mess it up, and my kitchen adventures often involve minor explosions.
- Did I mention it’s delicious? Because it’s ridiculously delicious.
Ingredients You’ll Need
Gather your troops, folks! Here’s what you’ll need for this no-flour banana bread masterpiece. Keep it simple, keep it real.
- 3-4 Ripe Bananas: And by “ripe,” I mean **seriously ripe**. We’re talking brown spots, black patches, practically ready for the compost bin. The uglier, the sweeter, trust me.
- 2 Large Eggs: Our trusty binders. They hold everything together so your bread doesn’t turn into a delicious crumble pile.
- 1/2 Cup Nut Butter: Creamy peanut butter, almond butter, cashew butter – pick your poison! Just make sure it’s the natural kind, no added sugar, no weird oils. This is key for moisture and structure.
- 1/4 Cup Maple Syrup or Honey: For that touch of sweetness. Adjust to your preference, but remember, those super ripe bananas bring their own sugar party.
- 1 tsp Vanilla Extract: Because vanilla makes everything better, period.
- 1 tsp Baking Soda: Our leavening agent. It’s what gives our bread that lovely lift.
- 1/2 tsp Ground Cinnamon (optional but highly recommended): Just a little hug for your tastebuds.
- Pinch of Salt: Balances everything out and makes the other flavors sing.
- Optional Add-ins (because life’s too short for plain banana bread): 1/2 cup chocolate chips (dark is my jam!), chopped walnuts, pecans, or a sprinkle of shredded coconut.
Step-by-Step Instructions
Alright, apron on, good vibes only! Let’s get this show on the road. These steps are practically foolproof, so breathe easy.
- First things first: Preheat that oven to **350°F (175°C)**. While it’s heating up, grab a 9×5 inch loaf pan. Grease it like you mean it, then line it with parchment paper, leaving an overhang on the sides. This makes for super easy removal later, FYI.
- In a large bowl, go to town on your ripe bananas. Mash them up with a fork until they’re mostly smooth with a few small lumps here and there. We’re not looking for baby food, just a good mush.
- Now, crack in your eggs. Add the nut butter, maple syrup (or honey), and vanilla extract to the bowl with the mashed bananas. Whisk it all together until it’s nicely combined and looks like a glorious, creamy mess.
- Sprinkle in the baking soda, cinnamon (if you’re using it), and that little pinch of salt. Mix gently until just combined. **Don’t overmix!** Overmixing is the enemy of tender baked goods.
- If you’re feeling fancy, now’s the time to fold in your optional add-ins, like chocolate chips or nuts. Just a few quick stirs to distribute them evenly.
- Pour your magnificent batter into the prepared loaf pan. Give the pan a gentle tap or two on the counter to settle the batter and release any air bubbles.
- Bake for **35-45 minutes**. You’ll know it’s done when a toothpick inserted into the center comes out clean (or with just a few moist crumbs, if you used chocolate chips).
- Let it cool in the pan for about 10-15 minutes. This is the hardest part, I know, but **patience is a virtue!** Then, use the parchment paper overhang to lift the bread out and transfer it to a wire rack to cool completely.
Common Mistakes to Avoid
Nobody’s perfect, and kitchen mishaps happen. But here are a few rookie mistakes you can totally dodge to ensure your banana bread comes out glorious:
- Using Under-Ripe Bananas: Yellow bananas are for eating fresh, not for banana bread. They won’t be sweet enough, and your bread will lack that signature banana punch. **Go for the brown and black ones!**
- Overmixing the Batter: I said it before, I’ll say it again. Mix until just combined. Aggressively beating the batter develops gluten (which isn’t even in here, but the principle applies) and can make your bread tough.
- Skipping the Greasing (or Parchment): Ever had half your loaf stuck to the pan? Yeah, it’s soul-crushing. Don’t be that person. Grease and parchment are your best friends.
- Not Letting It Cool: Slicing into hot banana bread is tempting, but it’s still “setting” inside. You risk a crumbly, unappealing texture. Let it cool; it’s worth the wait, promise.
- Forgetting to Preheat the Oven: This isn’t just a suggestion; it’s a command. An un-preheated oven means uneven baking and sad, dense bread.
Alternatives & Substitutions
Feeling creative? Or just missing an ingredient? No worries, we’ve got options!
- Nut Butter Swap: Not a fan of peanut butter? Almond, cashew, or even sunflower seed butter (for nut-free folks) work beautifully. Just ensure it’s natural and creamy.
- Sweetener Showdown: Instead of maple syrup, you can use agave nectar or even brown sugar (if you’re okay with a little refined sugar action). Taste and adjust to your sweet tooth!
- Egg-Free Fun: For a vegan version, you *might* be able to swap the eggs for two “flax eggs” (2 tbsp ground flaxseed mixed with 6 tbsp water, let sit for 5 minutes). The texture might be a smidge denser, but it’ll still be delish.
- Spice it Up: Add a pinch of nutmeg, a dash of cardamom, or a tiny bit of allspice for a different flavor profile.
- Extra Protein Boost: You could try adding a scoop of unflavored or vanilla protein powder, but be mindful it might dry out the bread slightly, so you might need an extra splash of liquid.
FAQ (Frequently Asked Questions)
Got questions? I probably do too, but I’ll answer these ones like a pro:
Q: Why no flour? Is this some kind of wizardry?
A: Kinda! The magic comes from the super ripe bananas and the nut butter, which provide enough structure and moisture to make flour completely unnecessary. It’s our secret rebellion against traditional baking, IMO.
Q: My bananas aren’t super ripe. Can I still make this?
A: Well, technically yes, but why hurt your potential for maximum deliciousness like that? Under-ripe bananas are less sweet and don’t mash as well, resulting in a less flavorful and possibly drier bread. Pop those bananas in a paper bag with an apple overnight to speed things up!
Q: Can I use a different size loaf pan?
A: You can, but you’ll need to adjust the baking time. A smaller pan might need longer, a wider pan might need less. Just keep an eye on it and use the toothpick test.
Q: Is this bread actually healthy?
A: “Healthy” is a big word! It’s definitely **healthier-ish** than traditional banana bread with refined flour and sugar, thanks to the whole food ingredients. But it’s still a treat, so don’t eat the whole loaf in one sitting unless it’s been *that* kind of week. (No judgment here!)
Q: How do I store this deliciousness?
A: Keep it in an airtight container at room temperature for up to 2-3 days, or pop it in the fridge for up to a week. For longer storage, slice it up and freeze individual pieces for a quick grab-and-go snack. Just thaw and enjoy!
Q: My banana bread sunk in the middle! What happened?
A: Aw, bummer! This often happens from overmixing, opening the oven door too early (let that baking soda do its work!), or sometimes if your baking soda isn’t fresh. It’s still perfectly edible, just a little less aesthetically pleasing. Don’t worry, even a sunk loaf is still a yummy loaf!
Final Thoughts
There you have it, superstar! You’ve just conquered the art of no-flour banana bread. You’re basically a kitchen wizard now, casually whipping up healthier-ish treats with minimal fuss. Now go impress someone—or yourself—with your new culinary skills. You’ve earned it! Grab a slice, maybe a cuppa, and bask in the glory of your delicious creation. Happy baking (and eating)!

