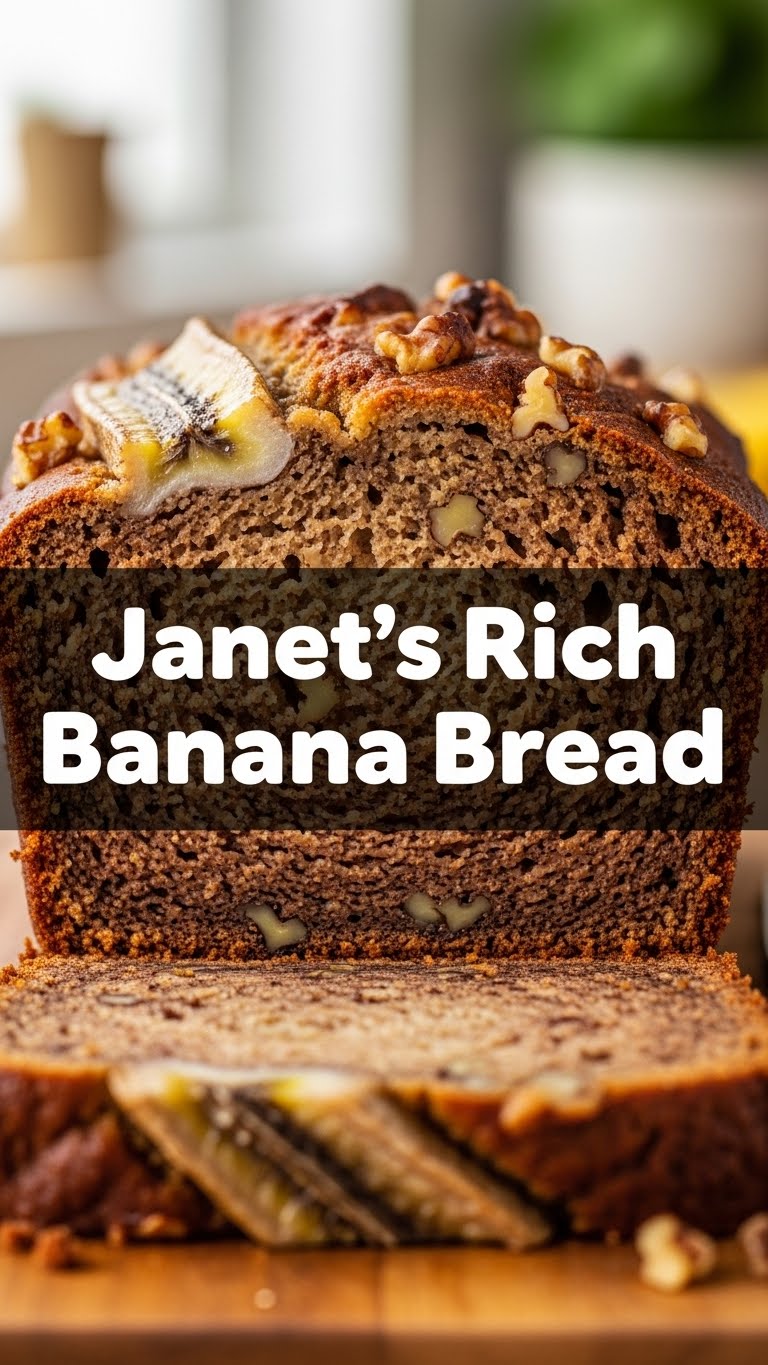
So, you’re staring at those sad, spotty bananas on your counter, aren’t you? The ones that are *just* a little too ripe for a smoothie, and definitely too squishy for your morning cereal? Don’t even think about tossing them! Because, my friend, those neglected, bruised beauties are about to become the star of Janet’s Rich Banana Bread – a recipe so good, it’ll make you wonder why you ever bought a *fresh* banana.
Why This Recipe is Awesome
Look, I get it. The internet is flooded with banana bread recipes. But Janet’s? This isn’t just *a* banana bread; it’s *the* banana bread. Why? Because it’s practically foolproof. Seriously, even if your baking skills usually involve “opening a packet,” you can crush this. It’s ridiculously moist (the good kind, not the weird kind), packed with flavor, and comes together faster than you can say, “Oops, I ate the whole loaf.” Plus, it makes your kitchen smell like a cozy autumn hug, and who doesn’t want that? It’s rich, it’s comforting, and honestly, it’s a tiny bit addictive. Don’t say I didn’t warn you.
Ingredients You’ll Need
Gather ’round, fellow culinary adventurer! Here’s your treasure map to deliciousness. Remember, fresh ingredients make a difference, but those overripe bananas are non-negotiable!
- 3-4 Very Ripe Bananas: The spottier, the better! We’re talking brown, mushy, practically liquid gold. No green bananas allowed, seriously.
- 1/2 cup (113g) Unsalted Butter: Softened to room temp. Don’t be a hero and melt it; we want fluffy, not greasy.
- 1 cup (200g) Granulated Sugar: Or a little less if your bananas are basically candy already. Your call, boss.
- 2 Large Eggs: Room temperature, because science says so (and it helps things blend better).
- 1 tsp Vanilla Extract: The good stuff. Not that imitation vanilla nonsense. Treat yourself!
- 1 1/2 cups (190g) All-Purpose Flour: Just regular old flour. Nothing fancy.
- 1 tsp Baking Soda: Our secret weapon for that perfect lift. Don’t skimp!
- 1/2 tsp Salt: Balances all that sweetness. Trust the process.
- Optional Add-ins (your choice!): 1/2 cup chopped walnuts, pecans, or chocolate chips. Because sometimes, you just need that extra jazz.
Step-by-Step Instructions
Alright, apron on, good vibes only! Let’s get baking!
- Get Your Oven Ready: First things first, preheat your oven to 350°F (175°C). Then, lightly grease and flour a 9×5 inch loaf pan. Or line it with parchment paper if you’re feeling fancy (and hate washing dishes).
- Mash Those Bananas: In a medium bowl, get those super ripe bananas and mash ’em up with a fork. You want some small lumps for texture, but mostly smooth. Set aside.
- Cream the Butter & Sugar: In a large bowl, using an electric mixer (or a strong arm!), cream together the softened butter and granulated sugar until it’s light and fluffy. This usually takes about 2-3 minutes.
- Add Eggs & Vanilla: Beat in the eggs, one at a time, until fully incorporated. Then stir in that glorious vanilla extract. Make sure everything is well combined before moving on.
- Combine Dry Ingredients: In a separate bowl, whisk together the flour, baking soda, and salt. Give it a good whisk to ensure everything is evenly distributed.
- Mix Wet & Dry: Gradually add the dry ingredients to the wet ingredients, mixing *just* until combined. Do not overmix! A few streaks of flour are totally fine. Overmixing leads to tough banana bread, and nobody wants that.
- Fold in Bananas (and Add-ins!): Gently fold in your mashed bananas. If you’re using walnuts, chocolate chips, or whatever your heart desires, fold them in now too.
- Pour & Bake: Pour the batter into your prepared loaf pan. Pop it into the preheated oven and bake for 55-65 minutes.
- Check for Doneness: How do you know it’s ready? Insert a toothpick into the center. If it comes out clean (or with a few moist crumbs), you’re golden! If not, give it another 5-10 minutes.
- Cool Down: Let the banana bread cool in the pan for about 10-15 minutes before carefully turning it out onto a wire rack to cool completely. (Or just slice into it warm because self-control is overrated. Your call, I won’t judge.)
Common Mistakes to Avoid
Listen up, buttercup! A few rookie errors can turn your rich banana bread dreams into a dense, sad reality. Learn from my past mistakes (and probably yours).
- Using Underripe Bananas: This is probably the biggest sin. Green-ish or firm bananas simply don’t have the sugar or moisture needed for that rich, sweet flavor and moist texture. Wait for the spots!
- Overmixing the Batter: Once you add the flour, mix *just* until combined. Seriously, stop when you see no more dry streaks. Overmixing develops the gluten too much, leading to tough, chewy bread. We want tender and soft!
- Not Preheating Your Oven: Rookie mistake! A cold oven won’t bake evenly, and your bread might not rise properly. Always give your oven at least 15-20 minutes to get to the correct temperature.
- Opening the Oven Door Constantly: I know it’s tempting to peek, but resist! Every time you open the door, the temperature drops, affecting the rise and cooking time. Wait until at least 45 minutes have passed before checking.
- Not Letting it Cool: Okay, this one is tough. But slicing into scorching hot banana bread means it might crumble and lose some of that moist goodness. A little cooling time allows it to set up properly.
Alternatives & Substitutions
Feeling adventurous? Or maybe you just ran out of something key? No worries, we can usually make it work!
- Sugar Swap: Don’t have granulated sugar? You can often use light brown sugar for a deeper, more caramel-y flavor. It’s excellent!
- Butter Alternatives: While butter gives the best flavor, you can swap it for an equal amount of vegetable oil (like canola or even a light olive oil) for a slightly different texture, often even moister. Margarine? Well, technically yes, but why hurt your soul like that?
- Flour Power: Want to make it a little healthier? You can substitute up to half of the all-purpose flour with whole wheat flour for a nuttier, heartier bread. Don’t go full whole wheat unless you’re ready for a denser texture, IMO.
- Mix-in Mania: The world is your oyster! Besides nuts and chocolate chips, try dried cranberries, raisins, shredded coconut, or even a swirl of cream cheese frosting on top post-bake.
- Spice it Up: A pinch of cinnamon or nutmeg can add a lovely warm depth to your banana bread.
FAQ (Frequently Asked Questions)
Got questions? I’ve got (casual, opinionated) answers!
- Can I use frozen bananas? Absolutely! Just thaw them completely, and make sure to drain any excess liquid before mashing. They’ll be super soft and perfect.
- My banana bread is too dense, what happened? My guess? Overmixing the batter. Or possibly not enough leavening (baking soda). Remember: mix until *just* combined!
- How do I store banana bread? Keep it covered tightly at room temperature for 2-3 days, or in the fridge for up to a week. If it lasts that long!
- Can I freeze banana bread? You bet! Wrap it tightly in plastic wrap, then foil, and freeze for up to 3 months. Thaw at room temperature for a delicious treat later.
- What if I only have two ripe bananas? You can usually get away with it, but the bread might be slightly less moist and banana-y. Add an extra egg or a splash of milk if it seems too dry.
- Can I make this into muffins? Yup! Divide the batter into a greased muffin tin and bake for about 20-25 minutes, or until a toothpick comes out clean. Muffins for days!
Final Thoughts
There you have it, folks! Janet’s Rich Banana Bread – your new go-to recipe for transforming those sad, forgotten bananas into a culinary triumph. It’s easy, it’s delicious, and it’s guaranteed to make you feel like a domestic goddess (or god). Now go impress someone – or just yourself – with your new baking prowess. You’ve earned that slice (or two!). Happy baking!

