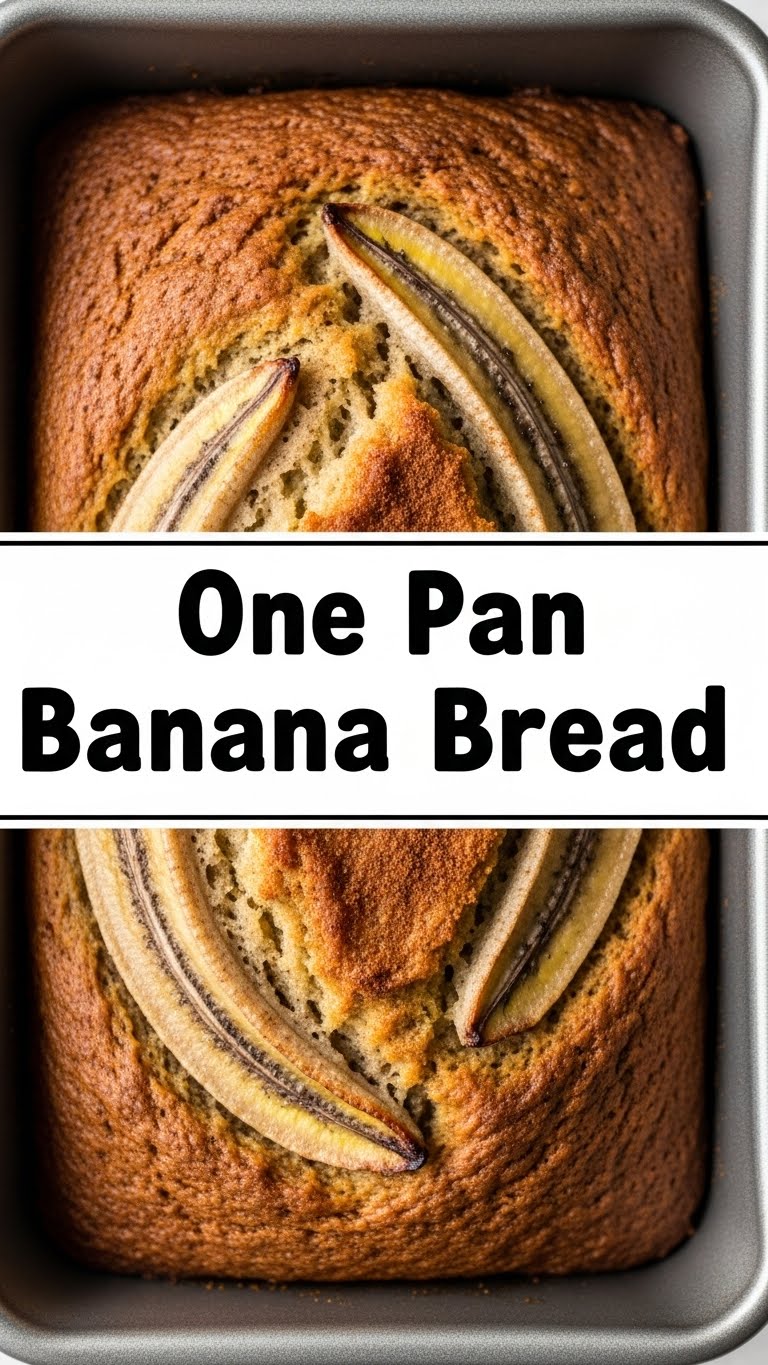
So you’re craving something tasty but too lazy to spend forever in the kitchen, huh? Same. What if I told you that you could whip up a batch of warm, comforting banana bread with *minimal* fuss and *maximum* deliciousness? And guess what? It all happens in one magical pan. No, really. Keep reading, my friend.
Why This Recipe is Awesome
Why bother with *this* banana bread, you ask? Because it’s basically the culinary equivalent of a warm hug that doesn’t judge your dirty dishes. First off, it’s **one pan**. That means less washing up, which, let’s be honest, is 80% of the battle, right? It’s also pretty much idiot-proof; even I (a person who once tried to microwave a metal spoon) managed not to mess this up. Plus, the flavor? Chef’s kiss! It’s moist, perfectly sweet, and makes your whole house smell like a bakery decided to move in. You’re welcome.
Ingredients You’ll Need
Alright, gather your troops! Here’s what you’ll need for this banana-y masterpiece:
- **3 overly ripe bananas:** You know, the ones sitting on your counter looking suspiciously like leopard print? Perfect. Don’t throw ’em out!
- **1 large egg:** Straight from the fridge, ready to mingle.
- **1/4 cup unsalted butter, melted:** Because everything is better with butter. Don’t have unsalted? Just reduce the salt later, genius.
- **1/2 cup granulated sugar:** For that sweet, sweet goodness. Adjust to your personal sweet tooth level.
- **1 teaspoon vanilla extract:** The MVP of baking. Don’t skip this, your taste buds will thank you.
- **1 cup all-purpose flour:** The backbone of our bread.
- **1 teaspoon baking soda:** Our leavening friend, making sure it rises beautifully.
- **1/2 teaspoon salt:** To balance out all that sweetness. Trust me on this.
- **Optional add-ins:** A handful of chocolate chips (because, duh), chopped walnuts, or pecans if you’re feeling fancy.
Step-by-Step Instructions
Let’s get this party started! Grab your chosen baking pan (an 8×8 or 9×9 inch pan works wonders) and let’s go:
- **Preheat & Prep:** First things first, get your oven to **350°F (175°C)**. Give your baking pan a quick grease and flour dusting, or line it with parchment paper. No sticking allowed!
- **Mash ‘Em Up:** In your designated “one pan” (that’s right, we’re using it as a mixing bowl first!), mash those ripe bananas with a fork until they’re mostly smooth, with a few charming lumps.
- **Wet Ingredients Unite:** Add the melted butter, egg, sugar, and vanilla extract to the mashed bananas. Stir it all together until it’s well combined and looks delightfully gooey.
- **Dry Spell:** Sprinkle the flour, baking soda, and salt directly over the wet ingredients in the same pan.
- **Fold It In:** Gently fold the dry ingredients into the wet until *just* combined. **Important: Don’t overmix!** Lumps are okay; tough banana bread is not. If you’re adding chocolate chips or nuts, now’s the time to fold them in too.
- **Bake Time!:** Spread the batter evenly in the pan. Pop it into your preheated oven and bake for **35-45 minutes**, or until a toothpick inserted into the center comes out clean.
- **Cool Down:** Once baked, let it cool in the pan for about 10-15 minutes before transferring it to a wire rack to cool completely. Or, if you’re impatient like me, cut a slice while it’s still warm. Just don’t burn your tongue!
Common Mistakes to Avoid
Listen up, buttercup! Don’t make these rookie errors:
- **Using unripe bananas:** This isn’t just about color; ripe bananas are sweeter and softer, making for a much moister bread. Green bananas? Hard pass.
- **Overmixing the batter:** Seriously, don’t do it. Overmixing develops the gluten too much, leading to a tough, dense banana bread instead of the soft, tender dream you’re aiming for. A few lumps are a sign of character, not a flaw.
- **Forgetting to preheat the oven:** Patience, young padawan! A properly preheated oven ensures even baking from the start. Otherwise, you risk a gummy center and dry edges. **Don’t skip this step!**
- **Not greasing your pan:** Unless you enjoy chiseling your banana bread out of the pan in sad, broken pieces, grease and flour it (or use parchment paper!). You’ve been warned.
Alternatives & Substitutions
Feeling a little wild? Or maybe just out of an ingredient? No worries, we’ve got options!
- **Butter alternative:** Out of butter? You can use **vegetable oil** or **coconut oil** (melted) in a pinch. It changes the flavor a bit, but it’ll still be delicious. Margarine? Well, technically yes, but why hurt your soul like that? Stick to butter if you can, IMO.
- **Sugar swap:** Brown sugar can totally stand in for granulated sugar. It’ll give your bread a richer, slightly caramel-y flavor, which is a win in my book.
- **Flour power:** Want to make it slightly healthier? Swap out a quarter or half of the all-purpose flour for **whole wheat flour**. It’ll be a bit denser but still yummy. Gluten-free? Use a 1:1 gluten-free baking blend.
- **Spice it up:** A dash of cinnamon or a pinch of nutmeg can elevate your banana bread game. Go on, be adventurous!
FAQ (Frequently Asked Questions)
Got questions? I’ve got (mostly sarcastic) answers!
- **Q: My bananas aren’t ripe enough! Can I still make this?**
- A: Technically, yes, but your bread will be less sweet and less flavorful. For a quick ripen, bake them in their skins on a baking sheet at 300°F (150°C) for 15-30 minutes until they’re black. Problem solved, banana whisperer!
- **Q: Can I use a different size pan?**
- A: Sure, but baking times will vary. A smaller pan might need more time, a bigger pan less. Just keep an eye on it and use the toothpick test. Don’t blame me if it’s over or underdone, you rebel!
- **Q: How do I store leftover banana bread?**
- A: Leftovers? What are those? Kidding! Store it tightly wrapped at room temperature for up to 3 days, or in the fridge for up to a week. It also freezes beautifully for longer storage.
- **Q: Can I add nuts or chocolate chips?**
- A: **Absolutely!** As mentioned, fold them in with the dry ingredients. About 1/2 to 1 cup is usually perfect. Don’t be shy with the chocolate; life’s too short for plain banana bread.
- **Q: Is this *really* a one-pan recipe if I’m preheating the oven and potentially mashing in a separate bowl?**
- A: Okay, fair point, you pedant! It’s “one pan to *bake* in” and “one pan to *mix* in” if you’re brave enough. The spirit of minimal washing up is what counts here, okay?! Let’s not get bogged down in semantics, FYIs.
Final Thoughts
So there you have it, folks! Your new favorite, ridiculously easy, and unbelievably delicious one-pan banana bread recipe. Go forth and conquer those overripe bananas! Seriously, you’ve just unlocked a new level of baking prowess (with minimal effort, shhh!). Now go impress someone—or yourself—with your new culinary skills. You’ve earned it, and a slice of warm banana bread never hurt anyone. Enjoy!

