Ever found yourself staring into the abyss of your fridge, wondering if magic can conjure something ridiculously delicious without, like, actual effort? Yeah, me too. And guess what? It totally can, especially when chocolate and hazelnuts are involved. Let’s make some truffles, shall we? Because who needs a fancy patisserie when you’ve got a kitchen and a can-do attitude?
Why This Recipe is Awesome
Okay, so why bother with this particular truffle recipe? Because, my friend, it’s practically a culinary cheat code. It’s shockingly simple, requires no fancy equipment (unless you count a spoon as fancy, which, let’s be honest, sometimes it is), and it tastes like you spent hours slaving away. Plus, it’s chocolate and hazelnuts – a combo that basically screams ‘eat me now!’ **Seriously, it’s almost impossible to screw up.** Even if you tried, you’d probably just end up with delicious, slightly misshapen chocolate goodness. Win-win, IMO.
Ingredients You’ll Need
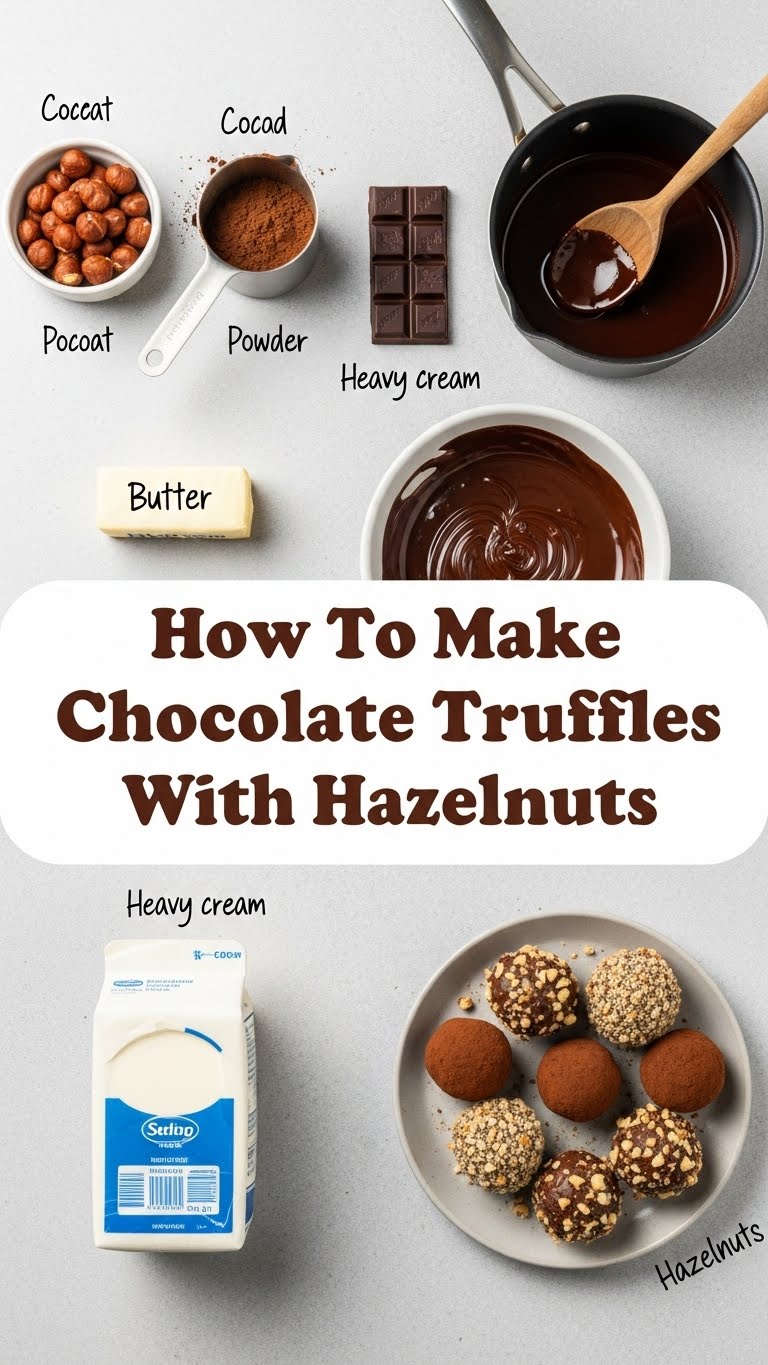
- Good Quality Dark Chocolate (8-10 oz / 225-280g): The good stuff. Don’t skimp here; your taste buds will thank you. (And maybe your soul.) Aim for 60-70% cacao for that perfect balance of bittersweet.
- Heavy Cream (1/2 cup / 120ml): For that luscious, creamy texture. No skim milk, unless you’re actively trying to disappoint yourself.
- Unsalted Butter (1 tablespoon / 14g): Just a tiny bit, for extra richness and shine. Think of it as a chocolate spa treatment.
- Vanilla Extract (1 teaspoon): A splash of magic. Or just, you know, vanilla.
- Roasted Hazelnuts (1/2 cup / 60g), chopped: The unsung hero, adding that perfect crunch and nutty hug. Make sure they’re roasted for peak flavor!
- Unsweetened Cocoa Powder (for rolling): Unsweetened, please. For that classic truffle dust look, and a slight bitterness to cut the sweetness.
- Optional: Sea Salt (a tiny pinch): A tiny pinch to make the chocolate sing. Trust me on this one.
Step-by-Step Instructions
- Chop the chocolate: Grab your chocolate bar and chop it into small, uniform pieces. The smaller, the faster it melts. Place these glorious bits into a medium heat-proof bowl.
- Heat the cream & butter: In a small saucepan, gently warm the heavy cream and butter over medium heat. Don’t let it boil! We’re looking for little bubbles around the edges, not a furious frolic. Remove from heat as soon as it simmers.
- Melt the chocolate: Pour the hot cream mixture directly over the chopped chocolate. Let it sit there, undisturbed, for about 5 minutes. This gives the chocolate a chance to warm up and soften. Then, with a whisk or spatula, stir gently from the center outwards until it’s a smooth, glossy, irresistible ganache. Stir in the vanilla extract (and sea salt, if using).
- Add hazelnuts: Fold in those lovely chopped roasted hazelnuts. Stir well to ensure every bit of nut gets coated in chocolatey goodness.
- Chill time: Cover the bowl with plastic wrap, making sure the wrap touches the surface of the ganache to prevent a skin from forming. Pop it in the fridge for at least 2 hours, or until it’s firm enough to scoop and roll. **Patience is a virtue here!**
- Roll ’em up: Once firm, use a small spoon or a mini ice cream scoop to portion out the ganache. Roll each portion quickly between your palms to form a roughly 1-inch ball. Work fast to avoid melting the chocolate with your warm hands.
- Dust with cocoa: Pour some unsweetened cocoa powder into a shallow dish. Roll each freshly formed truffle in the cocoa powder until it’s beautifully coated.
- Serve and enjoy! Arrange them on a plate, admire your handiwork, and then devour them. Or hide them all from your family. Your call.
Common Mistakes to Avoid
- Using wimpy chocolate: Seriously, this isn’t the time for ‘chocolatey flavored candy wafers.’ Go dark, go good quality. Your efforts deserve the best.
- Boiling the cream: A gentle simmer is fine, a rolling boil is a no-go. We want warm, not scalded, cream. Too hot, and you risk a grainy ganache.
- Impatience: Trying to roll truffles before they’re properly chilled is like trying to catch smoke. You’ll end up with a chocolatey mess and sticky hands. **Chill out, literally.**
- Over-handling: Your warm hands will melt the chocolate. Roll quickly and efficiently. Think ninja, but with truffles.
Alternatives & Substitutions
Feeling a little adventurous? Here are some tweaks:
- Nut-free? Totally! Skip the hazelnuts and roll them in sprinkles, crushed cookies, or just cocoa powder. Still delish!
- Different nuts? Pistachios, almonds, pecans… go nuts! Just make sure they’re roasted for maximum flavor. Toasting them briefly in a dry pan or oven makes a HUGE difference, FYI.
- Flavor boost? Add a splash of liqueur (think Grand Marnier, Kahlua, rum) with the vanilla for an adult kick. Or orange zest! Yum. A pinch of espresso powder can also deepen the chocolate flavor.
- Coating variety? Instead of cocoa, try finely chopped nuts, shredded coconut, powdered sugar, or even melted white chocolate drizzled over the top for a fancy touch.
FAQ (Frequently Asked Questions)
- Can I use milk chocolate? You *can*, but the truffles will be much sweeter and less intense. Dark chocolate brings the drama, you know? For best results, stick to dark.
- Do I have to roast the hazelnuts? **Yes, please!** Roasting brings out their incredible flavor and makes them less bitter. It’s like turning up the volume on deliciousness. Just spread them on a baking sheet and toast at 350°F (175°C) for 8-10 minutes until fragrant.
- How long do they last? In an airtight container in the fridge, about 1-2 weeks. But let’s be real, will they actually last that long? Probably not.
- My ganache is too thin! What happened? Probably not chilled enough. Or maybe your cream was too hot initially, causing separation. Pop it back in the fridge for longer. Patience, young padawan.
- My truffles are too soft to roll! See above. More chill time, friend. Or try rolling them on a piece of parchment paper to prevent them from sticking to your warm hands. You can also re-chill the ganache for a bit if your kitchen is super warm.
- Can I freeze these? Absolutely! Place them on a baking sheet until frozen solid, then transfer to an airtight container or freezer bag for up to 2-3 months. Thaw in the fridge or at room temp for a bit before serving.
Final Thoughts
So there you have it! You’re now officially a truffle-making maestro. Go forth and conquer those cravings, impress your friends (or just yourself, no judgment here), and bask in the glory of your chocolatey triumph. **You totally crushed it!** Now, about that second batch…


