So you’ve reached that point where you’re *craving* something fancy, but your energy levels are screaming ‘nope’ at anything involving a 12-hour simmer? Been there, made the t-shirt. Let’s talk tiramisu, but like, *next-level* tiramisu. We’re not just making one. Oh no, we’re making **two distinct, outrageously delicious tiramisu desserts, both featuring the glorious strawberry.** Because why settle for one perfect dessert when you can have a dynamic duo? Get ready to whip up some magic without, you know, actually feeling like you’ve been working magic.
Why This Recipe is Awesome
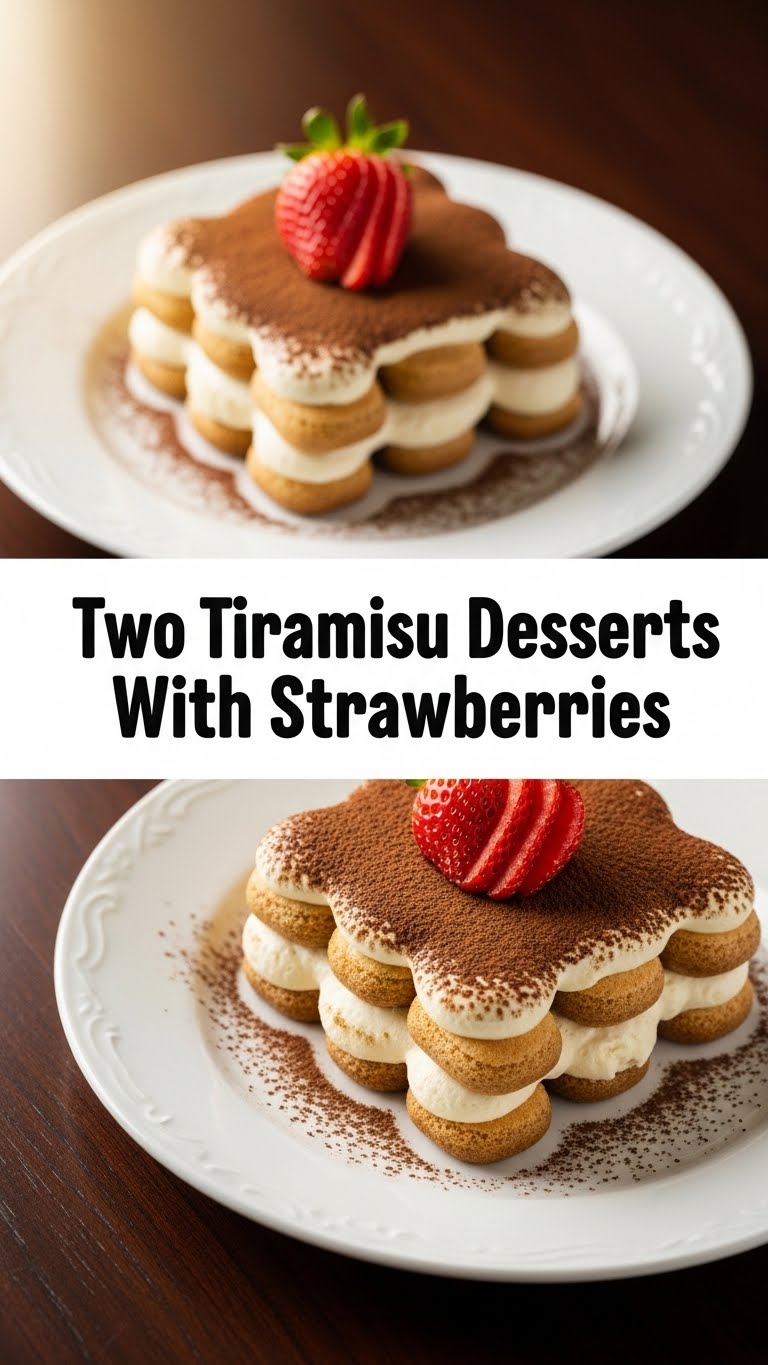
Because it’s not just *one* tiramisu, it’s two different strawberry tiramisu experiences from roughly the same starting point! This recipe is basically your culinary wingman for looking effortlessly impressive. It’s shockingly simple, tastes like you spent hours slaving away (you didn’t, shhh), and seriously, even I didn’t mess it up. Plus, strawberries! They bring a fresh, zesty kick that cuts through the richness, making these desserts dangerously addictive. We’re talking one classic coffee-kissed version with berries, and one bright, berry-forward dream. **Double the delicious, half the fuss!**
Ingredients You’ll Need
Get ready to assemble your dessert army! Here’s what you’ll need for both glorious creations. (Psst… most of this is for the glorious creamy base).
- Mascarpone Cheese: 16 oz (two 8oz containers). The unsung hero, the creamy dream. Don’t skimp!
- Heavy Cream: 2 cups (cold). For that cloud-like texture.
- Granulated Sugar: ¾ cup, divided. Sweetness, baby!
- Egg Yolks: 4 large. Give it that authentic richness.
- Vanilla Extract: 1 tsp. A splash of pure happiness.
- Ladyfingers: About 24-30 (one standard package). The spongey backbone.
- Fresh Strawberries: 2 lbs, hulled and sliced or quartered. The star of our show, obviously.
- Strong Brewed Coffee or Espresso: 1 cup, cooled (for Tiramisu #1). Get that caffeine kick!
- Optional Liqueur (Amaretto, Kahlua, Marsala): ¼ cup (for Tiramisu #1’s coffee dip). For an adulting boost.
- Strawberry Preserves or Jam: ½ cup (for Tiramisu #2’s dipping liquid). Pure berry bliss.
- Lemon Juice: 1 tbsp (for Tiramisu #2’s dipping liquid). Brightness!
- Cocoa Powder: For dusting (Tiramisu #1). The classic finish.
- Fresh Mint Leaves: For garnish (Tiramisu #2). Makes it look fancy.
Step-by-Step Instructions
Alright, let’s get down to business. Don’t worry, it’s easier than parallel parking.
Part 1: The Glorious Cream Base (For Both Desserts!)
- **Whip the Cream:** In a large, chilled bowl, whip the cold heavy cream with ¼ cup of sugar until you get stiff peaks. It should look like fluffy clouds. Set aside in the fridge.
- **Temper the Yolks:** In a heatproof bowl set over a saucepan of simmering water (don’t let the bowl touch the water!), whisk the egg yolks with the remaining ½ cup of sugar and vanilla extract. Whisk continuously for about 5-7 minutes until the mixture is pale, thick, and almost triples in volume. It should reach about 160°F (71°C) if you have a thermometer. This step cooks the yolks and makes them safe!
- **Cool it Down:** Remove the yolk mixture from the heat and continue whisking for a few minutes until it cools slightly.
- **Fold in Mascarpone:** Gently fold the mascarpone cheese into the cooled yolk mixture until just combined and smooth. Be gentle; you don’t want to deflate that air!
- **Combine the Clouds:** Now, *gently* fold the whipped cream into the mascarpone-yolk mixture until everything is beautifully combined and homogenous. **This is your magical tiramisu cream.** Divide it roughly in half into two separate bowls.
Part 2: Assembly Time!
Tiramisu #1: Classic Layers with a Strawberry Twist
- **Prep the Dip:** In a shallow dish, combine the cooled coffee (and liqueur, if using).
- **Dip ‘n’ Layer:** Quickly dip ladyfingers into the coffee mixture (don’t let them get soggy, nobody likes a mushy ladyfinger!). Arrange a single layer at the bottom of an 8×8 inch square dish or similar.
- **Cream & Berry:** Spread half of one portion of your tiramisu cream over the ladyfingers. Arrange half of your sliced strawberries over the cream.
- **Repeat!** Add another layer of dipped ladyfingers, followed by the remaining cream from that portion and the rest of the strawberries.
- **Chill Out:** Cover and refrigerate for at least 4-6 hours, but **ideally overnight.** This allows the flavors to meld and the dessert to set properly.
- **Dust ‘n’ Serve:** Before serving, dust generously with cocoa powder.
Tiramisu #2: Berry Bliss (No Coffee Here!)
- **Prep the Berry Dip:** In a shallow dish, whisk together the strawberry preserves (or jam) with the lemon juice until smooth. If it’s too thick, add a tiny splash of water.
- **Dip & Build:** Quickly dip ladyfingers into the strawberry mixture. You can assemble this in a smaller dish or, for a fancier vibe, layer them in individual glasses or jars.
- **Cream & Berry:** If using a dish, spread half of the second portion of cream over the ladyfingers, then arrange half of your remaining sliced strawberries. Repeat the layers.
- **Individual Cups:** For individual servings, layer dipped ladyfingers (you might need to break them), cream, and strawberries in glasses until full.
- **Chill Out:** Cover and refrigerate for at least 4-6 hours, but **overnight is best.**
- **Garnish & Shine:** Garnish with fresh mint leaves and perhaps a few extra strawberry slices before serving.
Common Mistakes to Avoid
- Soggy Ladyfingers: This is a cardinal sin! **Dip quickly, like a fraction of a second.** You want them moist, not waterlogged.
- Overwhipping Cream/Mascarpone: Overwhipped cream gets grainy. Overworking the mascarpone mixture can make it separate. **Fold gently until just combined.**
- Not Chilling Long Enough: I know, you want to eat it NOW. But seriously, **don’t skip the chill time.** It needs those hours for the flavors to develop and for everything to firm up. Rushing it will result in a soupy mess.
- Skipping the Cooked Yolks: While some recipes use raw eggs, cooking them gently over a bain-marie (water bath) ensures safety and gives the cream a richer, more stable texture. Don’t be lazy here!
Alternatives & Substitutions
Feeling rebellious? Here are some ways to shake things up:
- Other Berries: Not a strawberry fanatic (gasp!)? You can totally swap in raspberries, blueberries, or a mixed berry medley. Just be aware of their tartness.
- Cookies: Can’t find ladyfingers? Some folks use shortbread cookies or even thin slices of sponge cake. The texture will be different, but still tasty!
- No Alcohol: If you’re skipping the booze, just use extra coffee or strawberry liquid in your dips. No biggie.
- Dairy-Free: You can find dairy-free mascarpone alternatives and use coconut cream (the thick part from a chilled can) for whipping. Results will vary, but it’s doable!
- Flavored Liqueurs: For Tiramisu #1, try Grand Marnier for an orange kick, or even a strawberry liqueur if you’re feeling extra meta.
FAQ (Frequently Asked Questions)
Because you’ve got questions, and I’ve got (casual) answers.
- Do I really have to cook the egg yolks? Well, technically, you don’t *have* to, but **IMO, it makes the cream richer, more stable, and, you know, safer.** Why risk it when it’s so easy?
- Can I use frozen strawberries? You *can*, but they tend to be much softer and release more water when thawed. **Fresh is definitely best** for texture and presentation. If using frozen, thaw them and drain *really* well.
- My cream isn’t whipping! What gives? Is your cream super cold? Is your bowl super cold? If not, that’s probably why. **Chill everything – bowl, whisk, cream – for at least 15 minutes before whipping.**
- How long do these beauties last in the fridge? These are best enjoyed within 2-3 days. Beyond that, the ladyfingers might get a little too soft, and the strawberries… well, they just won’t be as vibrant.
- Can I make this ahead for a party? **Absolutely! In fact, it’s encouraged!** The flavors meld and deepen overnight, making it even more delicious. Just dust with cocoa/garnish right before serving.
- Help! My tiramisu is runny! This usually means one of two things: you didn’t chill it long enough, or you overworked your cream/mascarpone. Next time, give it more fridge time and fold gently, friend.
Final Thoughts
There you have it! Two stunning, utterly delicious strawberry tiramisus, ready to wow your taste buds (and anyone lucky enough to share them with you). You’ve tackled not one, but *two* desserts with flair and a minimum of fuss. So go on, bask in the glory. Take a picture, brag a little. You’ve earned it! Now go impress someone—or yourself—with your new culinary skills. Maybe even make a third version, just for fun? Just kidding… unless?


