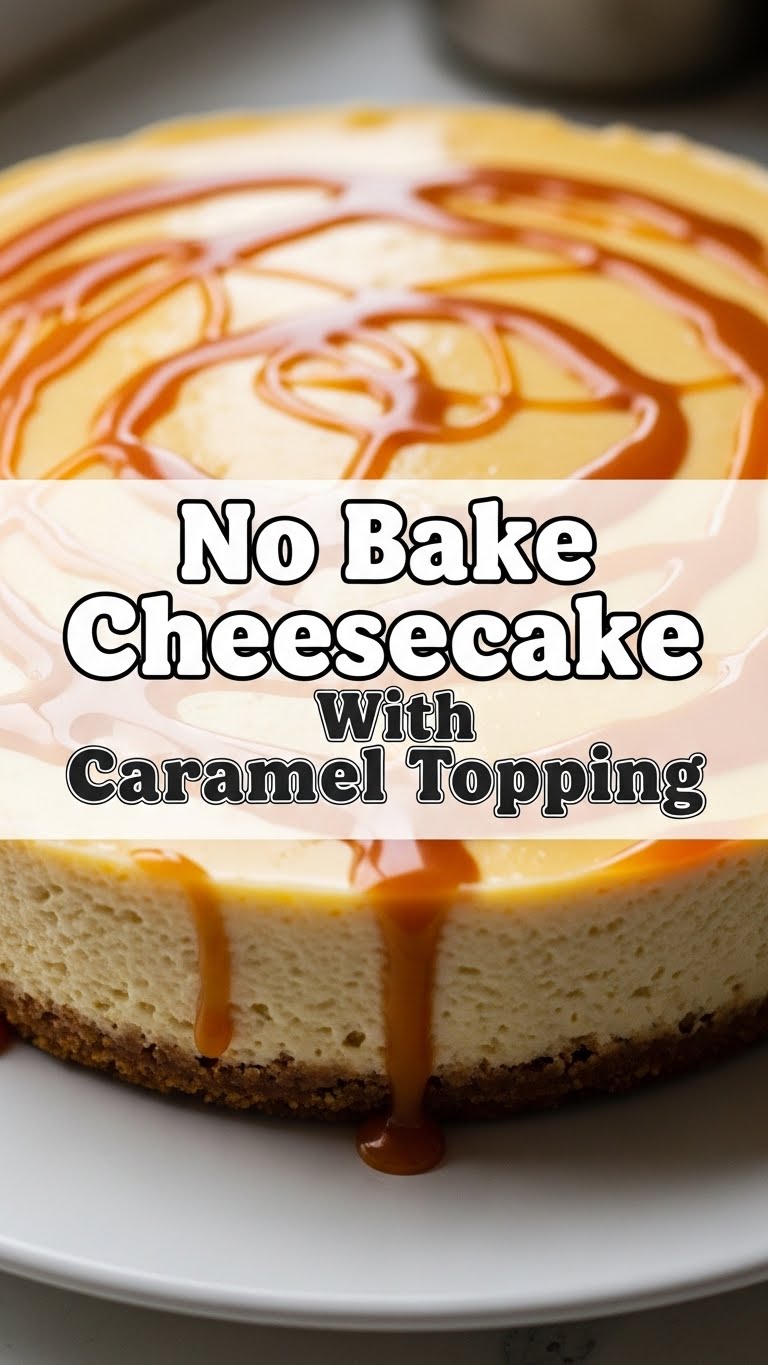
So, you’re craving something ridiculously delicious, creamy, and impressive, but the thought of turning on your oven or spending hours slaving away in the kitchen just makes you want to crawl back into bed? Been there, done that, bought the T-shirt. Guess what, my friend? Today, we’re making magic happen with zero baking involved. Yes, you heard me right: No-Bake Cheesecake with Caramel Topping! Get ready to wow everyone (or just yourself) with minimal effort and maximum deliciousness.
Why This Recipe is Awesome
Let’s be real, most of us want gourmet results without the gourmet effort. This recipe is basically your culinary fairy godmother. Why is it so awesome, you ask? Well, for starters:
- No Oven Required: Perfect for summer, perfect for when you’re feeling lazy, perfect for when your oven is staging a protest.
- Quick Assembly: You can whip this beauty together faster than you can decide what to watch on Netflix. Seriously.
- Foolproof (Even for Me!): It’s so straightforward, it’s practically idiot-proof. If I can nail it, you definitely can.
- Impressive Factor: It looks like you spent hours, but shhh… that’ll be our little secret.
- Pure Indulgence: Creamy, dreamy, tangy cheesecake with a luscious caramel drizzle? It’s basically a hug in dessert form.
Ingredients You’ll Need
Alright, let’s gather our edible weapons. We’re keeping it simple, fresh, and oh-so-tasty.
For the Crust:
- 1 ½ cups Graham Cracker Crumbs: About 12-15 full crackers. Get those ready to be obliterated.
- 6 tbsp Unsalted Butter: Melted. This is the glue that holds our crumbly dreams together.
- 2 tbsp Granulated Sugar: Just a little sweet kiss for the crust.
For the Cheesecake Filling:
- 2 (8 oz) blocks Full-Fat Cream Cheese: Softened. And yes, I said FULL-FAT. Don’t even think about the light stuff unless you want sad cheesecake.
- 1 cup Powdered Sugar: Sifted, if you’re fancy, or just really careful not to get lumps.
- 1 tsp Vanilla Extract: The classic, indispensable flavor booster.
- 1 ½ cups Heavy Cream: Chilled. This is what gives us that glorious, fluffy texture.
For the Caramel Topping:
- ¾ – 1 cup Store-Bought Caramel Sauce: Go for a good quality one. No judgment here, we’re all about convenience!
- Pinch of Sea Salt (Optional): If you’re feeling fancy and want that salted caramel vibe.
Step-by-Step Instructions
Time to get our hands (a little) dirty! Follow these steps and prepare for deliciousness.
Crush those Crackers: Get your graham cracker crumbs ready. You can smash them in a Ziploc bag with a rolling pin (therapeutic, highly recommend!) or pulse them in a food processor. Aim for fine crumbs, no big chunks.
Butter Up the Crust: In a medium bowl, combine your graham cracker crumbs, melted butter, and granulated sugar. Mix it well until it looks like wet sand. Press this mixture firmly into the bottom of a 9-inch pie dish or springform pan. **Pro Tip:** Use the bottom of a flat glass or measuring cup to get it really compact. Pop it in the fridge while you make the filling.
Cream Cheese Dream: In a large mixing bowl, beat the softened cream cheese with an electric mixer on medium speed until it’s super smooth and creamy (about 2-3 minutes). Scrape down the sides of the bowl to make sure everything gets incorporated.
Sweeten the Deal: Add the powdered sugar to the cream cheese mixture and beat again until fully combined and smooth. Stir in the vanilla extract. Give it a taste – need more vanilla? Go for it!
Whip It Good: In a separate, clean, chilled bowl (important!), whip the heavy cream on high speed until stiff peaks form. Don’t overmix, or you’ll get butter! You want it light and fluffy.
Fold with Love: Gently fold about a third of the whipped cream into the cream cheese mixture to lighten it up. Then, carefully fold in the remaining whipped cream until just combined. **Don’t overmix!** We want to keep that lovely airy texture.
Assemble and Chill: Pour the cheesecake filling over your chilled graham cracker crust. Smooth the top with a spatula. Now comes the hard part: resisting the urge to dig in immediately. Cover it loosely with plastic wrap and chill in the fridge for at least 4-6 hours, or even better, overnight. **Patience is a virtue here!**
Caramel Time: Once your cheesecake is perfectly set, drizzle that beautiful caramel sauce generously over the top. If you’re using sea salt, sprinkle a pinch now for that irresistible sweet and salty combo. Slice it up and serve!
Common Mistakes to Avoid
Hey, we all make mistakes, but let’s try to avoid these rookie errors, shall we? You’ve come too far to mess it up now!
- Impatience is Not a Virtue: Trying to serve it before it’s properly chilled. You’ll end up with a delicious (but very sad and runny) pile of goo. **Chill for at least 4-6 hours, overnight is best!**
- Low-Fat Lies: Using low-fat cream cheese or a substitute for heavy cream. Trust me, it just won’t be the same. Embrace the full-fat goodness for that creamy texture.
- Over-Whipping the Cream: Whipped cream goes from fluffy to grainy to butter pretty quickly. Keep an eye on it! Stop as soon as those stiff peaks appear.
- Rough Folding: Once the whipped cream is in, be gentle! Overmixing at this stage deflates the air, making your cheesecake less light and airy.
- Not Softening Cream Cheese: Cold cream cheese will give you lumps, no matter how much you beat it. Take it out of the fridge at least an hour before you start.
Alternatives & Substitutions
Feeling creative? This recipe is super adaptable! Here are a few ideas to switch things up:
- Crust Crusaders: Not a fan of graham crackers? Try crushed Oreos (chocolate crust, yum!), shortbread cookies, or even gingersnaps for a spiced kick. Adjust butter as needed!
- Topping Tango: Caramel not your jam? Top it with a rich chocolate ganache, a vibrant berry compote, or fresh fruit. A drizzle of lemon curd would also be divine!
- Flavor Fiesta: Add a tablespoon of lemon zest to the filling for a bright, tangy twist. Or, how about a little espresso powder for a coffee kick? Swirl in some melted peanut butter for a Reese’s-esque delight! The possibilities are endless, my friend.
FAQ (Frequently Asked Questions)
Got questions? I’ve got (casual) answers!
- Can I use margarine instead of butter for the crust? Well, technically yes, but why hurt your soul like that? Butter just tastes better and sets the crust more firmly. IMO, stick to butter.
- How long does this cheesecake last in the fridge? If it manages to last that long, it’ll keep well for about 3-4 days, tightly covered.
- Can I freeze this cheesecake? Absolutely! Wrap it tightly (without the caramel topping) and it can freeze for up to a month. Thaw in the fridge overnight before adding your topping.
- My filling seems too thin, help! Did you soften your cream cheese fully? Did you whip your heavy cream to stiff peaks? And most importantly, did you chill it long enough? Patience, my friend, patience! It will set.
- Do I *have* to use store-bought caramel? Nope! If you’re feeling ambitious, you can definitely make your own homemade caramel sauce. But this recipe is all about easy, so no shame in the store-bought game.
Final Thoughts
And there you have it! A show-stopping, palate-pleasing No-Bake Caramel Cheesecake that required minimal effort and zero oven time. You just unleashed your inner dessert guru, and trust me, it feels good. Now, go impress someone—or yourself—with your new culinary skills. You’ve earned every single delicious bite. Enjoy!

